Vegetables

Okra Wants to Produce. You Just Have to Stop Getting in Its Way.

James Calloway

James Calloway

Vegetable & Edibles Specialist · Updated April 2026

How to grow okra — vintage botanical illustration showing the plant in detail

Okra at a Glance

Sun

Sun

6-8 hours minimum full sun

Soil pH

Soil pH

6.5-7.0

Water

Water

1 inch per week

Spacing

Spacing

12-18"

Days to harvest

Days to Harvest

50-75 days

Height

Height

3-10 feet

Soil type

Soil

Sandy or loamy

Lifespan

Lifespan

annual

Get your personalized growing data

Enter your zip code for frost dates, growing season, and soil type.

Okra is one of the most productive vegetables you can grow in a hot-climate garden. A healthy plant in warm soil, harvested properly, will push out pods for months without complaint. It laughs at July heat. It shrugs at humidity. It keeps going until frost kills it, because nothing else will.

So why do so many gardeners fail with it?

Two reasons. They plant too early. And they don't harvest often enough.

That's it. Those two mistakes account for the vast majority of okra failures. The first kills plants before they have a chance. The second shuts down production on plants that were otherwise doing fine. Every other mistake on the list -- wrong variety, too much nitrogen, poor spacing -- is real, but those two are the ones that get people every year.

This guide fixes both, then covers everything else you need to grow okra well: which varieties belong in your zone, how to read your soil, how to water without rotting your roots, and how to keep the harvest coming all the way to frost. We pulled this from extension service research across the South and Midwest -- Texas A&M AgriLife, Clemson, UGA, Oklahoma State, NC State, and others -- plus cultivar trial data and the hard-won wisdom of growers who have figured out what actually works.

Let's get your okra right.


Quick Answer: Okra Growing at a Glance

USDA Zones: 5 through 11 (zones 7-11 are the sweet spot; zones 5-6 require early varieties and soil warming)

Sun: 6-8 hours minimum; 12-16 hours ideal for maximum pod production

Soil pH: 6.5-7.0 (neutral; this is not the pH challenge blueberries are)

Soil temperature: 65F at 4-inch depth before planting -- non-negotiable

Planting timing: 2-3 weeks after last frost date, not on it

Seed pre-treatment: Soak in warm water 12-24 hours before planting (cuts germination to 5-7 days)

Spacing: 12-18 inches between plants; 3-5 feet between rows

Water: 1 inch per week; drip or soaker hose preferred

Fertilizer: 2-3 lbs of 10-10-10 per 100 sq ft before planting; one side-dress after first harvest

First harvest: 50-75 days after planting (variety dependent)

Harvest frequency: Every 1-2 days -- this is not optional

Optimal pod size: 3-4 inches for most varieties


The Soil Temperature Problem (Why Most Okra Stalls in Zones 5-7)

Get this wrong and nothing else matters. Okra is a tropical plant -- a member of the hibiscus family that comes from warm, semi-arid Africa. It does not negotiate with cold soil. Plant it in soil below 65F at 4-inch depth and one of three things happens: the seeds rot before germinating, the seedlings emerge weak and yellow, or damping-off fungi attack the seedlings at the soil line and collapse them.

This is the number one killer of okra in zones 5, 6, and 7. Gardeners who have their tomatoes and peppers in the ground assume okra goes in at the same time. It does not. Okra needs even warmer soil than tomatoes. The calendar date means nothing here -- soil temperature is the only number that matters.

Below 60F: Do not plant. Seeds will rot. Seedlings will die.

60-64F: Still too cold. Germination will be slow, weak, and patchy.

65F: Minimum threshold. Germination takes 10-14 days.

70-85F: Optimal range. Pre-treated seeds germinate in 5-7 days.

85-95F: Excellent. Fastest possible emergence.

Get a soil thermometer. Push it to 4-inch depth. If it reads below 65F, wait. That measurement is the whole game.

How to Get There Faster in Cold Zones

In zones 5-6, the soil may not hit 65F until late May or early June. That gives you a frustratingly short growing window. Two techniques help.

Black plastic mulch. Lay it over the bed 2-3 weeks before planting. Black plastic absorbs solar heat and raises soil temperature noticeably faster than bare soil. It also suppresses weeds, which is a bonus. In zones 5-6, this is not just a nice trick -- it meaningfully extends your effective growing season.

Indoor seed starting. Okra has a taproot and does not transplant well from standard containers. If you start indoors, use peat pots or other biodegradable containers that go into the ground intact. Start 3-4 weeks before your last frost date. Use a heat mat to keep the soil at 70-85F. Harden off over 7-10 days before transplanting, and only move them outside when nighttime temperatures are reliably above 60F and soil has hit 65F.

The Seed Pre-Treatment You Should Always Do

Okra seeds have a hard seed coat that slows water absorption. Without treatment, germination takes 7-14 days and emergence is uneven -- some plants at one stage, others a week behind. Soak seeds in warm water for 12-24 hours before planting. That's it. Germination drops to 5-7 days and emergence is far more uniform. It takes thirty seconds and makes a meaningful difference. There's no good reason to skip it.


Best Okra Varieties by Zone

Variety selection for okra is simpler than for tomatoes or peppers -- no disease resistance codes to decode, no complicated chill hour math. The main variables are days to maturity (critical in short seasons), plant height, spine level, and mucilage content. Get those right for your situation and you'll be fine.

What zone are you in?

Enter your zip code for frost dates, growing season, and soil type.

> Not sure which varieties belong in your yard? We analyze your zone, season length, and sun exposure to give you personalized okra variety picks -- plus placement recommendations for 9 other vegetables. $9.99 for your complete guide. Get My Personalized Guide

Short-Season Zones (5-6): Days to Maturity Is Everything

Zone 5 is the northern limit for okra. The effective growing window -- from when soil hits 65F to first frost -- is roughly 90 days. That sounds like enough, but okra needs all of it. Only early-maturing varieties are reliable here. Plant anything over 56 days and you're gambling.

Cajun Delight is the best choice for the shortest seasons. At 50-55 days, it is the earliest reliably productive okra available, with reduced spines and high yields. This is the variety that makes okra possible in zone 5. If you're in zone 5 and not growing Cajun Delight, you're making your life harder than it needs to be.

Clemson Spineless is the most widely grown okra variety in America for a reason. At 56 days, it fits zone 5 if you push the season with black plastic and indoor starting. Spineless pods, high mucilage (excellent for gumbo and stews), and consistent performance everywhere it's planted. Has been the standard since 1939. That kind of track record doesn't happen by accident.

Annie Oakley at 52 days and Blondy at 50 days round out the zone 5 options. Both are compact -- under 4 feet -- which makes them viable for containers as well. If you're working with limited space or want the flexibility of a patio planting, these are your picks.

Zone 6 opens up a few more options. Emerald at 58 days is worth growing here specifically because it stays tender slightly longer than most varieties, giving you a more forgiving harvest window. Burgundy at 60 days is an ornamental curiosity -- deep red pods and stems that look striking in the garden, though the pods turn green when cooked. It works in zone 6 if you start early. Baby Bubba at 53 days was bred for containers and stays compact.

Zone 5-6 strategy: Indoor-start in peat pots 3-4 weeks before last frost. Use black plastic mulch. Stick to 56 days or fewer. Soak all seeds overnight before planting.

Standard Zones (7-8): The Full Menu Opens Up

Zones 7-8 are excellent okra territory. The season is long enough for every variety on the market, and the heat profile matches what okra actually wants. You can direct sow in April (zone 8) or May (zone 7), run a full season, and still have time for a fall crop planted 3 months before first frost.

Clemson Spineless is still the workhorse here. Plant it, grow it, harvest it every other day. It produces reliably. High mucilage makes it the right choice for gumbo and stews.

Emerald at 58 days earns its spot in zones 7-8 because of one trait: it stays tender longer than almost any other standard variety. If your schedule means you harvest every 2-3 days instead of every 1-2 days, Emerald is more forgiving of that lapse.

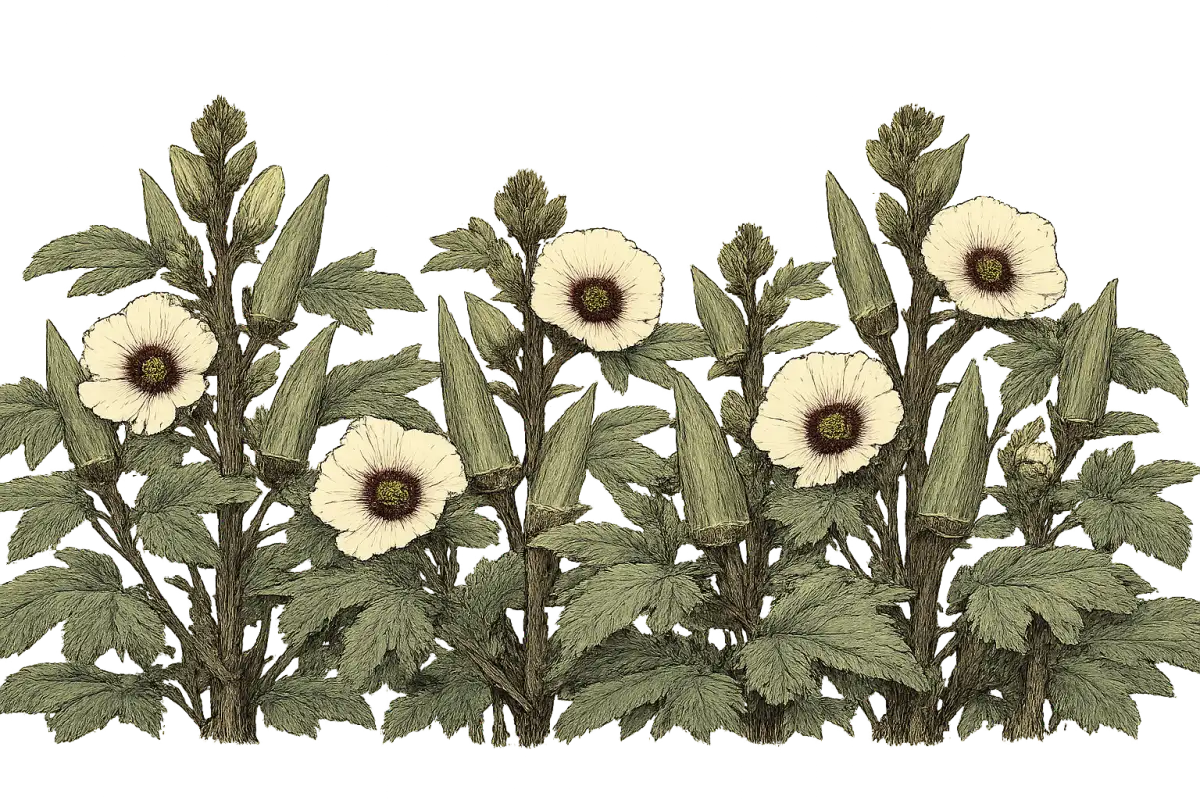
Star of David is the heirloom variety worth growing if you have the space. Plants reach 7-10 feet tall -- plan accordingly -- and the pods stay tender all the way to 5-7 inches, compared to the 3-4 inch window of standard varieties. The flavor is exceptional. It has spines, so wear gloves. It needs room, so give it 18-24 inches between plants. If those conditions don't fit your garden, skip it. But if they do, it's one of the most rewarding okra plants you can grow.

Burmese (sometimes called Long Pod) is the one to grow if you intend to grill or roast okra rather than cook it in liquid. It has very low mucilage -- almost no sliminess -- and pods stay tender all the way to 9-12 inches. The harvest window is dramatically more forgiving than any other variety. Texas A&M recommends Lee as a consistent, dependable producer for this region. Louisiana Green is the classic Gulf states gumbo variety -- high mucilage, long season, excellent performance.

Zone 7-8 strategy: Direct sow after soil hits 65F. Succession plant every 2-3 weeks for extended harvest. Consider ratooning in midsummer (cutting the main stem back to 6-12 inches to force a second flush of pods). Plant a fall crop.

Long-Season Zones (9-11): Okra's True Home

Unlike most vegetables, okra doesn't struggle with heat. It thrives at 75-95F and keeps producing up to 100F with adequate water. Zones 9-11 are where okra becomes a near-permanent fixture in the garden.

All the zone 7-8 varieties perform well here. Star of David reaches its full, impressive potential -- massive plants with rich-flavored pods. Louisiana Green peaks in the Gulf states. Burmese is exceptional for anyone who can't commit to daily harvesting. Cajun Delight at 50-55 days is the right pick for your earliest succession planting, getting pods on the table before the main-season varieties get going.

In zones 10-11, okra can produce nearly year-round with basic frost protection. Multiple succession plantings, ratooning mid-season plants, and fall crops all stack to create a remarkably long harvest window. Above 100F, pod set may slow temporarily -- this is normal. Keep plants well-watered and they'll resume production when temperatures moderate.

Zone 9-11 strategy: Plant March-April for the main crop. Succession plant every 2-3 weeks through June. Ratoon midsummer for a second flush. In zones 10-11, keep going with frost protection.

Quick Reference Table: Top Picks by Zone Group

Zone GroupTop 3 VarietiesMaturityWhy
5-6Cajun Delight, Clemson Spineless, Annie Oakley50-56 daysEarliest maturing; fit the tight season window
7-8Clemson Spineless, Emerald, Star of David56-75 daysFull menu; choose by cooking use and harvest style
9-11Louisiana Green, Burmese, Star of David60-75 daysLong-season heirlooms reach full potential in the heat

Planting, Spacing, and Soil Preparation

Get the Soil Right First

Okra is not as demanding about soil as many vegetables, but two things matter: drainage and pH. Waterlogged soil kills okra through root rot and creates conditions for southern blight -- a soilborne fungus that produces white growth at the stem base and rapidly kills plants. Good drainage is not optional.

The target pH is 6.5-7.0 -- neutral. This is simpler than crops like blueberries that need highly acidic soil. Most garden soil is close enough. Get a soil test from your county extension office ($10-25) before you start amending based on guesswork. Texas A&M AgriLife Extension, Clemson Extension, and UGA Extension all recommend this as the first step. The test tells you exactly what your soil needs. Without it, you're fertilizing blind.

For heavy clay soil, work in 2-4 inches of compost to improve drainage and reduce compaction. Okra's taproot needs soil worked 8-10 inches deep -- compacted soil restricts root development and reduces yields. For sandy soil, the same compost application helps with moisture retention. Loam and sandy loam need minimal amendment.

Pre-plant fertilizer: 2-3 pounds of 10-10-10 per 100 square feet, worked into the top 4-6 inches of soil. Don't exceed this. Excess nitrogen is a common mistake that produces beautiful, lush plants with almost no pods. More on that below.

Spacing

Thin to 12-18 inches between plants in the row. Space rows 3-4 feet apart for standard varieties, 4-5 feet for tall heirlooms like Star of David. This is wider than it looks like it needs to be when you're staring at small seedlings, but okra plants can reach 3-10 feet tall and 2-3 feet wide. Crowded plants compete for light and nutrients, and poor air circulation invites powdery mildew. Clemson Extension, UGA Extension, and Oklahoma State all converge on similar spacing recommendations. Give the plants room.

Sow seeds at 3/4 to 1 inch deep, 2-4 inches apart in the row, then thin after seedlings reach 3-4 inches tall. Thinning feels aggressive but it is necessary. Fewer, well-spaced plants produce more than many crowded ones.

The Planting Process, Step by Step

1. Confirm soil temperature at 4-inch depth is 65F or above.

2. Soak seeds in warm water 12-24 hours before planting.

3. Plant at 3/4 to 1 inch deep, 2-4 inches apart in the row.

4. Keep soil consistently moist (not saturated) until germination in 5-7 days.

5. Thin to 12-18 inches apart when seedlings reach 3-4 inches tall.

6. Apply 2-4 inches of organic mulch after thinning, keeping it 2-3 inches away from stems.

That last point about mulch clearance matters. Mulch against the stem base holds moisture against the stem, which creates conditions for southern blight. Keep a gap.


Watering: Consistent, Not Constant

Okra is drought-tolerant. That trait comes from its semi-arid African origins -- deep taproot, efficient stomata, thick fibrous stems that resist wilting. It will survive dry spells that would kill beans or squash.

But survival and production are different things. Drought-stressed okra produces fewer pods, and the pods that do form are smaller. The target is 1 inch of water per week during the growing season, including rainfall. Every extension service that weighs in on okra watering agrees on this number: Clemson, UGA, Texas A&M AgriLife, Oklahoma State. One inch per week.

How to Water

Use drip irrigation or a soaker hose, not overhead sprinklers. This is not a trivial preference. Wet foliage promotes powdery mildew, which is one of okra's more common disease problems. Drip keeps leaves dry, delivers water efficiently to the root zone, and pairs well with mulch. If you must use overhead watering, do it in early morning so foliage dries before evening. Never water in the afternoon or evening.

One deep watering per week is better than multiple shallow ones. Daily light sprinkling keeps the surface wet (promoting disease) while the deeper root zone stays dry. Give the soil a full inch in one or two sessions.

Sandy vs. Clay: Adjust Accordingly

Sandy soils drain quickly. Water moves through them fast, often below the root zone before plants can absorb it. On sandy soil, water more frequently in smaller amounts -- 2-3 times per week rather than once -- to keep moisture available at root depth. Texas A&M AgriLife specifically notes this adjustment.

Heavy clay holds water longer and risks waterlogging. Water less frequently, more deeply, and allow the top 2 inches to dry between waterings. Every 7-10 days is often enough on clay.

Container Watering

Containers dry out significantly faster than ground soil, especially in summer heat. Don't apply a once-a-week schedule to container plants. Check the top 1-2 inches of potting mix daily. When it feels dry at that depth, water thoroughly until water drains from the bottom holes. In peak summer heat above 90F, containers may need water twice daily. Don't let the potting mix dry out completely -- once it does, it becomes hydrophobic and resists re-wetting.

The Overwatering Warning

Overwatering is a more common killer of okra than underwatering. Waterlogged soil creates anaerobic conditions that destroy roots and invite two specific diseases: root rot and southern blight. The insidious part is that a plant with rotted roots will wilt -- because damaged roots can't transport water even in wet soil. The symptom looks like drought. The cause is the opposite. If your plant is wilting, check soil moisture before you reach for the hose. Mushy brown roots, white fungal growth at the stem base, and yellowing lower leaves are all overwatering signs, not drought signs.

Mulch reduces all of this. Three to four inches of straw, wood chips, or shredded leaves around established plants retains moisture, moderates soil temperature, and suppresses weeds. Mulched beds typically need 30-50% less water than bare soil. Apply it after plants are established and soil has warmed.


Feeding Okra: One Rule Above All Others

The rule is simple: don't overdo nitrogen.

Okra fed too much nitrogen produces spectacular plants -- tall, dense, deep green, impressive canopy. And almost no pods. This is the "all plant, no fruit" syndrome, and it's a direct consequence of pushing too much nitrogen. The plant has no reason to reproduce when it's in vegetative overdrive.

The Fertilization Schedule

Before planting: 2-3 pounds of 10-10-10 (or 15-5-10) per 100 square feet, worked into the top 4-6 inches of soil. This is the major feed. Do not exceed it.

After first harvest: One side-dress application of 1 cup of 10-10-10 per 10 feet of row. Sprinkle it along the row 6-8 inches from the plant stems, work it lightly into the soil surface, and water afterward. This is it. One application. A second can be made 4-6 weeks later if plants look pale or growth slows noticeably.

If your plants already have lush, abundant foliage and few pods when you find this guide, stop fertilizing entirely. Water only. Let the plant's nitrogen levels drop. Pod production will resume.

Container plants are the exception. Nutrients leach from potting mix with every watering. Feed container-grown okra with balanced liquid fertilizer every 2-3 weeks throughout the growing season.


Harvesting: The Task That Runs the Whole Season

Everything else in this guide leads to this. Harvesting frequency is the most important ongoing decision you make with okra. Get it wrong and nothing else you do compensates for it.

Pick Every 1-2 Days

This is not an overstatement. Pick every 1-2 days once pods start forming. Standard varieties go from perfect (3-4 inches) to woody and inedible in as little as 2 days in hot weather. The window between "ready" and "ruined" is that narrow.

Here's why the frequency matters beyond pod quality: when mature pods remain on the plant, the plant receives a hormonal signal that it has accomplished its reproductive mission. It shifts energy from flower production to seed maturation inside the existing pods. Pod production slows dramatically -- or stops entirely. The plant is not broken. It is doing exactly what plants do. You just need to keep removing pods to tell it to keep making more.

The math in hot weather is unforgiving. A pod at day one post-flowering is 1-2 inches -- too small to pick. At day three it's 3-4 inches -- perfect. At day five it's 5-7 inches -- borderline or already woody in standard varieties. At day seven it's 8-plus inches -- woody, fibrous, and inedible for most varieties. In 90F heat, that timeline compresses. Two days of missed harvesting can set production back for a week.

The Snap Test

Grasp the tip of the pod and try to snap it off. If it snaps cleanly, it's tender and ready. If it bends or feels fibrous, it's past its prime. This takes two seconds and tells you everything you need to know.

How to Pick Properly

Wear gloves and long sleeves. Every time. This is not optional. Okra plants have tiny trichomes -- spines -- on pods, leaves, and stems that cause skin irritation ranging from mild itching to significant rash. Even "spineless" varieties have some trichomes. The irritation is worse in hot weather when pores are open. Gardeners who skip protection avoid harvesting because it's uncomfortable. Uncomfortable harvesting leads to missed days. Missed days lead to woody pods and shut-down production. Wear the gloves.

Cut the stem just below the pod with a sharp knife or pruning shears, leaving about 1/4 inch of stem attached to the pod. Never pull or twist pods off -- that damages the plant and creates entry points for disease.

Variety-Specific Harvest Windows

Some varieties give you more time:

  • Standard varieties: 3-4 inches; woody past 4 inches
  • Clemson Spineless: Stays tender slightly longer; 4-5 inches is acceptable
  • Emerald: Bred for extended tenderness; stays good to 5 inches
  • Star of David: Thick, ridged pods stay tender to 5-7 inches
  • Burmese: The standout -- still tender at 9-12 inches

If daily harvesting genuinely isn't possible for your schedule, grow Burmese or Star of David. The dramatically wider harvest window makes both forgiving for gardeners who can only check the garden every 2-3 days.

What to Do When You Miss Days

Remove all oversized pods immediately -- even the woody ones. Leaving them on the plant continues sending the "stop producing" signal. Remove every one of them, resume daily harvesting, and the plant will begin producing new flowers within a few days. Expect a brief gap of 3-5 days while new pods develop. Then you're back in business.

Storage and Freezing

Fresh pods keep 3-5 days in the refrigerator in a paper bag or perforated plastic bag. Do not wash until ready to use -- moisture promotes mold. Don't store below 45F; okra suffers chilling injury at very cold temperatures.

Freezing is the best preservation method. Blanch whole pods in boiling water for 3 minutes, cool immediately in ice water, drain thoroughly, freeze flat on a baking sheet, then transfer to freezer bags. Pods frozen this way keep 10-12 months.

What zone are you in?

Enter your zip code for frost dates, growing season, and soil type.

> Want to know exactly where in your yard okra will thrive? Our tool maps sun and shade across your property and tells you the best placement for okra and 9 other vegetables -- matched to your address and zone. $9.99 for your personalized guide. Find My Best Spot


Extending the Season: Succession, Ratooning, and Fall Crops

A single planting of okra gives you a good run. Multiple strategies give you pods from early summer all the way to frost.

Succession planting. Sow new seeds every 2-3 weeks through early summer. Each succession begins producing about 60 days after planting, so staggered plantings create staggered harvests. By the time your first planting winds down, the next one is hitting its stride.

Ratooning. This is a traditional Southern technique that most Northern gardeners have never heard of. In midsummer -- typically July-August depending on your zone -- cut the main stem back to 6-12 inches above the ground. Continue watering and side-dress with fertilizer. The plant regrows from the stump and produces a second flush of pods. In zones 7-11, this extends the productive season by several weeks and is worth doing. It's not viable in zones 5-6 where the season is too short after cutting.

Expect 10-20% of plants not to survive ratooning. Plan for it.

Fall crops (zones 7+). Plant a dedicated fall crop at least 3 months before your first expected fall frost. A fall crop is not a continuation of your summer planting -- it's a separate planting started fresh, timed to hit peak production in the cooler days of early fall.


Pests and Diseases: What Actually Threatens Okra

Okra is relatively pest-resistant compared to tomatoes or squash. But a few specific insects and diseases do cause real problems. Know what to look for.

The Corn Earworm

The most damaging okra insect. This is the same caterpillar that attacks corn ears and tomato fruit -- a stout, striped larva that bores directly into pods, feeding on seeds inside. Damaged pods rot. The organic controls are Bt (Bacillus thuringiensis) and spinosad, both effective on young caterpillars before they bore in. Apply Bt in the evening since UV light degrades it quickly.

Here's the practical defense: frequent harvesting is the single best protection. Harvesting every 1-2 days removes eggs before they hatch. This is another reason the harvest schedule is not optional.

Stink Bugs and Leaffooted Bugs

Both pierce pods with needle-like mouthparts and cause curled, deformed pods, shriveled seeds, and bud drop -- which means fewer flowers, which means fewer pods. Hand-pick them into soapy water for small infestations. Neem oil works as a repellent. For heavy infestations, carbaryl (Sevin) is the conventional option per Texas A&M AgriLife. Pheromone traps are available for stink bugs.

Aphids

Dense colonies on undersides of leaves and new growth. They suck plant sap and excrete honeydew that attracts sooty mold. A strong blast of water from the garden hose knocks most of them off -- repeat every 2-3 days. Insecticidal soap or neem oil handles moderate infestations. Natural predators (ladybugs, lacewings, parasitic wasps) provide good biological control if you haven't wiped them out with broad-spectrum sprays.

Fusarium Wilt

Wilting during midday heat that initially recovers overnight. Then progressive yellowing from the bottom of the plant upward. Cut a stem lengthwise and you'll see brown discoloration in the vascular tissue. There is no cure. Remove and destroy infected plants immediately -- do not compost them. Prevention is the only strategy: crop rotation on a 3-5 year cycle, maintaining soil pH at 6.5-7.0 (fusarium is more aggressive in acidic soil), and planting resistant varieties when available.

Southern Blight

White, fan-shaped fungal growth at the soil line, with small round tan-to-brown structures (sclerotia) visible in the white growth. Rapid wilting and death follow. This is a warm, wet soil disease -- exactly the conditions in okra's preferred zones. Remove infected plants and the surrounding 6 inches of soil. Improve drainage. Keep mulch away from stems. Rotate crops. No chemical cure.

Root-Knot Nematodes

A problem primarily in zones 8-11 on sandy soils. Microscopic organisms that cause galls on roots, leading to stunted growth and yellowing that looks like a fertilizer deficiency. Pull up a plant and look at the roots -- visible knots confirm the diagnosis. Rotate crops for at least 2-3 years. Add heavy compost to support beneficial organisms that suppress nematode populations. Soil solarization (clear plastic over moist soil for 4-6 weeks in full summer sun) kills nematodes in the top several inches. French marigolds (Tagetes patula) planted as a cover crop produce root compounds toxic to nematodes.

Powdery Mildew

White powdery coating on upper leaf surfaces. Worse in humid conditions with poor air circulation. The fix is in the spacing -- 12-18 inches between plants and 3+ feet between rows gives air room to move. Neem oil applied every 7-14 days during humid weather is both preventive and curative. Sulfur fungicides work preventively but do not apply above 90F or they will burn foliage.


The Mistakes That Kill Okra (Ranked by How Often We See Them)

Mistake #1: Planting in Cold Soil

We said it at the top and it bears repeating. Soil below 65F at 4-inch depth. Seeds rot. Seedlings collapse. This kills more okra in zones 5-7 than anything else. Measure with a thermometer. Wait for 65F. Plant 2-3 weeks after last frost, not on the frost date.

Mistake #2: Not Harvesting Often Enough

The most common mistake among first-time okra growers. Every 1-2 days. Without exception. Pods go woody in 2 days in hot weather. Mature pods left on the plant shut down production. If you grow one thing from this guide, grow this habit.

Mistake #3: Over-Fertilizing with Nitrogen

Lush, beautiful, pod-free plants. You know what's causing it now. Apply 2-3 pounds of 10-10-10 per 100 square feet before planting, one side-dress after first harvest, and stop. Do not apply high-nitrogen fertilizers where the first number is dramatically higher than the other two.

Mistake #4: Skipping Seed Pre-Treatment

A 30-second fix with measurable results. Soak seeds 12-24 hours before planting. Germination drops from 7-14 days to 5-7 days with more uniform emergence. There is no reason not to do this.

Mistake #5: Improper Spacing

Thin to 12-18 inches between plants. It feels aggressive when they're small seedlings. Do it anyway. Crowded plants have poor air circulation, compete for resources, and develop powdery mildew. Fewer plants with room to grow outperform many crowded ones every time.

Mistake #6: Harvesting Without Protection

Okra trichomes cause skin irritation. It's worse in hot weather. Gardeners who skip gloves and long sleeves avoid harvesting because it's uncomfortable. Avoidance leads to woody pods and shut-down production. Wear protection every time and the discomfort stops being a reason to skip harvest days.

Mistake #7: Using Garden Soil in Containers

Garden soil compacts in containers, drains poorly, and may introduce soilborne diseases. Use a high-quality commercial potting mix with 20-25% perlite or vermiculite added. Never straight garden soil, straight topsoil, or straight compost in a pot.


Frequently Asked Questions

Can I grow okra in a container?

Yes, with the right setup. Minimum pot size is 5 gallons (12-14 inch diameter) per plant; 10-15 gallons for full-size varieties. Use high-quality potting mix with perlite -- not garden soil. Best compact varieties are Blondy (3 feet), Annie Oakley (3-4 feet), and Baby Bubba (3-4 feet). Dark-colored pots absorb more heat, which okra prefers. Expect 10-20 pods per plant per season -- less than ground-planted, but workable. Container plants need daily moisture checks and fertilizer every 2-3 weeks with balanced liquid fertilizer.

My okra plants look great but produce almost no pods. What's wrong?

Either insufficient sun (okra needs 6-8 hours minimum -- 12-16 for peak production), excess nitrogen from over-fertilizing, or both. Check your sun hours honestly. If the sun is adequate, stop all fertilization and water only. Pod production should resume as nitrogen levels drop. If plants are leggy and thin, the problem is sun, not nitrogen.

When should I plant a fall crop?

At least 3 months before your first expected fall frost, in zones 7 and warmer. Calculate backward from your frost date. A variety like Cajun Delight at 50-55 days gives you some buffer; a variety at 60-75 days needs every one of those 3 months.

What okra is best for gumbo?

Clemson Spineless and Louisiana Green are the high-mucilage varieties that thicken gumbo properly. Burmese has low mucilage and is the wrong choice for gumbo -- use it for grilling or roasting instead. Star of David falls in between: good flavor but not the thickening power of Clemson Spineless.

How do I know if fusarium wilt is the problem?

The pattern is specific: wilting during midday heat that initially recovers overnight. As it progresses, lower leaves yellow and the yellowing moves upward. The diagnostic confirmation is cutting a stem lengthwise and seeing brown discoloration in the vascular tissue. If you see that, remove the plant, do not compost it, and mark the spot for rotation. Nothing in the garden fixes fusarium -- rotation prevents it.

Is okra really worth growing in zone 5?

If you want fresh okra and you're in zone 5, yes -- with realistic expectations. Stick to Cajun Delight or Blondy. Start indoors in peat pots. Use black plastic mulch. You'll get a shorter harvest window than growers in zones 7-9, but a healthy plant producing for 6-8 weeks still puts meaningful food on the table. The mistakes to avoid are trying mid-season varieties that need 60-75 days, and planting before soil hits 65F.

What zone are you in?

Enter your zip code for frost dates, growing season, and soil type.

> Your yard has a best spot for okra. Let us find it. We map sun and shade across your exact property and match variety recommendations to your zone. Personalized to your address for $9.99. Get Started


The Bottom Line

Okra is not a difficult crop. It is a specific one. Give it warm soil (65F minimum at 4-inch depth), full sun, 1 inch of water per week, and light fertilization. Match your variety to your zone's season length. Harvest every 1-2 days once production starts. Keep doing that until frost.

That's most of what you need to know.

The crop rewards consistency more than expertise. A grower who checks the garden every other day and picks pods at 3-4 inches will outproduce someone with perfect soil and perfect fertilizer who harvests once a week. The harvest schedule is the job. Everything else supports it.

Plant Cajun Delight in zone 5-6 and start indoors. Plant Clemson Spineless and Emerald in zones 7-8. Let Star of David and Louisiana Green run in zones 9-11. Soak your seeds the night before planting. Thin aggressively. Wear gloves when you harvest. Pick every other day.

The rest works itself out.

Research for this guide was synthesized from Texas A&M AgriLife Extension, Clemson Cooperative Extension, University of Georgia Extension, Oklahoma State University Extension, NC State Extension, and UF/IFAS, as well as published cultivar trial data and commercial okra variety performance records.

Where Okra Grows Best

Okra thrives in USDA Zones 7, 8, 9, 10. Explore each zone's complete guide for growing tips, companion plants, and seasonal advice.

Also possible in: Zone 6 (challenging but possible with the right conditions).

Not sure of your zone? Look it up by zip code →