Best Garlic Varieties by Zone
Zone determines type. Type determines flavor, storage, and harvest timing. This is the decision tree most gardeners skip, and it explains more failed garlic harvests than any other single factor.
Cold Zones (2-4): Where Hardneck Dominates
These zones are hardneck paradise. Extended cold winters provide abundant vernalization, and the coldest conditions produce the most complex flavor development in Rocambole and Porcelain types.
The University of Minnesota Extension specifically recommends Rocambole, Purple Stripe, and Porcelain for zones 3-4 and explicitly warns against grocery store garlic, which "does not do well under Minnesota conditions." That is as direct as extension service advice gets.
In zones 2-3, Music and German Extra Hardy (Porcelain) are your most cold-tolerant options. German Red (Rocambole) and Chesnok Red (Purple Stripe) round out the top four. Plant late August to early September -- the ground freezes early at these latitudes and you cannot afford to delay. Apply at least 6 inches of straw mulch immediately after planting. This is not optional in extreme cold; without it, winter mortality increases significantly.
Zone 4 opens up the full hardneck menu. Spanish Roja and German Red are Rocambole at their peak -- these zones are what those varieties were made for. Add Bogatyr (Marble Purple Stripe) and Georgian Crystal (Porcelain) for variety. Planting window is mid-September through early October. Four to six inches of straw mulch.
Standard Cold Zones (5-6): The Full Hardneck Menu
Everything works here. Zone 5 gets adequate cold for full hardneck vernalization while being mild enough that plant mortality during winter is low. Zone 6 adds the flexibility to experiment with cold-hardy softneck varieties alongside hardnecks.
Ohio State Extension recommends hardneck Music, Georgian Fire, and Georgia Crystal for zones 5-6, alongside softneck Broadleaf Czech, Italian Late, and Red Toch. Plant October through mid-October in zone 5, early to mid-October in zone 6.
If you want the best raw-eating garlic you have ever tasted, grow Spanish Roja in zone 5. If you want something more versatile that holds up through long cooking, Music (Porcelain) is the reliable choice. For baking specifically, Chesnok Red (Purple Stripe) is worth growing for its transformation in heat.
Zone 6 is where it gets interesting for softnecks. Inchelium Red and Lorz Italian (both Artichoke types) handle zone 6 winters with proper mulching and give you softneck storage life -- 9-10 months -- alongside your hardneck flavor varieties. Growing both types simultaneously is the optimal zone 6 strategy: eat the Rocambole first (shortest storage), save the Artichoke for winter and spring.
Transition Zone (7): Both Types Work
Zone 7 is the most versatile garlic zone in the country. Northern highbush hardnecks and softnecks both succeed here. Your limiting factor is Rocambole -- mild zone 7 winters often do not provide adequate vernalization for this family, and it struggles as a result.
Stick to German Extra Hardy, Chesnok Red, and Music among hardnecks -- these have demonstrated reliable performance at zone 7 winter temperatures. For softnecks, Inchelium Red, Red Toch, and New York White Neck are the standard choices. Rutgers Extension (covering zones 6-7) recommends hardneck Killarney Red, Spanish Roja, Chesnok Red, Metechi, Music, and German White, alongside softneck Inchelium Red, Lorz Italian, French Red, and Rose Du Var.
Planting window in zone 7 is mid to late October. Both types become roughly equally viable here, so grow what you want to eat.
Warm Zones (8-9): Creole, Softneck, and the Refrigerator Protocol
Zone 8 is where the hardneck/softneck divide becomes a hard rule -- with one critical exception.
Most hardneck families will not get adequate vernalization in zone 8 winters. Softneck varieties (Inchelium Red, Lorz Italian, Thermadrone) are your primary choice, requiring less cold to develop bulbs. Turban types (Tzan, Shantung Purple) and Asiatic types (Asian Tempest) also work -- both are early maturing with low vernalization needs.
But the Creole family changes everything for Southern growers. Creole garlic is a hardneck type that thrives in hot Southern climates where every other hardneck fails. It evolved with naturally low vernalization requirements, adapted to warm conditions, and produces some of the most beautiful and flavorful garlic available -- nutty, sharp heat that fades elegantly, deep purple and burgundy skins, and an exceptional 9-10 months of storage (nearly matching softneck longevity). Top Creole varieties: Burgundy, Cuban Purple, Labera Purple, and Creole Red. These are the current favorites of gourmet cooks, and they are best grown in the South. They perform poorly in cold Northern zones.
For zone 8, planting window is late October through November. Seed garlic may benefit from 6-8 weeks of refrigeration at 40F before planting if your winters are marginal.
Zone 9 requires the full refrigeration protocol for most hardneck types: 10-12 weeks at approximately 40F in the warmer part of the refrigerator (not the back, not the freezer), stored in paper bags that allow breathing. Never use airtight containers -- garlic rots. Florida panhandle growers report that 10-12 week treatments reliably prevent garlic from failing to vernalize; shorter 6-8 week treatments only worked consistently during colder-than-average winters. Stick with softnecks and Creole types as your primary planting, with refrigerated Turban and Asiatic hardnecks as secondary options.
Hot Zones (10): Softneck and Timing Are Everything
Zone 10 -- South Florida, Southern California, Hawaii -- is the most challenging zone for garlic. Refrigeration of seed garlic before planting is nearly always required. Plant from December through January. Softneck varieties (California Early, California Late, Silverskins) and Creole types (Burgundy, Cuban Purple) are your realistic options.
Two additional challenges compound the vernalization problem. First, zone 10 soil heats rapidly in spring, and garlic bulbing halts entirely at 90-91F soil temperature. Once you cross that threshold, no further bulb growth occurs regardless of other conditions. The window between 60F (when bulbing begins) and 91F (when it stops) is narrow in hot climates, which is why Southern-grown garlic tends to be smaller. Second, pre-harvest temperatures above 80F can prevent proper dormancy entry, reducing storage life. A zone 10 grower planting Creole or Artichoke softneck with proper refrigeration and deep planting (4-6 inches) will get usable garlic. They should not expect the same bulb size as a Minnesota grower harvesting German Red.
Quick Reference Table: Top Picks by Zone Group
| Zone Group | Top Varieties | Type | Why |
|---|
| 2-4 | Music, German Extra Hardy, German Red, Chesnok Red | Hardneck (Porcelain, Rocambole, Purple Stripe) | Maximum cold hardiness; peak flavor in cold winters |
| 5-6 | Spanish Roja, Music, Chesnok Red, Inchelium Red | Hardneck + cold-hardy Softneck | Full hardneck menu; add softneck for storage |
| 7 | German Extra Hardy, Music, Inchelium Red, Red Toch | Hardneck + Softneck | Both types viable; Rocambole unreliable |
| 8-9 | Burgundy, Thermadrone, Inchelium Red, Tzan | Creole Hardneck + Softneck | Low vernalization; Creole is the hardneck star |
| 10 | Burgundy, Cuban Purple, California Early, Silverskins | Creole + Softneck | Refrigeration required; heat-adapted types only |
When to Plant (And Why Spring Is Not an Option)
Garlic is fall-planted. There is no workaround.
Without at least 40 days at or below 40F -- the vernalization requirement -- garlic cannot differentiate into individual cloves. Spring-planted garlic produces rounds: single undivided bulbs that look like fat green onion bulbs at harvest. Not what you want. Even with a 4-6 week refrigeration treatment before spring planting, expect 30-50% smaller bulbs compared to fall-planted garlic. The math does not work out. Plant in fall.
The rule: Plant 4-6 weeks before the ground freezes, targeting soil temperature of 55-60F at four-inch depth.
Above 65F soil temperature at planting, you risk excessive top growth before winter and potential clove rot in warm wet soil. Below 40F, root growth stops and cloves may not establish before the ground locks up. The 55-60F window is what you are aiming for. A soil thermometer costs $10 and removes all guesswork.
A rough air temperature guide: wait until nighttime temperatures consistently dip below 50F.
City-specific windows: Duluth and Anchorage want to be in the ground by September 1-15. Minneapolis and Fargo: September 15 through October 1. Portland, Maine; Chicago; Denver; and Des Moines target October 1-15. Detroit, Salt Lake City, and Boise: October 10-25. New York City, Washington DC, Nashville, and Atlanta: late October through mid-November. Seattle and Portland, Oregon: October 15 through November 15. Dallas: November. Houston, Phoenix, San Diego: November through January.
Planted too early: Excessive top growth before winter. Those shoots are vulnerable to frost damage, and the plant wastes energy on foliage instead of root development. Particularly risky in zones 7 and warmer where fall stays warm. More than 4-6 inches of top growth before the ground freezes means you planted too early.
Planted too late: Insufficient root establishment before the ground locks. Higher winter mortality. Delayed spring growth. Smaller bulbs. Slightly early is better than slightly late. If you miss the window by a week, plant anyway and add extra mulch.
How to Plant: Soil, Depth, Spacing, and Mulch
Soil Preparation
Garlic is a heavy feeder that grows underground. Both of those facts have consequences for how you prepare your soil.
Target pH of 6.0-7.0, with 6.2-6.8 as the practical ideal. UMN, USU, and Ohio State Extension all converge on this range. Below 6.0, apply agricultural lime several months before planting. Above 7.5, apply elemental sulfur.
Soil type matters more for garlic than for most vegetables. You want loam or sandy loam that is loose, well-drained, fertile, and moisture-retentive without being wet. Compacted clay restricts bulb expansion underground -- the bulb literally cannot push outward, and you get small, misshapen heads. If your soil does not drain well -- dig a 12-inch hole, fill it with water, and if it does not drain within an hour you have a drainage problem -- build raised beds.
Incorporate 2-4 inches of well-rotted compost or aged manure tilled into the top 8-12 inches. Do not use fresh manure: it carries bacteria risk and attracts onion maggot. Two to four weeks before planting, remove all weeds, till to 8-12 inches, and rake smooth.
The Planting Sequence
Pointed end up. This cannot be said firmly enough. The flat basal plate at the bottom is where roots emerge. The pointed tip is where the shoot comes from. Plant upside down and the shoot has to curve 180 degrees to escape -- wasted energy, smaller misshapen bulb. Every clove, every time, pointed end up.
Depth: 2-3 inches in zones 2-7 (standard). Deep enough to protect from freeze-thaw heaving; shallow enough that shoots can push through in spring. In cold zones 2-5, plant at the 3-inch end of that range. In warm zones 8-10, go 4-6 inches deep -- deeper soil is cooler, which extends the critical bulbing window.
Spacing: 4-6 inches between cloves, with 6 inches being optimal for large bulbs. Row spacing of 6-12 inches for standard gardens, 12-18 inches for ease of access, up to 24 inches if you are using equipment. In raised beds, a 6-inch grid in all directions works well. UMN uses a double-row system: cloves 6 inches apart in rows centered 30 inches apart.
Do not separate cloves from the bulb until planting day (or 1-2 days before). Keep the papery wrapper on each individual clove. Use the largest, healthiest cloves from your best bulbs -- large clove equals large bulb at harvest.
After planting, water lightly to settle soil and then mulch immediately.
Mulching: Not Optional
Straw mulch is the gold standard. Not hay -- straw. Hay comes from cut meadow grasses and is loaded with seeds that will germinate directly in your garlic bed, creating a weed catastrophe. Straw comes from harvested grain crops with seeds already removed. Shredded leaves are an excellent alternative. Grass clippings work in thin layers if pesticide-free.
Application depth by zone: 6+ inches in zones 2-4 (critical for winter survival -- even 3-4 inches of straw can raise effective soil temperature by 10-15F during cold snaps), 4 inches in zones 5-7, 3 inches minimum in zones 7-10.
Timing: cold zones (2-5), mulch immediately after planting. Warm zones (7-9), wait until after the first frost -- mulching too early in warm climates encourages premature growth.
In spring, do not remove all the mulch. Keep 2-3 inches in place for weed suppression and moisture retention. Pull back excess from around emerging shoots if they cannot push through.
Spring Care: Feeding, Watering, Weeding, and the Scape
Fertilization
Garlic is a heavy nitrogen feeder. The spring feeding schedule is straightforward: first application when green shoots emerge in March or April, second application when plants reach 6-8 inches. Ohio State Extension adds an optional third application six weeks after the second. Stop all nitrogen by the first week of May (UMN guideline). Late nitrogen produces oversized tops at the expense of bulbs and reduces storage quality.
Fertilizer options: urea (46-0-0) top-dressed at emergence and again 2-3 weeks later (UMN). Ammonium sulfate (21-0-0) at 0.5 lb per 100 sq ft mid-April, 0.25 lb per 100 sq ft late May (USU). A balanced 19-19-19 at 1-1.25 lbs per 100 sq ft (Ohio State). Organic growers: fish emulsion (1-2% fish with 0.5% kelp, applied every two weeks mid-March through mid-May per Rutgers), blood meal, or composted manure side-dressed in early spring.
Rutgers recommends 1 lb of nitrogen per 1,000 sq ft as a pre-plant application, along with phosphorus and potassium based on soil test results.
Watering
Target approximately 1 inch per week during active spring growth. Sandy soils may need up to 2 inches per week. Drip irrigation is ideal -- delivers water to the root zone while keeping foliage dry, which reduces rust and mildew risk. Soaker hoses are a reasonable alternative. If using overhead sprinklers, water in the morning so foliage dries by evening.
Mulched beds retain moisture significantly longer. A mulched bed might need water every 7-10 days; bare soil needs watering every 3-4 days. Adjust accordingly.
The most important watering rule in garlic growing: stop watering 2 weeks before harvest. This one rule is broken constantly, and the consequences are real. Watering near harvest prevents natural maturation drying, deteriorates bulb wrappers, dramatically increases fungal disease risk, produces bulbs that cure poorly, and makes harvesting messier. Two weeks out, stop. Do not water. Resist the urge.
Weed Management
Garlic competes very poorly with weeds. This is one of its genuine weaknesses as a crop. Weeds can overtake young garlic plants in spring and dramatically reduce bulb size before you realize what is happening.
Your straw mulch is the primary defense. It handles the bulk of weed suppression passively. The active component: inspect beds weekly from March through June and hand-hoe weeds when they are under 1 inch tall (Rutgers). Shallow cultivation only -- garlic roots are near the surface and deep hoeing damages bulbs. Never let weeds go to seed in garlic beds.
The Scape: The Bonus Crop That Also Makes Your Garlic Bigger
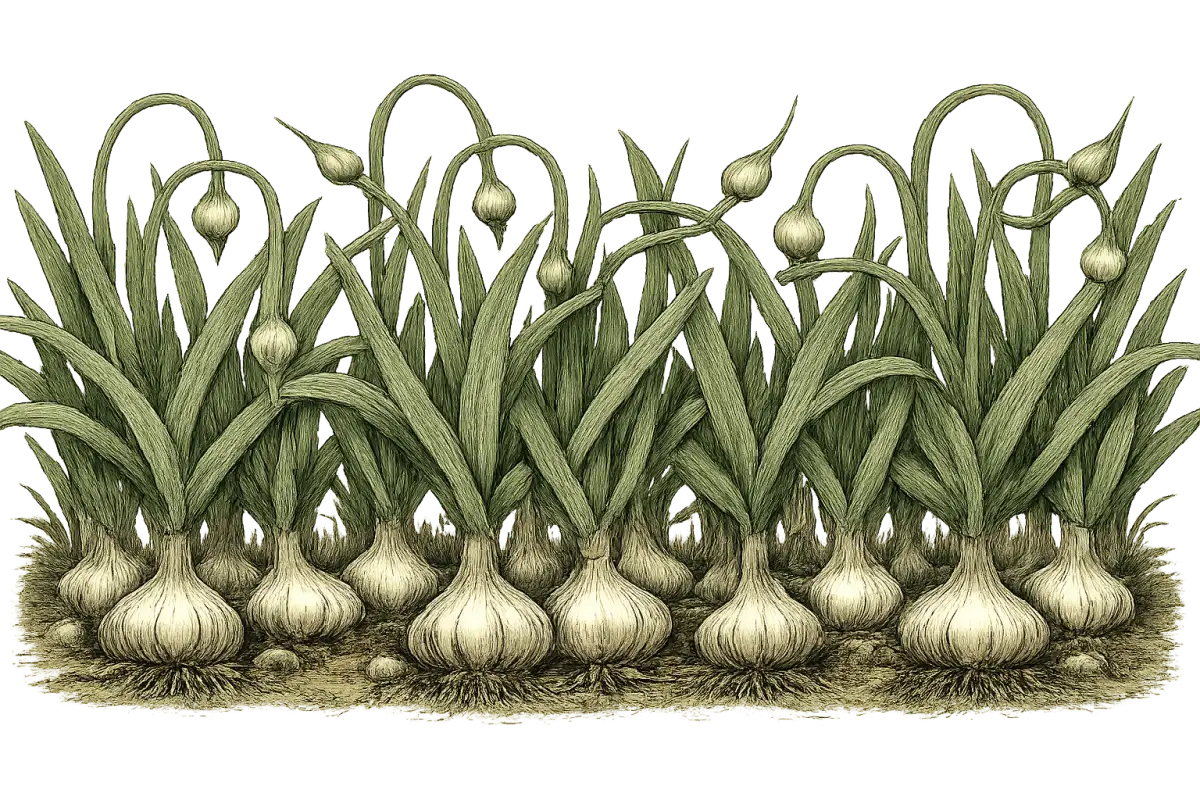
In late spring to early June, hardneck garlic produces a scape: a twisting, curling green flower stem that emerges from the center of the plant. This is both a delicious harvest and a critical management action.
Remove it. A 2017 University of Guelph study found that garlic yield increased 20-30% when scapes were removed. That is not a marginal improvement -- that is a single 30-second action per plant delivering nearly a third more garlic at harvest. It is the highest-impact single task in garlic growing, and many beginners either skip it or do not know about it.
Harvest when the scape has made one full curl, typically 8-10 inches long. Snap or cut at the base where it emerges from the leaf whorl. Do not pull -- that can damage the plant. Harvest all scapes on all hardneck plants. Leaving even one reduces bulb size on that plant.
As for eating them: garlic scapes have a delicate, herbaceous garlic flavor -- softer and more subtle than raw cloves, grassy like a scallion-chive hybrid. Make scape pesto (scapes, nuts, parmesan, olive oil in a food processor -- freeze in ice cube trays for year-round use). Saute in butter for 6-8 minutes until tender. Grill whole after tossing in olive oil. Pickle in vinegar brine. They keep 2-3 weeks refrigerated. This is the crop within the crop that most garlic growers never take advantage of.
Harvest: Reading the Plant, Not the Calendar
Harvest timing is the part that trips up experienced growers, not just beginners. The temptation is to pick a date and harvest everything. That is not how it works.
The leaf die-back method: Harvest when the bottom 2-3 leaves are completely brown and dead, but 5-6 upper leaves are still green. This represents roughly 40-60% of total leaves showing yellowing or browning.
Why leaf count matters: each green leaf on the garlic plant corresponds to one wrapper layer on the bulb underground. As leaves die back from the bottom up, those corresponding wrapper layers deteriorate. You need enough green leaves remaining to ensure adequate wrapper coverage for the cured, stored bulb. Too many leaves dead means wrappers gone -- cloves start separating, the bulb falls apart, and storage life collapses to weeks instead of months. Too few leaves dead means the bulb is not fully developed.
If you are unsure, do a cut test: dig one bulb, slice it in half vertically, and check whether the cloves fill their skins completely. Plump cloves that fill their wrappers mean you are ready. Small cloves with loose wrappers mean wait another week and test again.
Harvest windows by zone: Zones 2-4: late July to mid-August. Zones 5-6: mid-July to early August. Zone 7: late June to mid-July. Zones 8-9: June to early July. Zone 10: late May to June. Hardneck generally matures 1-2 weeks before softneck. Turban and Asiatic types in warm climates can be ready as early as April-May.
Harvest technique: Never pull garlic straight up by the stem. The stem breaks and the bulb stays in the ground, or the force bruises cloves. Use a garden fork, insert it 4-6 inches away from the plant, and gently lever the bulb out. Choose a dry day -- wet soil clings to bulbs and complicates curing. Shake off loose soil but do not wash. Move harvested bulbs to shade immediately. Garlic must not cure in direct sunlight. Unlike onions, sun exposure causes sunscald and can cook the cloves, ruining both flavor and storage potential.
Keep stems and roots attached until curing is complete. Do not cut anything yet.
Curing and Storage: Where Most of the Shelf Life Is Won or Lost
You harvested the garlic correctly. Now you need to cure it correctly or months of work becomes a moldy pile.
Curing
Curing is controlled drying. It transforms the outer leaf sheaths and neck tissues into the papery skin that protects the bulb in storage. Uncured garlic rots quickly.
Conditions: 70-110F, low humidity (below 75%), continuous good airflow, shade. Duration: 10-14 days in dry climates, up to 4-6 weeks in humid climates. Above 120F, waxy breakdown of cloves occurs -- do not use a hot greenhouse. Above 75% humidity, curing extends and mold risk increases. Stagnant air promotes rot.
Methods: Bunch curing -- tie 5-10 plants at stems and hang from rafters or clothesline (2-3 weeks). Rack curing -- single layer on ventilated hardware cloth or slatted shelves, good airflow from all sides (up to 2 weeks). Net curing -- individual bulbs in mesh bags (3-4 weeks). In humid Gulf Coast and Southeast climates, use fans to ensure adequate air movement and monitor for fermentation smells indicating poor conditions.
How to know it is done: outer skins are dry and papery, neck is constricted and hard, stems are completely dry and brown, roots are shriveled and hard like a brush.
Post-cure processing: cut stems to 1/2 inch or more above the bulb -- stems cut too short increase air penetration and shorten storage life. Trim roots close to base. Remove only the dirtiest outer wrapper layer. More wrappers mean longer storage; do not strip them down trying to get a clean-looking bulb.
Storage
Two authoritative temperature ranges exist and they serve different purposes.
For home kitchen use, Cornell Small Farms recommends 56-58F at 45-50% humidity. This is the eating quality sweet spot.
For maximum duration, UMass Extension recommends 30-32F at 60-70% humidity, achieving 6-7 months at that condition.
The critical warning: Standard refrigerator temperature is 35-40F. This falls directly in the worst possible sprouting zone. Storing whole garlic bulbs in the refrigerator triggers rapid dormancy break and internal sprout development. This is counterintuitive -- cold feels like it should preserve things -- but it is well-documented. The refrigerator is where garlic goes to die. Do not put whole bulbs in there.
The temperature danger zones in detail: 40-50F triggers rapid sprouting (the worst range). 50-65F is intermediate -- garlic eventually sprouts. Above 65F, delayed sprouting but garlic shrivels from moisture loss. 30-32F maintains dormancy for maximum duration.
Store in mesh bags (best airflow for long-term), paper bags, open baskets, or softneck braids. Never sealed plastic or airtight containers.
Storage Life by Family
Silverskin stores longest at 9-12 months. Creole and Artichoke follow at 9-10 months. Porcelain gets 7-9 months. Purple Stripe and Marble Purple Stripe: 6-7 months. Glazed Purple Stripe: 5-7 months. Rocambole and Asiatic: 5-6 months. Turban is the shortest at 3-5 months.
Practical implication: eat your Rocambole and Turban types in fall and early winter. Save your Artichoke and Silverskin types for spring. If you grow both hardneck and softneck together, you can cover the full year with fresh garlic.