Vegetables

Asparagus: Plant It Once, Eat It for 25 Years (If You Don't Make These Mistakes)

James Calloway

James Calloway

Vegetable & Edibles Specialist · Updated April 2026

How to grow asparagus — vintage botanical illustration showing the plant in detail

Asparagus at a Glance

Sun

Sun

Full sun, minimum 6 hours daily, ideally 8-10 hours

Soil pH

Soil pH

6.5-7.0 minimum; 7.0+ preferred

Water

Water

1 inch per week, especially critical during first 2 months after planting

Spacing

Spacing

12-18 inches between crowns"

Days to harvest

Days to Harvest

2-3 years to first light harvest from crown planting

Height

Height

4-6 feet

Soil type

Soil

Well-drained

Lifespan

Lifespan

perennial

Get your personalized growing data

Enter your zip code for frost dates, growing season, and soil type.

You are going to wait three years to eat anything. That is the deal with asparagus. Three years of building a crown, feeding ferns, and keeping your hands off the harvest. In exchange, you get a perennial vegetable bed that will outlast most of your furniture. A well-maintained asparagus bed produces for 15 to 25 years. MSU Extension notes that under ideal conditions, beds have lasted 50 years or more.

Do the math on that. A single established bed yields 3 to 4 pounds of spears per 10-foot row annually, and a well-spaced planting of all-male hybrid crowns can do considerably better. Fresh asparagus at the grocery store runs $3 to $5 per pound when it's in season and higher when it's not. Over 20 years, you are looking at a serious return on a $30 investment in crowns and one afternoon of deep soil preparation.

The problem is that most people approach asparagus like an annual vegetable. They treat it casually, harvest too early, skip the soil pH, plant it in a soggy corner, and wonder why the bed collapses by year four. Asparagus is not casual. It is a perennial with a long memory. Get the establishment right and it rewards you for decades. Get it wrong and it punishes you for just as long.

This guide is built from research synthesized across university extension services at MSU, UMN, Oregon State, Penn State, Clemson, and UC Davis. No guesswork. Here is what actually works.


Quick Answer: Asparagus Growing at a Glance

USDA Zones: 3 through 8 (zones 9-10 are marginal; insufficient winter chill is the limiting factor)

Sun: Full sun, minimum 6 hours daily; 8-10 hours ideal

Soil pH: 6.5-7.0 minimum; MSU Extension targets 7.0+ for Fusarium disease suppression

Drainage: Non-negotiable — crowns die in waterlogged soil; avoid any site where water stands more than one hour after rain

Crown age at planting: 1-year-old crowns only; older crowns suffer transplant shock and may carry disease

Spacing: Crowns 12-18 inches apart within rows; rows 4-6 feet apart

First harvest: Year 2-3 (1-2 weeks only); full 6-8 week season by year 5

Mature yield: 3-4 lbs per 10-foot row annually; up to 3x more from all-male hybrids vs. open-pollinated types

Top varieties: Millennium (zones 3-5), Jersey Knight (zones 3-7), Jersey King (zones 6-9), UC 157 (zones 7-10)

Stop harvesting when: Spear diameter shrinks to pencil size

Fertilize: Post-harvest (June-July) for the bulk of nitrogen; stop all fertilizer and irrigation by August 1

Harvest daily in warm weather: Spears grow up to 2 inches per day at 70°F+


The Decision You're Really Making (It's Not About Vegetables)

Before the trench, the crowns, and the pH test — understand what asparagus actually is. It is not a vegetable plant. It is infrastructure.

You are choosing a permanent location in your garden that will be occupied, exclusively, by asparagus, for the next two to three decades. Ferns will grow 4 to 6 feet tall in summer and shade everything around them. You need to place the bed at the north end of your garden so those ferns don't block light from your other crops (UMN Extension). You need a site with full sun, excellent drainage, and soil you're willing to prepare thoroughly — because you only get one chance at that preparation. You cannot double-dig a bed with established crowns in it.

This is the part most gardening guides gloss over. Asparagus roots reach 10 feet deep (MSU Extension). The crown you plant today will be feeding off the soil profile you prepare this year for the next quarter century. Every shortcut in soil preparation is a shortcut that compounds.

So do it right the first time. This guide will tell you exactly how.


Soil Preparation: The One Shot You Get

pH Is Your Fusarium Defense

Target pH of 6.5 to 7.0 at minimum. MSU Extension pushes harder: 7.0 or slightly higher. There is a specific reason for that recommendation, and it matters more for asparagus than for virtually any other vegetable you'll grow.

Fusarium crown and root rot is the most devastating asparagus disease in existence, and there is no cure. Once Fusarium establishes in your soil, it produces dormant resting spores — chlamydospores — that survive for up to 30 years. UC Davis states it "survives in the soil indefinitely." Soil fumigation does not eliminate it. You cannot spray it away. The only tool you have against Fusarium is prevention, and the most powerful preventive measure available to you is soil pH. Fusarium is suppressed at pH 7.0 and above. This is why MSU targets the high end of the range.

Most eastern and Pacific Northwest soils run naturally acidic — often pH 5.5 to 6.0, right in the Fusarium danger zone. Agricultural lime is the fix, but lime reacts slowly. In naturally acidic regions, MSU recommends starting lime application a full year before planting. Soil test at 12-inch depth (not the standard 4-6 inches — asparagus roots go far deeper than that). Get the pH moving before you ever buy a crown.

Alkaline soil above pH 8.0 can be addressed with elemental sulfur, but this situation is uncommon. Asparagus tolerates alkalinity better than most vegetables.

Drainage: If Water Stands Here, Don't Plant Here

The rule is simple and MSU states it plainly: avoid any area where water stands for more than one hour after rain. Not two hours. Not "drains by morning." One hour.

Waterlogged soil kills asparagus crowns through two mechanisms simultaneously. Physical oxygen deprivation suffocates roots. And wet soil creates perfect conditions for Phytophthora root rot and Fusarium — both thrive in saturated, anaerobic conditions. Once crowns rot from poor drainage, the bed is finished. There is no recovery.

For clay soils, the answer is raised beds or double-digging — not hoping the drainage improves. Clemson Extension recommends double-digging in clay: remove the top 12 inches of soil, break up the subsoil 10-12 inches deeper with a spading fork, incorporate organic matter into that subsoil layer, then return the topsoil with added compost. It's labor-intensive. Do it anyway. A 12 to 18-inch raised bed achieves the same result with less excavation. Sandy soils — Michigan's Oceana County grows 10,000 commercial acres of asparagus on sand — are naturally asparagus-friendly. They warm fast in spring and drain perfectly.

In clay, plant crowns at the shallower end of the depth range (6-8 inches). In sand, go deeper (10-12 inches) for insulation and moisture retention. In loam, 8-10 inches is standard.

Organic Matter and the Pre-Plant Timeline

Asparagus is a heavy feeder with extraordinary storage capacity. Per UMN's Nutrient Management Guide, asparagus roots store approximately 150 lbs of nitrogen, 37 lbs of phosphorus, and 170 lbs of potassium per acre. You're building the bank account. Set it up well.

Incorporate compost at 20% by volume (Clemson) — roughly 2 to 3 inches worked in 10 to 12 inches deep. Place additional compost in the trench bottom before crowns go in. Apply phosphate fertilizer directly into the trench: MSU recommends triple super phosphate (0-46-0), Clemson recommends 5 lbs of 5-10-10 per 100 feet of row. Phosphorus is immobile in soil — it stays where you put it. You must place it where roots will grow, which is in the trench.

Keep high-nitrogen or high-salt fertilizers away from direct crown contact at planting. They burn establishing roots.

Your pre-plant schedule:

  • One year out: Soil test at 12-inch depth. Apply lime if pH is below 6.5. Scout and eliminate perennial weeds — Canada thistle, quackgrass, and field bindweed are nearly impossible to remove from an established bed.
  • Fall before planting: Broadcast and incorporate phosphorus and potassium 8-12 inches deep. Add compost or aged manure deeply — fall application allows winter decomposition. Never use fresh high-ammonium manure (poultry or swine) on crowns.
  • Spring at planting: Final soil prep, dig trenches to appropriate depth, amend trench bottoms with compost and phosphate, place crowns.

One Rule That Cannot Be Broken

Never plant asparagus where asparagus previously grew. Not after 5 years. Not after 10. Fusarium persists indefinitely, and Penn State also documents self-allelopathic toxins from old asparagus roots that suppress new plantings. If you have an old bed that failed, the new bed goes in a completely different location. If no alternative exists, wait a minimum of 5 to 7 years and use only Fusarium-tolerant varieties.


Best Asparagus Varieties by Zone

This is the second most consequential decision you'll make, after soil preparation. Asparagus requires winter dormancy to produce well. Cold recharges the energy reserves in the crown. This requirement shapes everything about variety selection — cold zones need late-emerging varieties that escape frost damage, warm zones need heat-tolerant types with lower chill requirements, and zones 9-10 are genuinely marginal.

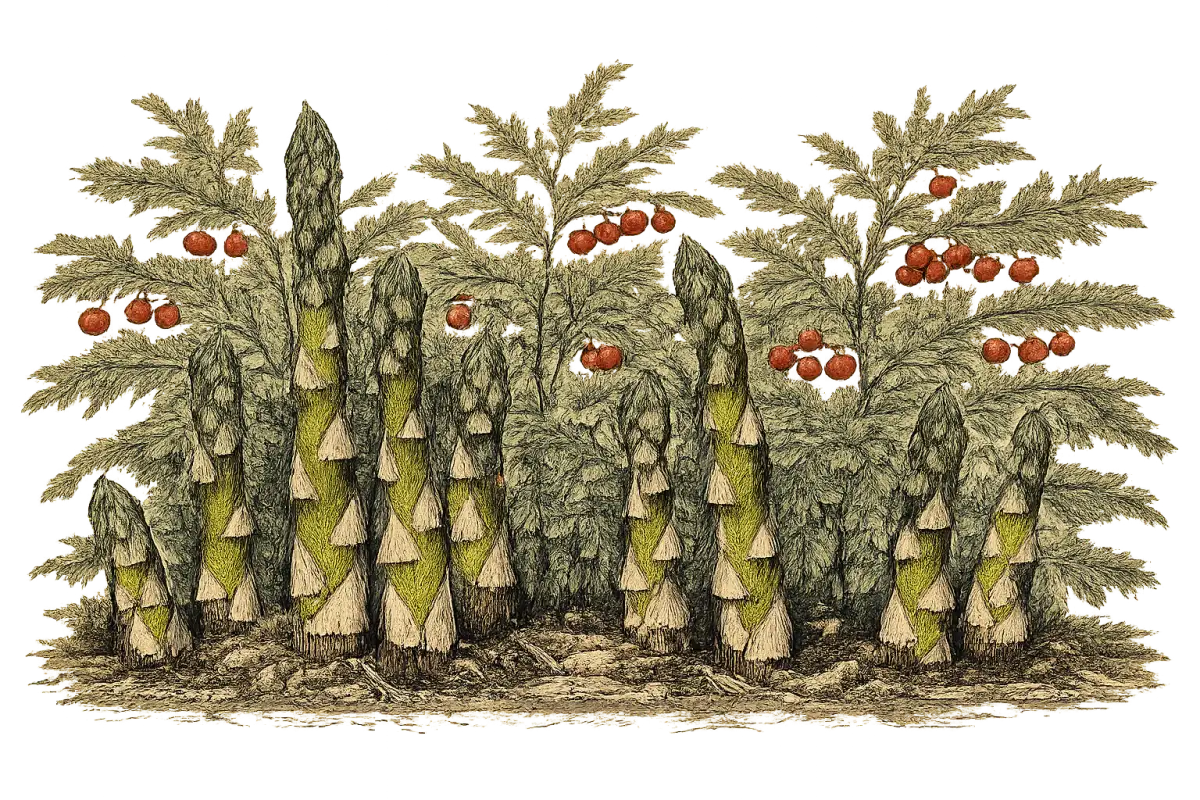
The other factor: plant sex. Asparagus is dioecious — male and female plants are separate individuals. Female plants put energy into berry and seed production. That means 30 to 50% fewer spears. All-male hybrid cultivars produce up to 3 times more spears than open-pollinated types, according to both Clemson Extension and MSU Extension. For any serious planting, all-male hybrids are not optional — they're the obvious choice. The open-pollinated options are discussed below, but the numbers don't lie.

What zone are you in?

Enter your zip code for frost dates, growing season, and soil type.

Cold Zones (3-5): Where Frost Does the Damage

Zones 3 and 4 — northern Minnesota, Wisconsin, Montana, Maine, Vermont — have one primary asparagus problem: late spring frosts ambush emerging spears. The solution is a late-emerging variety that waits until most frost risk has passed.

Millennium is the top pick for these zones, and UMN Extension says so directly. Developed at the University of Guelph in Ontario — people who understand cold — Millennium emerges late enough to dodge the worst spring frost threats. It's vigorous, high-yielding, and tolerant of Fusarium crown and root rot. In zones 3 to 5 with unpredictable spring frosts, this is the variety that delivers consistent results.

Jersey Knight is the best of the Rutgers-developed Jersey hybrid series for cold zones. It has the best overall spear quality of the Jersey line, exceptional resistance to Fusarium crown rot, rust, and Fusarium wilt, and — unusually for asparagus — tolerates clay soils. It emerges later than some varieties, which helps with frost avoidance. Apply 6 or more inches of winter mulch; the Jersey series is vulnerable below -30°F without snow cover.

Viking KB-3 is an open-pollinated cold-hardy backup for zone 3 to 4 growers who want a secondary option or where hybrid supply is constrained.

Purple Passion is available for zones 3 to 7 if novelty is the goal. It produces ultra-sweet purple spears (they turn green when cooked) with about 20% higher sugar content than green varieties. It is not all-male, so expect roughly 50/50 male-female plants and correspondingly lower yields than hybrids. A specialty pick, not a productivity pick.

Plant in late April to early June after last frost when soil reaches 50°F. Harvest season runs early May to late June. Apply 6 or more inches of winter mulch.

Standard Zones (4-5): The Heart of Asparagus Country

Zones 4 and 5 — the upper Midwest, Northeast, Iowa, Michigan, New York, New Hampshire — are where asparagus thrives. Michigan's Oceana County alone grows 10,000 commercial acres of asparagus. This is the climate asparagus was made for.

The full Jersey series performs well here. Jersey Knight is the go-to all-around performer — disease-resistant, consistent, clay-tolerant, and reliably productive. Jersey Giant delivers extra-large 7 to 9-inch spears with intense flavor, and is notably less susceptible to Phytophthora root rot than Jersey Supreme or Millennium (UMN Extension) — relevant in wetter sites. Jersey Supreme is an early-season producer with high yields that adapts to both warm and cold ends of this zone range. Millennium remains an excellent choice, especially in the zone 4 to 5 overlap where spring frost risk persists.

Planting window is late April to mid-May when soil hits 50°F. Harvest season runs late April to mid-June. Apply 4 to 6 inches of winter mulch.

Mid-Range Zones (5-6): Where Selection Opens Up

Zones 5 and 6 — Pennsylvania, Ohio, Indiana, Missouri — can grow essentially any variety successfully. Jersey Knight, Jersey Giant, and Jersey Supreme all perform well. Jersey Gem adds an early-producing option. Mary Washington, the American heirloom that has been grown for over a century, is a reliable backup — it's cold-hardy across zones 3 to 8, produces good-flavored spears with pale purple tips, and is widely available. Its yield is 30 to 50% below modern hybrids, and female plants self-seed into volunteer seedlings throughout the bed. Viable if budget is the constraint; not the smart choice if yield is the goal.

In humid summers, 6-foot row spacing between rows matters for disease prevention. Cercospora blight and asparagus rust both thrive in dense canopies. Air circulation is a disease management tool.

Plant in early to mid-April as soil warms to 50°F. Harvest season is mid-April to mid-June.

Transition Zones (6-7): Wider Choices, Rising Fusarium Pressure

Zones 6 and 7 — Virginia, the North Carolina Piedmont, Tennessee, Arkansas — can grow nearly any variety, but Fusarium crown rot becomes more aggressive as soil temperatures rise. pH management targeting 7.0 or above is especially important here.

Jersey Knight remains reliable across this wide range. Jersey King is the standout for warmer southern climates within this zone — Clemson Extension identifies it as the best Jersey variety for warm conditions. It's vigorous, disease-resistant, and produces large spears. Jersey Giant also adapts well to warmer conditions.

South Carolina Piedmont growers (Clemson Extension) have a planting window of March 1 to April 15. Watch for Cercospora blight in humid summers — wider row spacing reduces risk meaningfully. Harvest season is early April to late May.

Warm Zones (7-8): Heat Changes Everything

Zones 7 and 8 — South Carolina coast, Georgia, Texas, Oklahoma — push asparagus into difficult territory. Heat accelerates spring spear emergence, which sounds good until you realize it creates compressed harvest windows. Fusarium is more aggressive in warm soils. Harvesting must stop earlier due to heat stress. pH management is critical.

Jersey King is the top hybrid pick for warm southern climates. Apollo is early-producing and heat-tolerant — specifically suited to southern zones where the harvest window closes fast. UC 157, developed at UC Davis for California and Mexico growing conditions, thrives here. Atlas provides large, heat-tolerant spears as another option.

Coastal South Carolina (Clemson) plants February 1 to March 15. Harvest season is March to mid-May. Winter mulch is light to optional depending on location.

Warm-Climate Zones (8-10): Know What You're Getting Into

Zones 8 through 10 — Florida, southern California, Arizona — are where asparagus grows poorly, and you should know that before you plant. Insufficient winter chill for proper dormancy leads to lower overall yields, shorter productive lifespan, and greater care requirements. UMN Extension and MSU Extension are clear on the marginal nature of this zone range for asparagus.

Coastal California with cool nights can still produce reasonably well. Interior hot zones — Phoenix, inland Southern California — are the most challenging. Evaluate whether your specific microclimate actually delivers sufficient winter dormancy before committing to a long-term bed.

If you're in this zone and committed to trying: UC 157 is the top choice, bred specifically for these conditions. Apollo and Atlas round out the heat-tolerant options.

Planting window is late winter to early spring. Harvest season runs February to April where the crop grows. No winter mulch needed.

Quick Reference Table: Top Picks by Zone Group

Zone GroupTop 3 VarietiesTypeWhy
3-4Millennium, Jersey Knight, Viking KB-3All-male hybrid / OPLate emergence avoids frost; extreme cold hardiness
4-5Jersey Knight, Jersey Giant, MillenniumAll-male hybridBest asparagus climate in the US; widest selection
5-6Jersey Knight, Jersey Giant, Jersey SupremeAll-male hybridReliable across the full zone range
6-7Jersey Knight, Jersey King, Jersey GiantAll-male hybridFusarium pressure rises; King excels in warmth
7-8Jersey King, Apollo, UC 157All-male hybridHeat tolerance; compressed harvest window
8-10UC 157, Apollo, AtlasAll-male hybridBred for warm climates; zones 9-10 are marginal

A note on availability: The original Jersey series nursery has discontinued production. Supplies of Jersey cultivars have been limited since 2024 and may continue to shrink. Confirm availability with suppliers before finalizing your variety selection.


How to Plant Asparagus: The Trench Method

Crowns, Not Seeds

Home gardeners should plant 1-year-old crowns. Seeds are viable for large-scale operations or specific varieties unavailable as crowns, but they add approximately one year to the harvest timeline. Crowns give you a direct route to spears.

The "1-year-old" specification is not arbitrary. MSU Extension is emphatic: use 1-year-old crowns only. Older crowns suffer more transplant shock, not less, because moving a larger established root system is more disruptive. And older crowns from nurseries carry higher disease risk. Inspect crowns at purchase: they should be plump, wheat-brown in color, with 15 to 20 storage roots (Clemson). Reject any crown with grayish, water-soaked roots — that is a Phytophthora sign. Reject shriveled or dried crowns. Start with healthy material or don't start at all.

Timing by Zone

Plant when soil temperature reaches 50 to 60°F in early spring:

  • Zones 3-4: Late April to early June
  • Zones 4-5: Late April to mid-May
  • Zones 5-6: Early to mid-April
  • Zones 6-7: Mid-March to mid-April
  • Zones 7-8: Late February to March
  • Zones 8-10: Late winter to early spring

The Trench, Step by Step

Step 1 — Dig the trench. Width is 12 to 18 inches. Depth depends on soil type: 6 to 8 inches in heavy clay (shallower prevents waterlogging), 8 to 10 inches in loam, 10 to 12 inches in sandy soil (deeper for insulation and moisture). Row spacing of 4 to 5 feet minimum between rows; MSU specifically recommends 6-foot spacing for improved air circulation and disease control.

Step 2 — Amend the trench bottom. Line the bottom with compost-amended soil. Apply phosphate fertilizer directly into the trench — MSU recommends triple super phosphate (0-46-0); Clemson recommends 5 lbs of 5-10-10 per 100 feet of row. Keep high-nitrogen fertilizers away from direct crown contact.

Step 3 — Place the crowns. Create a small mound or ridge at the trench bottom. Set each crown centered on the mound with roots spread outward and downward — like a spider on a hill. Space crowns 12 to 15 inches apart in home gardens, up to 18 inches for wider commercial spacing.

Step 4 — Cover with only 2 to 3 inches of soil initially. Do not fill the trench. This is counterintuitive and critical. Emerging spears need to reach light without exhausting stored crown energy tunneling through too much soil.

Step 5 — Fill gradually. As spears emerge and grow 2 to 3 inches, add another 2 inches of soil. Repeat each time spears grow through the layer. Continue until the trench is filled to ground level. MSU's method: cover 3 inches initially, add another 3 inches after 6 weeks, complete filling in late fall or early spring. Clemson adds 2 inches every 2 to 3 weeks until 6 to 8 inches deep.

Step 6 — Water immediately and consistently. One inch per week minimum during establishment. The first 2 months after planting are the most critical — Clemson notes that water stress during this window reduces lifetime yields. Moisten to at least 6-inch depth; shallow watering promotes shallow roots.

Step 7 — Mulch between rows. Three to 4 inches of straw or wood chips. Weed competition during establishment severely limits crown development and can permanently reduce the bed's productive life. Mulch now.


The Establishment Period: Three Years of Restraint

Why You Cannot Harvest in Year 1

This needs a direct explanation because it's the rule most gardeners break.

When a spear emerges in spring, it is powered by energy stored in the root crown over the previous season. If that spear is harvested, it is gone — energy spent, nothing returned. If that spear is left alone, it grows into a 4 to 6-foot fern that spends the entire summer photosynthesizing. Those carbohydrates travel downward into the root crown and replenish the reserves that will power next year's spears.

MSU Extension calls the fern "the factory that supplies energy to the crown." Oregon State Extension doesn't soften it: "If you harvest asparagus the first year after planting, you will likely kill your plants, since they won't be able to retain enough food reserves to sustain themselves."

Year 1: no harvest. Every spear becomes a fern. Full stop.

The Progressive Harvest Schedule

Year After PlantingHarvest DurationNotes
Year 1No harvestAll spears must grow into fern
Year 21-2 weeksVery light; some sources say still no harvest
Year 32-4 weeksLight harvest only if ferns were vigorous in years 1-2
Year 44-5 weeksModerate harvest
Year 5+6-8 weeksFull production season

MSU Extension is the most conservative: no harvest years 1 to 2, light harvest (8 to 12 pickings) in year 3, 4 weeks in year 4, full 6 to 7-week season from year 5. Some growers use the "1-2-4-8 rule" — 1 week in year 2, 2 weeks in year 3, 4 weeks in year 4, 8 weeks from year 5. Either framework works. What doesn't work is harvesting longer than the schedule calls for because the spears look good.

The variance across extension services reflects actual crown condition. If fern development in years 1 and 2 was vigorous, you have more buffer. If fern growth was weak — due to poor soil, weed pressure, or water stress — be even more conservative.

What zone are you in?

Enter your zip code for frost dates, growing season, and soil type.


Watering and Feeding: What the Numbers Actually Say

Watering: Less Than You Think (After Year 2)

During establishment, asparagus needs 1 inch of water per week. Water to at least 6-inch depth. Sandy soils need more frequent irrigation than loam or clay. Don't skip this during the first two months — Clemson's research links water stress in early establishment to permanently reduced lifetime yields.

After establishment, the story changes completely. Asparagus roots reach 10 feet deep. MSU Extension states that irrigation is "completely unnecessary" in Michigan and the eastern US once the bed is established. Most Minnesota growers only irrigate in year 1 (UMN Nutrient Guide). In arid western regions, irrigation remains necessary — but the distinction is climate, not plant biology.

When irrigation is used on established beds: infrequent, deep soaking is better than frequent shallow watering. Deep watering supports the deep root development that makes asparagus drought-tolerant. UMN's guideline for fern growth periods is 0.10 to 0.20 inches of soil water per day, maintaining 50 to 60% of water-holding capacity.

Method matters for disease. Overhead irrigation wets fern foliage and promotes asparagus rust, Cercospora blight, and purple spot. Drip or furrow irrigation is the preferred method — Clemson specifically recommends drip to reduce Phytophthora risk. If overhead irrigation is unavoidable, irrigate mid-morning so foliage dries before evening.

Stop all irrigation after August 1 (MSU Extension). Same rule as fertilizer. The plant needs to slow down and enter dormancy on its own schedule.

Fertilizing: The Post-Harvest Application Is the Important One

Asparagus is a heavy feeder. Its root system stores enormous nutrient reserves, and those reserves must be replaced annually. The fertilization timeline is different from what most gardeners expect — and getting the timing wrong is a meaningful mistake.

The most important nitrogen application of the year happens after harvest ends, not before it. Apply the bulk of nitrogen as a topdress in June or July, after the final harvest. UMN's Nutrient Guide notes an added benefit: delaying fertilization until post-harvest reduces early weed growth — early fertilization stimulates weeds before asparagus ferns shade the bed.

For home gardens: UMN recommends 1 to 1.5 lbs of 10-10-10 per 100 square feet; Clemson recommends 5 lbs of 5-10-10 per 100 feet of row pre-plant, then the same rate annually. Clemson's post-harvest recommendation is 1.5 lbs of calcium nitrate (15.5-0-0) per 100 feet of row.

Nitrogen form matters. MSU Extension recommends preferring nitrate-form nitrogen over ammonium forms. Nitrate-type fertilizers — calcium nitrate, sodium nitrate — may reduce Fusarium pressure. Ammonium forms may worsen the pathogen environment. For home gardeners using standard balanced fertilizers, this is secondary to getting the timing and rates right. But if you're in a Fusarium-prone area or working in warm soil, choose nitrate forms when available.

For sandy soils specifically: apply 20 to 25 lbs of nitrogen per acre (or the home-scale equivalent) in spring before spear emergence. Sandy soils don't hold nitrogen through winter, so a small spring application supports spear development even in established beds (UMN).

On phosphorus: it's immobile in soil and must be placed where roots will grow. Front-load phosphorus at planting in the trench. For established beds, soil test every 3 years — if phosphorus tests above 31 ppm, skip phosphorus applications entirely. On potassium: asparagus stores more potassium than nitrogen in its root system. Maintain adequate levels based on soil tests.

The hard stop: August 1. Stop all fertilizer and irrigation after August 1 (MSU Extension). Late-season nitrogen promotes soft fern growth that hasn't hardened off before frost and exhausts crown reserves trying to sustain late growth. This is one of the most counterintuitive rules in asparagus management. Follow it anyway.

What Never to Use

Never apply "Weed and Feed" products to an asparagus bed. The herbicide component damages or kills asparagus (UMN Extension). Never use fresh high-ammonium manure (poultry, swine) directly on crowns — it burns roots. Never fertilize after August 1. Never skip the post-harvest nitrogen application — consistently missing it leads to gradual crown decline that compounds over years.


Harvesting: Read the Spear, Not the Calendar

When to Pick

Harvest spears at 6 to 10 inches tall with closed, tight, firm tips. UMN specifies 6 to 8 inches; MSU says 8 to 10 inches; Penn State says minimum 7 inches with at least 5/16-inch diameter. The tips are the real indicator. Once they start opening and feathery needles emerge, the spear has passed its prime. It's still edible but tougher, and loose tips tell you your harvest frequency is too low.

Spears grow up to 2 inches per day at 70°F and above (UMN Extension, Penn State). That is not a typo. A spear at 4 inches in the morning can be at 8 inches by afternoon and fully ferned out the following morning. In warm weather, harvest daily. In cool weather (50 to 60°F), every 2 to 4 days is sufficient. An established bed in full production accumulates approximately 22 to 24 individual harvest events over a 6 to 7-week season (MSU Extension).

Harvest every spear, including thin "whips." Leaving thin spears doesn't benefit the crown. They grow into thin, weak ferns that provide less photosynthetic return than robust ferns from vigorous buds. They waste energy without proportionate benefit (MSU Extension).

Snap or Cut

Snapping — bending the spear near the base until it breaks — works as well as cutting and eliminates the need to trim woody portions. The spear breaks naturally where tender tissue transitions to fibrous tissue, usually 1 to 4 inches above the soil. MSU endorses snapping. It's faster, simpler, and eliminates the risk of accidentally cutting buried neighboring spears with a blade. For home gardeners, snapping is the right method.

Cutting at or just below the soil surface gives slightly longer shelf life because the fibrous base protects the harvested spear from dehydration. Relevant for commercial growers and for anyone storing spears for several days before eating. Either method, done correctly, affects the mother plant identically.

When to Stop

Two signals tell you to stop harvesting:

Spear diameter shrinks to pencil size. This is Clemson Extension's universal indicator. Thin spears mean the crown is exhausting its reserves and sending up progressively weaker growth. When diameter consistently drops below roughly 3/8 inch, stop immediately.

Yield drops to 70% of the season's peak. UC Davis's benchmark for stopping harvest. Production declining below this threshold means the crown is depleted.

Zone-specific stop dates matter independently of spear condition. Minnesota gardeners (zones 3 to 4) stop by July 1 regardless of what the spears look like — the crown must have sufficient fern development time before the northern growing season closes (UMN Extension). MSU recommends a 6 to 7-week maximum harvest, ensuring 4 or more months of fern growth before frost.

After the final harvest, allow every subsequent spear to grow into fern. Not most of them. All of them.

Harvest Season by Zone

ZoneApproximate Harvest Season
Zones 3-4Early May to late June
Zones 4-5Late April to mid-June
Zones 5-6Mid-April to mid-June
Zones 6-7Early April to late May
Zones 7-8March to mid-May
Zones 8-9February to April

Storing What You Harvest

Fresh asparagus degrades fast. Refrigerate immediately after harvest. Wrap cut ends in a damp paper towel and place in a plastic bag, or stand spears upright in an inch of cold water covered with a plastic bag. Penn State recommends 32 to 36°F at 90 to 95% relative humidity for maximum shelf life of 7 to 14 days. Snapped spears lose moisture faster from the exposed tender end — use within 5 to 7 days.

For freezing: wash, sort by thickness, blanch 2 to 3 minutes in boiling water (longer for thicker spears), immediately transfer to an ice bath, drain thoroughly, freeze in a single layer on a baking sheet, then transfer to freezer bags. Quality holds for 8 to 12 months.

Asparagus is a low-acid vegetable. If you're canning, pressure canning is required — not water-bath canning. Freezing preserves quality better than canning and is generally the preferred method (UMN Extension).


The Annual Care Cycle (What to Do and When)

This is the rhythm of an established asparagus bed. Get comfortable with it — you'll be doing it for decades.

Early spring: Push mulch back from the crown area before spears emerge. Soil needs to warm to 50°F for emergence. Weed the bed before first shoots appear — this is the easiest weed control window of the year. Shallow cultivation only (under 2 inches deep) before emergence; asparagus crowns are shallow and easily damaged by aggressive tillage.

Harvest season: Harvest daily in warm weather. Every 2 to 4 days in cool weather. Stop when spears hit pencil diameter or the season's zone-specific stop date.

Post-harvest (June-July): Let every remaining spear grow into fern. Apply the main nitrogen fertilization as a topdress. Weed — the last good window before the fern canopy closes. Apply 2 to 3 inches of compost as an annual top-dressing.

August 1: Stop fertilizer. Stop irrigation. Hard stop. Let the ferns do their work and slow naturally.

After the first hard frost: Allow ferns to turn fully yellow and brown before cutting. Cutting green ferns robs the crown of the stored energy it hasn't finished translocating. Once ferns are dead, cut to 2 to 3-inch stubs. Remove all debris from the bed. Burn it or dispose of it away from the garden — do not compost if disease was present. Fall removal is strongly preferred over spring removal by both UMN and MSU: asparagus beetle adults overwinter in dead fern debris, asparagus aphid overwinters as eggs on fern stems, and Fusarium and Cercospora spores overwinter in fern tissue. Fall removal disrupts all of them simultaneously.

Late fall: Apply 4 to 6 inches of winter mulch — straw, chopped leaves, wood chips, or compost. In zones 3 to 4, use 6 or more inches. Cease watering.


The Top Mistakes That Kill Asparagus Beds

Mistake 1: Harvesting in Year 1

Oregon State Extension says it can kill the plant. This is not an exaggeration. The crown has no fern photosynthesis to replenish the reserves spent pushing up spears. Strip those spears in year 1 and the crown starves. The entire productive life of the bed is decided in years 1 through 3.

Mistake 2: Overharvesting Beyond the Season

Continuing harvest after the crown is depleted causes a multi-year decline spiral — progressively thinner spears, shorter harvest windows, eventual bed failure. The signal is spear diameter. Pencil-sized spears mean the crown is spent. Stop. Let it fern.

Mistake 3: Cutting Green Ferns

The fern is the energy factory. It photosynthesize all summer and translocates carbohydrates down to the crown. MSU Extension is explicit: stop fertilizer and irrigation after August 1, do not cut ferns early. Cut to 2 to 3-inch stubs only after ferns have turned completely yellow and brown following the first hard frost. Cutting green ferns — for any reason, including tidiness — directly reduces next year's spear production.

Mistake 4: Planting in Poor Drainage

Crown rot from waterlogged soil can wipe out an entire bed within one or two wet seasons. Once crowns rot, the bed is abandoned. Test the site after heavy rain — if water stands for more than one hour, choose a different location or build raised beds.

Mistake 5: Ignoring pH

Low pH puts the bed squarely in Fusarium's preferred range. Fusarium has no cure. It survives in soil for up to 30 years. Prevention through pH management — targeting 6.5 to 7.0 minimum, 7.0 or above per MSU — is the only meaningful defense. Test the soil before planting, not after problems appear.

Mistake 6: Planting Where Asparagus Grew Before

Fusarium spores persist indefinitely. Self-allelopathic toxins from old roots suppress new plantings (Penn State). Soil fumigation does not eliminate long-term Fusarium populations. Always choose a new site.

Mistake 7: Buying 2-Year-Old Crowns

MSU Extension is emphatic: use 1-year-old crowns only. Older crowns suffer more transplant shock, not less. And older nursery crowns carry higher disease risk. The intuition that bigger crowns give a head start is wrong — they often perform worse than 1-year-old crowns because the transplant disruption is more severe.

Mistake 8: Neglecting Weed Control During Establishment

Young asparagus competes poorly with weeds. Perennial weeds — Canada thistle, quackgrass, field bindweed — established in an asparagus bed are essentially unrecoverable without destroying the planting. Address perennial weeds completely before planting. During establishment, hand-pull carefully with shallow cultivation only (under 2 inches deep). Mulch between rows.

Mistake 9: Salting the Bed

This is old folk practice based on the idea that asparagus tolerates salt better than weeds. MSU Extension debunks it: studies found that 1,000 or more pounds of salt per acre were required for minimal weed control — amounts that damage soil structure and can injure the asparagus itself. No modern extension service recommends salt. Mulch and hand-pulling are the actual answer.

Mistake 10: Fertilizing After August 1

Late-season nitrogen promotes soft, succulent growth that doesn't harden off before frost. The crown exhausts reserves trying to sustain growth it can't complete. Increased disease susceptibility follows. The August 1 cutoff (MSU Extension) exists for good reason. Follow it.

What zone are you in?

Enter your zip code for frost dates, growing season, and soil type.


Pests and Diseases: What to Actually Worry About

The Common Asparagus Beetle

This is the primary pest wherever asparagus grows in the US. Adults are about 1/4 inch long with black and red wing covers and six whitish square spots — distinctive enough to identify on sight. They overwinter in dead fern debris and emerge in spring exactly when asparagus spears do.

Eggs are dark, oval-shaped, and glued at 90-degree angles to spear surfaces. Larval feeding causes "shepherd's crook" — spears curve into a hook shape. The most economically damaging effect is larval feeding on new ferns, causing defoliation that reduces the crown's energy reserves and directly reduces next year's harvest.

UMN Extension's action thresholds: treat when 10% of plants have adult beetles, 50 to 75% of plants have larvae, or 2% of spears have eggs. In small gardens, hand-picking into soapy water is effective. Lady beetles, lacewings, and the parasitic wasp Tetrastichus asparagi provide meaningful natural suppression in most years. Chemical options during harvest include carbaryl (1-day pre-harvest interval) applied in afternoon, when beetle activity peaks between 12 PM and 6 PM on sunny days. On ferns after harvest, dimethoate, spinosad, and neem oil are options.

Fall fern removal is the single most effective cultural control — it eliminates overwintering adults.

Asparagus Aphid

Small and easy to dismiss, but the most dangerous pest to establishing plantings. The asparagus aphid injects a toxin while feeding on ferns that translocates down to dormant underground buds. Severe infestations cause "witch's broom" — dwarfed, bushy, silver-colored plants — and can kill young plants entirely. Established beds are more tolerant; establishing plants in years 1 to 2 are highly vulnerable.

UMN Extension's action threshold is very low — only a few aphids per plant can cause substantial damage. Lady beetles and the parasitic wasp Diaeretiella rapae control aphids in most years. When chemical control is needed, dimethoate and Fulfill are most effective in Michigan (MSU study). Fall fern removal also eliminates overwintering eggs.

Fusarium Crown and Root Rot

This is not a pest management problem. It is a prevention problem. There is no cure. The three Fusarium species that cause crown and root rot produce dormant resting spores that survive in soil for up to 30 years. Soil fumigation doesn't eliminate them. Chemical treatments for established infections don't exist.

Prevention: start with healthy 1-year-old crowns, maintain pH at 6.5 to 7.0 minimum (7.0+ per MSU), build and maintain high soil organic matter, never exceed the harvest window, minimize plant stress, never replant in old asparagus ground, and choose tolerant varieties — Jersey Knight, Jersey Giant, Jersey Supreme, Millennium, UC 157, and Apollo all carry meaningful Fusarium tolerance.

Symptoms on mature plants: one to several stunted, bright yellow ferns during summer; reddish-brown discoloration at stalk bases extending into the crown; what MSU describes as "brick-red rot working from the crown exterior inward." Once you see this pattern, the affected plants cannot be saved. If Fusarium takes a bed, do not renovate — start a new bed in a completely different location.

Phytophthora Root Rot

A water mold, not a true fungus. Requires wet soil to spread. First signs are reduced yields and fern development, then shepherd's crook spears, then crown death. Field pattern is distinct patches of affected plants in low-lying or poorly drained areas.

Prevention is everything here. No effective chemical cure exists. Select a well-drained site, use drip rather than overhead irrigation, inspect crowns at planting and reject any with grayish water-soaked roots. Jersey Giant is notably less susceptible than Jersey Supreme or Millennium in wet, heavy-soil sites (UMN Extension).


The Bottom Line

Asparagus asks for patience in exchange for longevity. Three years of restraint — no meaningful harvest, just feeding ferns and building the crown — and you have a productive perennial bed that outlasts most garden projects you'll ever attempt.

The non-negotiables are genuinely non-negotiable. Drainage or the bed dies. pH management or Fusarium wins. No harvest in year one or the crown starves. These aren't suggestions from overly cautious extension services — they're the distilled lessons of what actually kills asparagus beds, repeated across decades of research at MSU, UMN, Clemson, Penn State, Oregon State, and UC Davis.

Get those right, choose a variety matched to your zone, and stop fertilizing and irrigating after August 1. The rest is maintenance.

The payoff: 3 to 4 pounds of spears per 10-foot row every spring, for 15 to 25 years, from a planting that requires one afternoon of serious soil preparation and an annual cycle of unremarkable routine care. Fresh asparagus harvested at the right size tastes categorically different from what you buy at the grocery store. It should — yours wasn't picked for shipping durability. It was picked because it was ready.

Plant it right. Wait it out. The bed will outlast your impatience.

Research synthesized from university extension services including Michigan State University Extension, University of Minnesota Extension, Oregon State Extension, Penn State Extension, Clemson Extension, UC Davis / UC IPM, and University of Guelph. Variety recommendations reflect published cultivar trial data and zone-specific field performance guidance.

Where Asparagus Grows Best

Asparagus thrives in USDA Zones 4, 5, 6, 7. Explore each zone's complete guide for growing tips, companion plants, and seasonal advice.

Also possible in: Zone 3, Zone 8 (challenging but possible with the right conditions).

Not sure of your zone? Look it up by zip code →