Vegetables

Sweet Corn Is Harder Than It Looks — And That's Exactly Why It's Worth Growing

James Calloway

James Calloway

Vegetable & Edibles Specialist · Updated April 2026

How to grow sweet corn — vintage botanical illustration showing the plant in detail

Sweet Corn at a Glance

Sun

Sun

8+ hours full sun

Soil pH

Soil pH

6.0-6.8

Water

Water

1-1

Spacing

Spacing

8-12 inches within rows, 30-36 inches between rows"

Days to harvest

Days to Harvest

58-95 days

Height

Height

5-7 feet

Soil type

Soil

Well-drained loam or sandy loam

Lifespan

Lifespan

annual

Get your personalized growing data

Enter your zip code for frost dates, growing season, and soil type.

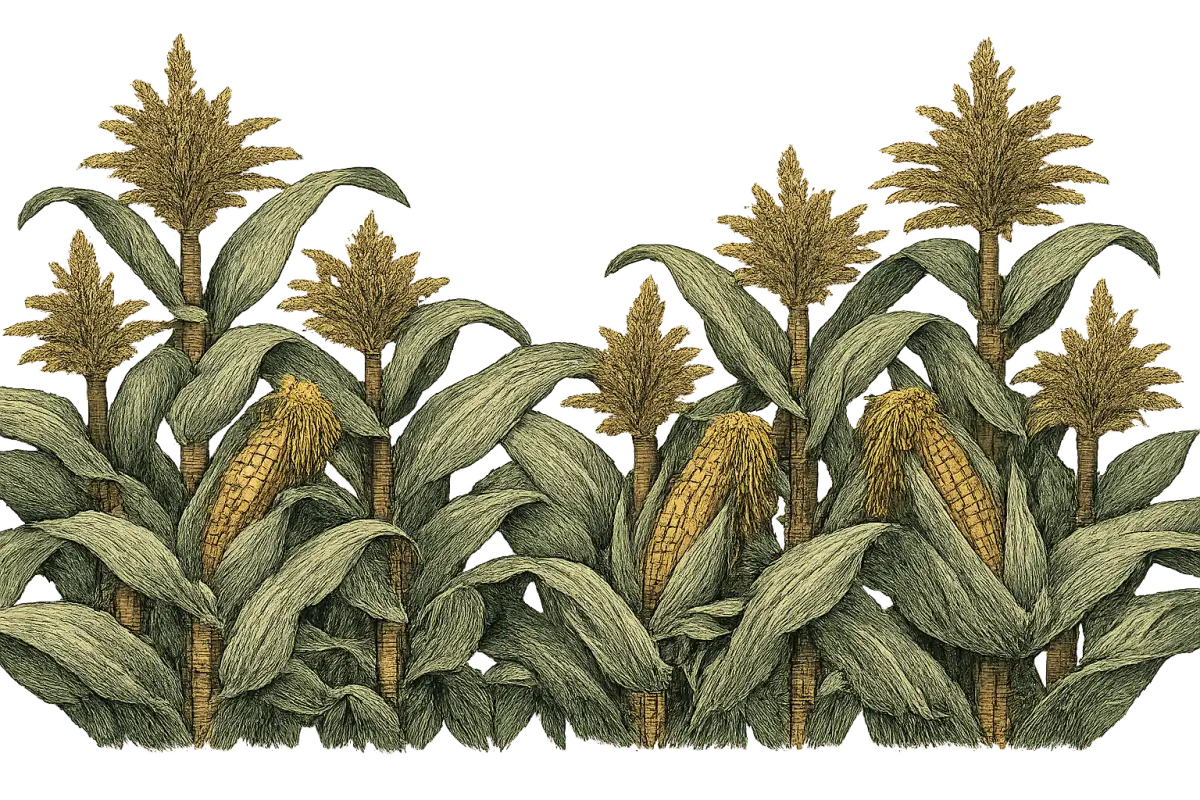
Let me tell you what grocery store corn actually is. It was picked 2-5 days ago, loaded onto a refrigerated truck, shipped across the country, stacked under fluorescent lights, and then purchased by someone who microwaved it for dinner. By the time it hits your plate, the sugar is mostly gone. You are eating starch in a husk.

Garden corn is a different food entirely. The old maxim -- don't pick the corn until the water is boiling -- exists because the sugar-to-starch conversion in a standard variety starts within hours of harvest. Pick an ear at 7 AM, sit down to eat it at 7:15, and you will understand immediately why people plant 40-plant blocks in backyard gardens. That flavor is not available in any store.

But here is the honest version: sweet corn is not the forgiving crop that tomatoes are. It has specific requirements that trip up even experienced gardeners. Wind pollination means planting layout is non-negotiable. Genetic type determines whether your seeds rot in the ground or germinate cleanly. One night without your electric fence means raccoons eat your entire harvest. And there is a harvest window -- sometimes only a few days wide -- that you either hit or miss.

Get those details right and you will grow the best corn you have ever eaten. Get them wrong and you will grow a lot of tall green stalks that produce nothing worth eating. This guide is about getting them right.


Quick Answer: Sweet Corn Growing at a Glance

USDA Zones: 3 through 10 (with the right variety and timing)

Sun: 8 hours of direct sunlight minimum -- corn is a C4 plant and rewards every hour of light

Soil pH: 6.0-6.8

Soil Temperature at Planting: 55F for su and se types; 60-65F minimum for sh2 supersweet

Planting Depth: 1 to 1.5 inches

Spacing: 8-12 inches within rows; 2.5-3 feet between rows

Block Minimum: 4 rows by 4 plants (16 plants) -- single rows fail

Water: 1-1.5 inches per week; 1.5-2 inches during silking

Nitrogen: Approximately 1 pound actual nitrogen per 1,000 square feet, split across three applications

Harvest Trigger: Milky white juice when a kernel is punctured, 18-21 days after silks appear

Harvest Window: 3-5 days at peak per ear; entire planting ripe for 7-10 days

Main Threats: Raccoons, corn earworm, poor pollination from bad layout, cold soil with sh2 varieties


The Pollination Problem (Why Corn Is Different From Everything Else)

Every other vegetable you grow relies on insects for pollination. Sweet corn does not. Corn is wind-pollinated -- bees are irrelevant. Each silk on an ear connects to one potential kernel. There can be 600-1,000 silks on a single ear, and each one must catch a windblown pollen grain for that kernel to develop. A missed silk means a missing kernel.

That mechanism explains the single most important rule in corn growing: plant in blocks, never in single rows.

Think about what happens in a single long row. Pollen falls from the tassel above, gets picked up by the wind, and blows perpendicular to the row. It lands in the garden path, or the lawn, or the neighboring flower bed. The plants in that row are pollinating everything except each other. The result is ears with missing kernels, gaps in the rows, kernels on only one side, or completely blank ears that look fully developed from the outside.

Iowa State University Extension calls this the most common sweet corn mistake home gardeners make. After reviewing what actually happens when people plant single rows, that assessment is hard to argue with.

A block planting -- at least 4 rows by 4 plants deep -- solves the problem. In a block shape, pollen drifts in any direction and hits surrounding plants. The 4x4 minimum (16 plants in roughly 50 square feet) is a real minimum. A 4x10 block of 40 plants will give you reliably full ears and a meaningful harvest. Four rows of 2 plants is not a block -- it is a suggestion.

If you genuinely cannot fit 16 plants, hand-pollination is your backup. In the morning, when tassels are actively shedding pollen, shake them over a paper bag to collect what you can. Dust the collected pollen onto silks with a small brush. Do this on calm, dry mornings during the pollination window. It works. It is more effort than anyone wants to spend in their garden, which is a good argument for finding 50 square feet.


Understanding the Five Genetic Types (Before You Buy a Single Seed)

Most vegetable crops have varieties that differ in flavor, color, and days to maturity. Sweet corn has all of that -- plus five distinct genetic types that differ in fundamental ways. Buy the wrong type for your situation and you will either have seeds that rot in cold soil or corn that tastes starchy despite every other thing going right.

Standard Sugary (su) is what your grandparents grew. Traditional sweet corn flavor, moderate sugar, easy germination in cool soil starting at 55F. The downside: sugar converts to starch fast. Within 1-2 hours of picking, the quality of a su variety is already declining. The "boiling water" rule was written about su corn. If you love old-school corn flavor and can cook immediately after picking, su varieties are honest, reliable, and easy to grow. Silver Queen (92 days), Golden Bantam (78 days), and Jubilee (84 days) are the workhorses of this type.

Sugar Enhanced (se) is the best all-around choice for most home gardeners. Higher sugar than su with tender, creamy kernels. Sugar-to-starch conversion is slower -- you have 6-8 hours instead of 1-2. Germinates well at 55-60F. The flavor and texture are genuinely better than su, and the practical flexibility is better too. Bodacious (75 days), Incredible (83 days), and Ambrosia (75 days, bicolor) are the top se varieties and represent the middle ground where most gardeners should start.

Supersweet (sh2) is where the marketing gets loud and the requirements get strict. These varieties carry 2-3 times more sugar than su types and can be refrigerated for 5-7 days without losing their sweetness -- an enormous practical advantage. The trade-offs: sh2 kernels are less tender and more crunchy than se, germination requires 60-65F soil (seeds rot in cold, wet soil), and sh2 must be isolated from all other corn types or cross-pollination will ruin every ear. Illini Xtra Sweet (85 days), Early Xtra Sweet (71 days), and How Sweet It Is (87 days) are the leading varieties. If you want to grow sh2, commit to it fully and grow nothing else in your garden.

Synergistic (syn) types split the difference in a clever way: each ear contains approximately 75% se kernels and 25% sh2 kernels. You get the tenderness of se with meaningful sweetness from sh2, and germination is more forgiving than pure sh2. Serendipity (82 days) and Montauk (73 days) have gained real followings among gardeners who want a single high-quality variety without the strict management of sh2. Isolation requirements still apply between syn and sh2.

Augmented Supersweet (shA/aug) is the newest category, stacking the se gene on top of sh2 for tender and extra sweet kernels with slow starch conversion. The technology is sound; the variety selection is still catching up.

Isolation: The Rule Nobody Follows Until They Ruin a Harvest

If you plant sh2 within 250 feet of any other corn -- su, se, field corn, popcorn, your neighbor's ornamental corn -- and their bloom times overlap, the resulting kernels will be starchy and tough. Wind carries corn pollen over 250 feet easily. The isolation requirement is not a suggestion.

Your options: 250 feet of distance (rarely practical in a home garden), or a 2-week difference in maturity dates between types so bloom times do not overlap. The simplest path in a small garden is to grow one type only. If you want sh2, grow only sh2. If you want to mix types, choose varieties whose maturity dates differ by at least 2 weeks and plant them on a schedule that ensures their silking periods do not coincide.

What zone are you in?

Enter your zip code for frost dates, growing season, and soil type.


Best Sweet Corn Varieties by Zone

Choosing the right variety for your zone is mostly about days to maturity matching your frost-free window, and genetic type matching your soil temperature reality. Here is what works where.

Short-Season Zones (3-5): Maturity Dates Are Non-Negotiable

The challenge in zones 3-4 is simple arithmetic. With 90-120 frost-free days, you need corn that matures in 60-80 days. A 92-day variety planted in early June does not have time to produce in a zone 3 garden. Layer on top of that the soil temperature problem: supersweet sh2 types want 65F soil, and in zone 3 you may not hit that until mid-June with any reliability. If you plant sh2 on the optimistic end of that window and the soil stays cold and wet, your seeds rot.

The practical answer for zones 3-4 is su and se varieties with short maturities.

Earlivee at 58 days is the fastest reliable variety we know of for the shortest seasons. It is not the most sophisticated corn, but it produces where nothing else has time to. Early Sunglow at 63 days is another short-season su with cold-tolerant germination and compact stalks that handle the wind exposure common in northern gardens. For flavor, Sugar Buns at 72 days brings se tenderness to a maturity date that fits zone 4 -- pair it with Bodacious at 75 days for a modest succession. Golden Bantam at 78 days is the classic heirloom of this region, still worth growing for anyone who prefers old-school flavor and has a full zone 4 window.

Zone 5 opens up considerably. The full se lineup fits, and late su varieties like Silver Queen (92 days) become viable with a well-timed planting. Incredible at 83 days delivers large ears and high yield. Ambrosia at 75 days is the bicolor of choice -- sweet, tender, and one of the better-looking ears in the garden. Montauk at 73 days brings synergistic genetics into a maturity date that fits zone 5.

Zone 3-5 strategy: plant two varieties of different maturities at the same time rather than staggering by date. A 62-day variety alongside a 75-day variety planted together gives you a built-in succession without risking a second sowing getting caught by fall frost.

Standard Zones (6-8): The Full Menu Is Available

Zone 6 is where corn growing gets genuinely easy. Soil hits 60F reliably in early May, the frost-free window runs 150-180 days, and every genetic type is viable. The main decisions are about flavor preference, storage needs, and whether you want to manage sh2 isolation.

For most zone 6 gardeners, an se-based planting is the right starting point. Bodacious and Incredible are the two most proven performers. Add Ambrosia for bicolor coverage and Serendipity for synergistic sweetness. If storage flexibility matters -- you want to share ears with family, bring them to a gathering, or simply not cook within an hour of picking -- Illini Xtra Sweet at 85 days is the sh2 workhorse. Silver Queen at 92 days rewards patience: it is a late-season white corn with outstanding flavor that has held its place in seed catalogs for decades because it keeps earning it.

Zone 7-8 has the season to run all of this plus early-harvest sh2 varieties. Early Xtra Sweet at 71 days lets you open the season before July heat peaks. How Sweet It Is at 87 days is an All-America Selections winner -- a white sh2 with proven heat performance. Montauk at 73 days handles the heat well as a synergistic type. The zone 8 caution: temperatures above 95F reduce pollen viability. Plant earlier (April in zone 8) so that silking occurs before peak summer heat, not during it. When temperatures are extreme, pollen desiccates in the air before it reaches silks -- a problem no amount of irrigation fixes.

Hot-Climate Zones (9-10): Timing Is Everything

The approach in zones 9-10 inverts the logic of colder zones. The concern is not whether the season is long enough -- it obviously is -- but whether you can complete pollination before summer heat makes it impossible. Pollen dies above 95F. In zone 9, that window closes in June or July. Your job is to plant early enough to silk in May or early June, well before peak heat.

Plant as soon as soil reaches 60F in late February or March. Target varieties with 70-85 day maturities so that silking occurs in May. Ambrosia at 75 days, Bodacious at 75 days, and Early Xtra Sweet at 71 days are fast enough to fit this window. Silver Queen at 92 days is pushing it in zone 9 but can work with a February planting in warmer areas. Incredible at 83 days handles warm conditions when irrigated properly.

A fall planting starting in August can produce excellent late-season ears in zones 9-10 as temperatures cool below the pollen-killing threshold. This is underused and worth trying.

Irrigation in zones 9-10 is not supplemental -- it is the crop. Water demand during silking can hit 2 inches per week, and silk desiccation from heat and drought can destroy pollination faster than any pest.

Quick Reference: Top Picks by Zone Group

Zone GroupTop 3 VarietiesTypeWhy
3-4Earlivee, Early Sunglow, Sugar Bunssu / seShort maturity; cold-soil germination
5Bodacious, Incredible, AmbrosiaseBest flavor-to-ease ratio; fits window
6-7Incredible, Illini Xtra Sweet, Silver Queense / sh2 / suFull-season variety flexibility
7-8How Sweet It Is, Montauk, Early Xtra Sweetsh2 / synHeat-adapted; season coverage
9-10Bodacious, Ambrosia, Early Xtra Sweetse / sh2Fast enough for spring heat window

Soil Temperature and Prep (Where Most Planting Mistakes Happen)

Sweet corn wants soil in the 6.0-6.8 pH range. That is a forgiving target -- most garden soil is somewhere close, unlike the aggressive acidification that blueberries require. Test anyway. At below 5.5, you risk aluminum toxicity and nutrient lockout. Apply agricultural lime 2-3 months before planting if you need to raise pH, and get a soil test from your county extension office rather than guessing at rates -- the recommendation varies by soil type.

The more critical number is soil temperature. Use a thermometer at 2-inch depth. Do not rely on air temperature or calendar dates. Clay soils lag behind air temperature by weeks; sandy soils warm faster. The variation between a south-facing slope and a low-lying area in the same backyard can be significant.

Standard (su) and sugar enhanced (se) types germinate at 55F, though 60-65F produces cleaner, faster stands. Supersweet (sh2) is where the temperature requirement becomes a hard line: minimum 60F, preferred 65F or warmer. The sh2 kernel has a shrunken endosperm with very little starch reserve compared to su or se. In cold, wet soil, sh2 seeds absorb water too slowly to germinate and rot before they emerge. Fungicide-treated sh2 seed reduces this risk in marginal conditions, but the better answer is to simply wait for warm soil.

If you are impatient -- and every corn grower is impatient by late May -- use black plastic mulch. Laid over the planting area 2-3 weeks before target planting date, it raises soil temperature 5-10F. That alone can move your safe sh2 planting date a week or more earlier. Raised beds warm faster than in-ground plantings for the same reason. South-facing slopes are worth using if you have them.

Feeding Corn Like the Grass It Is

Sweet corn is a member of the grass family. Grasses eat nitrogen. More nitrogen than you think. More than any other common garden vegetable. The target is approximately 1 pound of actual nitrogen per 1,000 square feet over the growing season, split into three applications.

Apply a balanced fertilizer (10-10-10) worked into the soil at planting. Side-dress with a nitrogen source when plants hit 12 inches tall -- this fuels the rapid vegetative growth that precedes tasseling. Side-dress again at tasseling to fuel ear development and kernel fill. Organic options that work well: blood meal (12-13% nitrogen, fast-release), fish emulsion as a liquid side-dress, and composted manure worked in before planting.

Nitrogen deficiency shows clearly in corn. Lower leaves turn yellow starting at the tip, with the yellowing tracking inward along the midrib in a V-shape. Stunted plants, pale green color, and small poorly-filled ears all follow. If you see V-shaped yellowing, side-dress immediately.

The rotation advantage: plant corn where beans or peas grew the year before. Rhizobium bacteria in legume root nodules fix nitrogen in the soil, and some of that residual nitrogen is available to the following corn crop. It does not eliminate your side-dressing schedule, but it does reduce how much nitrogen you need to apply at planting.

Soil preparation before planting follows a clear sequence: test pH and amend if needed (fall or early spring), spread 2-4 inches of compost and till into the top 8 inches, apply balanced fertilizer, and rake to a smooth level surface for even seed depth. Do not work clay soil when it is wet -- you create hard clods that persist through the season and impede root development. Squeeze a handful; it should crumble, not form a sticky ball.

One timing note that extension agents repeat often: do not apply lime and nitrogen fertilizer at the same time. Lime volatilizes ammonium nitrogen, wasting the application. Apply lime in fall, fertilizer in spring.


Water: Consistent Is the Only Standard That Counts

The weekly target is 1 to 1.5 inches of water, including rainfall. In zones 8-10 during peak summer heat, plan on 2 inches. These numbers are straightforward. The harder part is understanding why consistency matters more than total volume.

Corn has a shallow, fibrous root system. The majority of roots occupy the top 12 inches of soil. Brace roots -- the aerial roots that emerge from lower stem nodes -- add stability against wind but limited water reach. This shallow architecture means corn cannot access deep groundwater the way tomatoes or squash can. It is entirely dependent on whatever moisture is in the topsoil. Topsoil dries out fastest. Even a few days without rain or irrigation during warm weather creates measurable stress.

The Three Weeks That Determine the Harvest

From when silks first emerge through kernel fill is a 3-4 week window that can make or destroy an otherwise well-managed crop. Three compounding failures happen under water stress during this period.

First, silk desiccation. Silks dry and shrivel before catching pollen grains. Since each silk connects to one potential kernel, dried silks mean missing kernels -- even if your block planting is perfect and pollen is everywhere.

Second, pollen viability. Extreme heat combined with drought desiccates pollen grains in the air before they reach silks. No amount of block-planting fixes this.

Third, kernel fill failure. Even after successful pollination, kernels need consistent water to develop. Stress during fill produces small, underdeveloped kernels.

All three can happen simultaneously. The result looks like pollination failure -- large sections of missing kernels -- even in a well-designed 4x10 block. ISU Extension and UMN Extension are both clear on this: water stress during silking is the leading cause of partially filled ears in gardens where pollination layout is not the problem.

Leaf rolling is corn's distress signal. When leaves curl inward along their length and form tubes rather than lying flat, the plant is reducing its transpiration surface area to conserve water. That is an urgent signal to irrigate, not a cosmetic issue.

One timing wrinkle with overhead irrigation: morning is when tassels actively shed pollen, typically 9 AM to noon. Running overhead sprinklers during that window washes pollen away and reduces pollination success. Use drip or soaker hoses between rows if possible -- they deliver water to the root zone, leave tassels and silks dry, and do not interfere with pollination at any time of day. If overhead irrigation is your only option, run it in late afternoon or evening.

Mulch is underrated for corn. Three to four inches of straw, shredded leaves, or grass clippings (herbicide-free) between rows reduces soil evaporation significantly, keeps soil temperature more consistent, and extends the effective window between irrigations. Apply after plants reach 6-8 inches and keep it a couple of inches away from the stalks.

What zone are you in?

Enter your zip code for frost dates, growing season, and soil type.


Pests: The Earworm You Can Live With and the Raccoon You Cannot Ignore

Sweet corn attracts a predictable set of pests. The management strategies are well-established. The important thing is knowing which ones you can tolerate and which ones will destroy the entire planting.

Corn Earworm: Unpleasant but Manageable

Corn earworm is the most common insect pest across all US zones. If you grow corn long enough, you will find one. The adult moth lays eggs on fresh silks. Larvae -- green, brown, or pink caterpillars up to 2 inches long -- enter the ear through the silk channel and feed on kernels at the tip.

Typical damage is the top 1-2 inches of the ear. Cut it off. Eat the rest. The flavor and safety of undamaged kernels are unaffected. Earworm damage is cosmetic for most of the ear, and treating it as a catastrophe is the wrong response.

If you want to reduce earworm damage, the mineral oil method works well without any chemical inputs. Wait until silks begin to brown naturally -- meaning pollination is complete. Then apply half a teaspoon of mineral oil to the silk channel at the tip of each ear. The oil suffocates larvae and blocks entry. Timing matters: apply too early and you block pollen from reaching silks, causing the poor kernel set you were trying to prevent. Apply after silks brown and pollination is done.

Bt spray (Bacillus thuringiensis, approved for organic use) applied directly to silks when they first appear is another effective option. Bt degrades in sunlight and washes off in rain, so reapplication is necessary. Target the silk channel specifically. Early-season plantings that silk in June typically face less earworm pressure than late plantings silking in August, when moth populations peak in most zones.

European Corn Borer: Prevent Through Sanitation

European corn borer larvae tunnel into stalks and ear shanks, weakening stalks and causing lodging. The damage is less visible than earworm -- you may not notice until a stalk suddenly snaps. Bt spray applied to foliage when moths are active helps. The most effective long-term management is removing and destroying corn stalks after harvest. Stalks are the primary overwintering site for corn borer. Leaving them standing through winter is essentially setting up housing for next year's pest population. Till under or compost the stalks.

Raccoons: The One You Actually Need to Worry About

Every other corn pest is manageable. Raccoons are in their own category.

They are intelligent, strong, dexterous, persistent, and nocturnal. They communicate -- once one raccoon finds your corn, others follow. They can destroy an entire planting in a single night. The cruelest part of raccoon timing is that they seem to arrive precisely 1-2 days before perfect harvest. You go to bed with a corn patch. You wake up with flattened stalks and single-bite ears scattered across the ground.

Human hair, bars of soap, and moth balls are garden folklore. They do not work. Raccoons live among humans every day. They are not deterred by human scent. Motion-activated sprinklers buy you a week or two before raccoons habituate and walk through the spray.

Electric fence is the only truly reliable deterrent. Two wires: bottom at 4 inches above ground, top at 12 inches. Bait the bottom wire with peanut butter on aluminum foil strips. The raccoon reaches for the bait, makes contact with the wire, receives a shock, and learns that this particular patch of ground is dangerous. Install the fence before ears begin to form. If raccoons learn a location is safe before the fence goes up, they are harder to deter and more likely to probe the perimeter aggressively. A solar-powered or battery-powered fence charger works fine. Check daily for shorts caused by vegetation touching the wires.

UMN Extension, ISU Extension, and UNH Extension all recommend electric fence as the definitive raccoon deterrent for home corn growers. The message is consistent because the evidence is consistent. If you live in raccoon territory -- which is most of the US -- and you grow corn without electric fence, you are optimistic in a way that experience tends to correct once.

Birds at Emergence

Crows and blackbirds pull newly emerged corn seedlings to eat the seed kernel still attached to the root. This is a first-two-weeks-of-emergence problem. Floating row cover laid immediately after planting and removed when plants hit 6 inches prevents it entirely. Once corn is established, bird pressure on the plants drops. They will return at harvest to peck at exposed ear tips, but that is a minor issue compared to losing a stand of seedlings.


The Harvest Window: Hit It or Miss It

The harvest window for sweet corn is not generous. An ear is at peak quality for 3-5 days, depending on weather and variety. The entire planting ripens over 7-10 days. Miss that window and you will be eating starchy dough instead of sweet, juicy corn, regardless of how well you grew the crop.

Three Ways to Know When to Pick

Count days from silking. Start checking 18-21 days after silks first appeared. This is your trigger to begin daily monitoring, not an automatic harvest date. Hot weather accelerates maturity; cool weather slows it.

Look at the silks. Green, moist silks mean the ear is still actively receiving pollen and is not ready. Drying, browning silks mean you are close -- begin daily checks. Dry, brown, slightly sticky silks mean likely ready; confirm with the milk stage test. Completely dry and brittle means check immediately; you may be at or past peak.

The milk stage test is definitive. Peel back the husk slightly on one ear and puncture a kernel with your thumbnail. Clear, watery juice means too early -- wait 2-3 days. Milky white juice means peak quality -- harvest immediately. Doughy or pasty with no juice means you are past the window and quality is declining, though the ear is still edible.

Harvest in early morning. Sugar content is highest in the morning because photosynthesis during the previous day produced sugars that overnight respiration has not yet consumed. Cooler temperatures also slow the sugar-to-starch conversion clock once you pick the ear.

To pick, grasp the ear firmly near its base and twist downward in one smooth motion. The ear snaps cleanly from the stalk. Most sweet corn varieties produce 1-2 ears per stalk; the top ear closest to the tassel is larger and matures first.

Once ears are at peak, harvest them all. Do not leave ripe ears on the stalk expecting them to hold there -- they will not. Quality declines on the stalk once past the milk stage. Pick, refrigerate with husks on (husks protect the kernels from drying), and plan to cook quickly based on your variety type.

The Clock After Picking

This is where genetic type becomes a practical kitchen decision.

Standard su varieties: eat within 1-2 hours of picking. That is not an exaggeration. The "boiling water first" advice was written about su corn, and it reflects real chemistry. If you grow Golden Bantam or Silver Queen, cook it immediately.

Sugar enhanced se varieties: you have 6-8 hours of good quality. Same-day eating at any point is excellent. Refrigerate immediately if you cannot cook right away.

Supersweet sh2 varieties: the practical advantage of sh2 is on full display here. Refrigerated sh2 corn holds for 5-7 days without significant quality loss. This is why Illini Xtra Sweet and How Sweet It Is are the right choices for gardeners who want to share corn, store it for a few days, or simply cannot cook immediately after picking.

Freezing: The Right Way to Preserve the Harvest

Frozen corn is dramatically better than canned corn. It is worth doing correctly.

Husk the ears and remove all silk. Blanch in boiling water for 4 minutes for full-sized ears -- blanching stops the enzyme activity that converts sugar to starch even in frozen conditions. Skip blanching and your frozen corn will be starchy and off-flavored within weeks, regardless of how good it was at harvest. Immediately plunge blanched ears into ice water for 4 minutes to stop cooking. Drain thoroughly, then cut kernels from the cob by standing the ear on its base and slicing downward with a sharp knife.

Spread cut kernels in a single layer on a parchment-lined baking sheet and freeze for 1-2 hours before transferring to freezer bags. Single-layer freezing prevents the solid clump problem that makes frozen corn hard to use in portions. Properly frozen corn holds quality for 8-12 months.


The Mistakes That Cost People Their Harvest

This is the short version. Each of these has already been covered in detail above, but here is the diagnostic list for when something goes wrong.

Ears with missing kernels or sparse kernel rows: Almost always a pollination problem from single-row planting. Sometimes water stress during silking mimics this. If your block layout is correct, look at your irrigation first.

Kernels that are starchy and tough despite a "supersweet" label: Cross-pollination from an incompatible corn type nearby. sh2 that received pollen from su, se, field corn, or popcorn produces exactly this result. Check isolation distances and maturity overlap.

Seeds that never germinated: sh2 planted in cold, wet soil below 60F. Wait for the right soil temperature. Use a thermometer, not the calendar.

Yellow lower leaves in a V-pattern: Nitrogen deficiency. Side-dress immediately.

Ears destroyed overnight before harvest: Raccoons. Electric fence, installed before ears formed.

All corn ripe in the same 7-day window: No succession planting. Next season: plant two varieties of different maturities at the same time, or stagger plantings 2 weeks apart.

Seedlings disappearing at emergence: Birds pulling seedlings for the seed kernel. Floating row cover until plants reach 6 inches.

Stunted plants that never thrive despite everything else being right: Transplanting. Corn is direct-seeded only. A damaged root system from transplanting sets back growth significantly and rarely recovers fully.

What zone are you in?

Enter your zip code for frost dates, growing season, and soil type.


Succession Planting: The Only Way to Have Corn All Summer

Plant a single block of corn and you will have 7-10 days of peak-quality ears. All of them at once. There is a limit to how much corn one family can eat in a week, and frozen corn -- good as it is -- is still not the same as fresh off the stalk.

The fix is simple. Plant a new block every 2 weeks from your earliest safe planting date through mid-summer. Each block must meet the 4x4 minimum for proper pollination -- a succession of undersized blocks that each fail to pollinate is not an improvement.

Alternatively, plant an early-maturing variety (58-70 days), a mid-season variety (75-83 days), and a late variety (85-95 days) at the same time. They mature in sequence and stretch the harvest window without requiring multiple planting dates. This approach is simpler to manage and eliminates the risk of a second or third planting getting caught by early frost in northern zones.

The combined approach -- two or three succession dates using varieties of different maturities -- gives you 6-8 weeks of fresh corn. That is a real summer's worth of eating, and it is what succession planting is actually for.

If you are mixing sh2 varieties into a succession plan, maintain isolation between sh2 and any other type. Each succession block needs to silk at least 2 weeks apart from any different genetic type, or you need 250 feet between them. In a home garden, the simpler answer is to keep all succession blocks the same genetic type.


Frequently Asked Questions

How many stalks does it take to get a meaningful harvest?

A 4x4 block of 16 plants is the pollination minimum. For a family harvest that lasts more than a few meals, a 4x10 block of 40 plants is the practical starting point. Most standard varieties produce 1-2 ears per stalk, so 40 plants yield 40-80 ears over 7-10 days. Plan accordingly.

Can I grow sweet corn in a container?

Not practically. Corn's height (5-8 feet), root system, and block planting requirement for pollination make it a poor candidate for container culture. Even large containers cannot accommodate the minimum 16-plant block needed for adequate pollination.

Should I hill my corn?

Hilling -- mounding soil around the base of plants when they reach 12 inches -- is worth doing if your site is exposed to wind. It stabilizes the brace roots that anchor tall stalks. It also reduces lodging (stalks falling over) from European corn borer damage. It is not required in sheltered locations, but it costs nothing and helps in windy gardens.

Is bicolor corn a different type genetically?

No. Bicolor refers to kernel color (a mix of yellow and white kernels on the same ear), not genetic type. Bicolor varieties exist in su, se, sh2, and syn types. Ambrosia is bicolor se. Bicolor is a cosmetic characteristic, not a flavor or performance one. Grow it if you like the look.

Why does my corn from the farmer's market taste better than the supermarket?

Because it was picked recently. The single largest determinant of sweet corn flavor is time elapsed since harvest. Farmer's market corn was typically harvested that morning or the evening before. Supermarket corn was harvested 2-5 days earlier and has been converting sugar to starch ever since. The variety barely matters compared to timing. This is also why garden corn beats both.


The Bottom Line

Corn asks more of you than most garden vegetables. More space, more nitrogen, more attention to irrigation timing, more planning around pollination layout, and an electric fence if raccoons are in your area. In return, you get something that genuinely does not exist in any store: an ear of corn picked at the milk stage, carried inside, and eaten within the hour.

Get the block planting right. Match your variety type to your zone and soil temperature. Water hard during silking. Know your harvest window and hit it. Those four things cover 90% of what makes the difference between good corn and a disappointing season.

The rest is details. This guide covers them. Now go find 50 square feet and plant a block.

Research for this guide draws from extension service publications including Iowa State University Extension, University of Minnesota Extension, University of New Hampshire Extension, Michigan State University Extension, and ISU's Sweet Corn Genetic Types documentation. Variety performance data is sourced from cultivar trial records and published extension recommendations.

Where Sweet Corn Grows Best

Sweet Corn thrives in USDA Zones 5, 6, 7, 8. Explore each zone's complete guide for growing tips, companion plants, and seasonal advice.

Also possible in: Zone 3, Zone 4, Zone 9, Zone 10 (challenging but possible with the right conditions).

Not sure of your zone? Look it up by zip code →