Vegetables

Growing Potatoes: Everything You Need to Know to Pull a Real Harvest

James Calloway

James Calloway

Vegetable & Edibles Specialist · Updated April 2026

How to grow potatoes — vintage botanical illustration showing the plant in detail

Potatoes at a Glance

Sun

Sun

6-8+ hours full sun

Soil pH

Soil pH

5.0-6.0

Water

Water

1 inch per week

Spacing

Spacing

10-12 inches in row, 30-36 inches between rows"

Days to harvest

Days to Harvest

55-160 days

Height

Height

18-24 inches

Soil type

Soil

Loose

Lifespan

Lifespan

annual

Get your personalized growing data

Enter your zip code for frost dates, growing season, and soil type.

Potatoes are supposed to be simple. Drop them in the ground, hill them up, dig them out. That is the whole story, right?

Except most first-time growers end up with a patch of magnificent green foliage and a bucket of marble-sized disappointments. Or they bite into a potato that tastes vaguely wrong and wonder if the crop is cursed. Or they spend the whole season watering faithfully and dig up tubers that are knobby, cracked, and hollow in the middle.

None of this is bad luck. It is the same handful of mistakes, made over and over, by people who were never told the actual rules. And the rules are not complicated. They are just different from what you would guess.

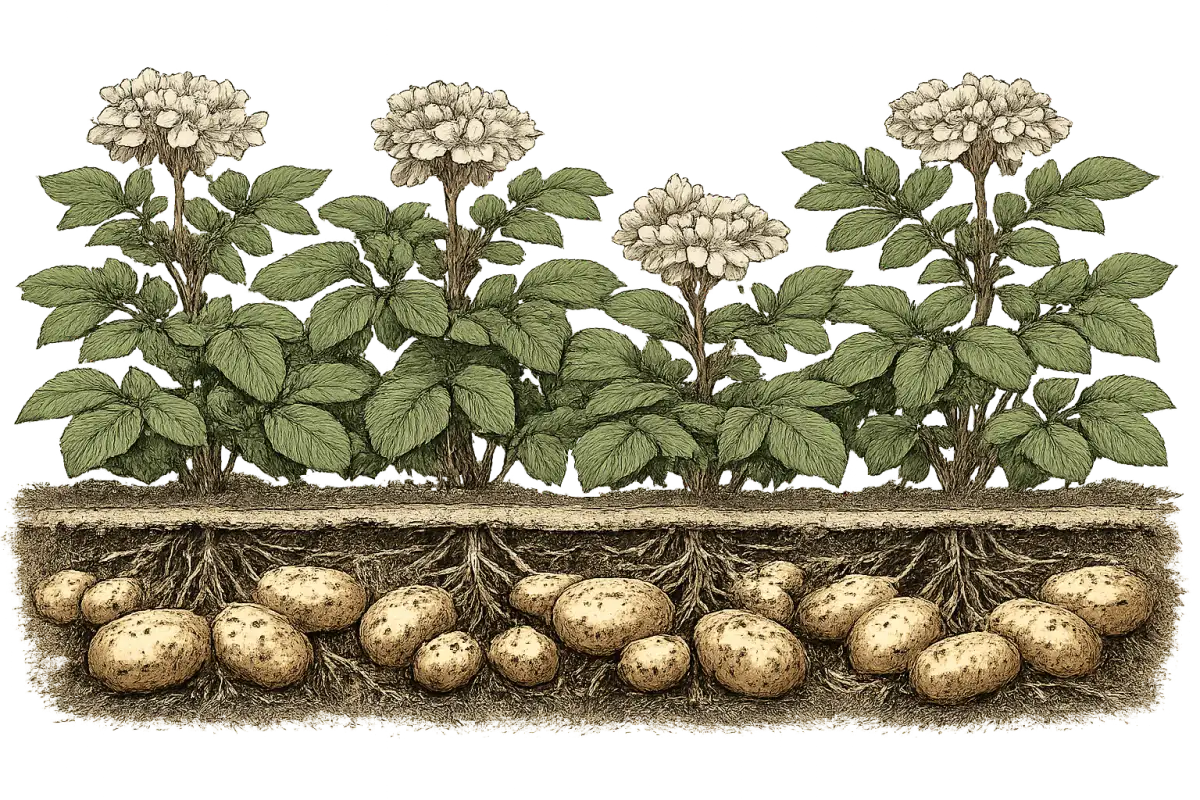
Potatoes are a cool-season crop that wants nothing more than loose soil, consistent moisture, and enough buried stem to hang tubers from. A single 10-foot row, done right, can yield 50-100 pounds of food. A 20-gallon grow bag on a patio yields up to 12 pounds with zero digging and almost no space. A well-planned succession of early, mid, and late varieties gives you fresh potatoes from midsummer through fall, with storage potatoes that last into the following spring.

This guide covers every decision that actually matters -- variety selection by zone, planting methods, hilling, watering, fertilization, harvest timing, and the mistakes that ruin the most crops. We will tell you what the extension services actually recommend, not the vague "keep moist and fertilize as needed" advice that fills most of what is written about potatoes.

Let's dig in.


Quick Answer: Potato Growing at a Glance

USDA Zones: 3 through 11 (cool-season crop; timing varies dramatically by zone)

Sun: Minimum 6 hours direct sunlight; 8+ hours ideal

Soil pH: 5.0-6.0 (non-negotiable for scab prevention)

Planting depth: 4-6 inches deep, eyes facing up

Spacing: 10-12 inches between seed pieces, 30-36 inches between rows

Water: ~1 inch per week early; 2-3 inches per week during tuber bulking

Fertilizer: Moderate nitrogen, higher phosphorus, highest potassium (5-10-10 or 4-8-10)

Hilling: Start at 6-8 inches of plant height; repeat every 2-3 weeks

Days to harvest: 55-160 days depending on variety

New potatoes: Any variety, 7-8 weeks after planting

Yield (trench/hill): 5-10 lbs per row foot in good conditions

First rule: Never plant grocery store potatoes. Use certified seed potatoes only.


The Soil pH Rule Nobody Tells You About

Before we talk about varieties or planting dates or any of the interesting stuff, you need to understand one soil fact that dictates everything else.

Potatoes need soil pH between 5.0 and 6.0. That is slightly acidic. Not as extreme as blueberries, but still well below what most garden soil naturally sits at. And the reason is specific: the common scab pathogen, Streptomyces scabiei, thrives in neutral to alkaline soil. Keep your pH in the 5.2-5.8 range and you create actively hostile conditions for scab. Let it drift above 6.5 and you are essentially sending an invitation.

This matters more than people realize because the two most common "helpfulness" impulses in gardening -- liming the soil and adding wood ash for potassium -- both raise pH directly into scab territory. Do not lime potato beds. Do not add wood ash. If you want extra potassium without touching pH, use sulfate of potash (0-0-50). If you need to bring pH down, use elemental sulfur or ammonium sulfate fertilizer.

Test before you plant. Extension services offer inexpensive soil testing and you cannot manage what you have not measured. Sandy loam is the ideal native texture -- tubers expand freely, drain well, and come out clean at harvest. Heavy clay drains poorly, restricts tuber growth, and produces misshapen potatoes. If clay is what you have, build raised beds and fill them with something better.

Amend with well-rotted compost, aged manure, or leaf mold. Avoid fresh manure -- it promotes scab and dumps excessive nitrogen into the bed. Avoid fresh wood chips, which rob nitrogen as they decompose. Keep fresh anything away from potato beds.

One more requirement that matters: rotation. Do not plant potatoes -- or any member of the nightshade family, including tomatoes, peppers, and eggplant -- in the same spot more than once every 3-4 years. Soil-borne diseases and pests accumulate fast in nightshade ground. Colorado potato beetles actually overwinter in the soil near last year's crop and walk to find new plants. Moving your potato patch even a short distance genuinely helps.


Certified Seed Potatoes: This Is Not Optional

Here is the most important sentence in this entire guide: do not plant grocery store potatoes.

I know you have a potato in the back of the pantry that is already sprouting. I know it seems wasteful to throw it out and buy seed potatoes instead. Plant it anyway and here is what might happen: supermarket potatoes are routinely treated with chlorpropham (CIPC), a sprout inhibitor that prevents germination. Your potato may simply refuse to grow. And if it does grow, you have just introduced an uninspected tuber -- one that has never been tested for late blight, viruses, or bacterial pathogens -- directly into your garden soil where those diseases can persist for years.

USDA-certified seed potatoes are inspected, lab-tested, and guaranteed disease-free. That is the entire point of the certification. The cost difference between certified seed and store-bought is real but small. The disease risk is not small.

If you genuinely want to experiment with a store-bought potato, use an organic one (less likely to be inhibitor-treated) and grow it exclusively in an isolated container. Never in soil that will grow food again.

Once you have certified seed potatoes in hand, here is how to prepare them: cut larger tubers into egg-sized chunks with at least one eye each -- two or three eyes per piece is better. Let the cut pieces dry at room temperature (60-70F) for 2-3 days. This forms a protective callus layer that resists rot when the pieces hit cold, wet soil. Golf-ball-sized or smaller seed potatoes can go in whole.

Chitting: Worth the Bother in Short Seasons

Chitting means pre-sprouting seed potatoes indoors before planting. Place them eyes-up in egg cartons or shallow trays, in a bright room held at 50-60F, four to six weeks before your planned planting date. Wait for sprouts that are 0.5-1 inch long, stubby, green, or purple-tinged.

If your sprouts come up long, pale, and spindly, they grew in darkness and are weak. Rub them off and start over in better light. Good chitted sprouts are stout and compact.

Chitting gives you a 2-4 week head start, which is genuinely valuable in zones 3-5 where the growing window is short. It also lets you verify seed viability before committing pieces to the ground. Handle chitted potatoes carefully at planting -- broken sprouts set you back.


Best Potato Varieties by Zone

Potato variety selection comes down to two things: how long is your growing season, and what do you want to do with the potatoes afterward. Season length is the hard constraint. Everything else is preference.

Early-season varieties mature in 55-85 days. Mid-season takes 90-110 days. Late-season runs 110-160 days -- Russet Burbank, the most widely grown baking potato in the country, takes around 150. If your zone does not give you 150 frost-free days with soil warm enough for potato growth, Russet Burbank is not your variety. This is basic math that a lot of gardeners skip.

What zone are you in?

Enter your zip code for frost dates, growing season, and soil type.

Cold Zones (3-5): Race Against Frost

In zones 3 and 4, you have one job: beat the frost. Full stop. The growing window is short -- mid-April to early May is your spring planting window, and in zone 3 you are targeting harvest by mid-to-late September before hard freeze hits.

That means early-season varieties only. Red Norland is the workhorse of cold zones: 75-85 days, high yield, great flavor, and excellent performance in the short-season Upper Midwest and northern New England. Purple Viking at 70-80 days adds visual drama and works beautifully in zone 3-4 gardens. Yukon Gold is the most forgiving early variety for first-time growers -- it matures in 75-90 days, has a naturally buttery flavor, holds up in almost any cooking application, and it consistently performs well across a wide range of conditions.

For zone 5, you gain a little breathing room. The planting window opens in late March to mid-April, and mid-season varieties become viable. French Fingerling at 90-100 days produces small, elegant, rose-skinned tubers with yellow flesh and a nutty flavor that is genuinely unlike anything you find in a supermarket. Gold Rush at 90-100 days is a russet type with good disease resistance -- a reasonable choice if you want baking potatoes but cannot grow the 150-day Burbank.

Chitting is especially valuable here. A two-to-four week head start indoors can mean the difference between a mature harvest and a race against October frost.

Mulch planted areas for frost protection. Use row covers for late cold snaps. If a late frost kills the foliage, do not panic -- the buried portion of the plant usually recovers. The soil is insulating what matters.

Standard Zones (6-7): The Full Range Opens Up

Zone 6 is where potato growing gets genuinely interesting. You can grow early, mid, and late varieties. If you plan it right, you can have fresh potatoes from midsummer through fall and storage potatoes sitting in your cellar through the following spring.

The strategy here is succession planting. Start with an early variety like Red Norland or Caribe (70-80 days, purple skin with white flesh, excellent as new potatoes). Follow with a mid-season variety like Carola -- a German yellow-flesh variety with waxy, velvety texture and outstanding flavor. Then anchor the late season with Kennebec (110-120 days), a northeast favorite that stores well and handles just about anything in the kitchen.

German Butterball deserves a special mention here. It is a late-season yellow-flesh variety at 110-120 days with rich, buttery flavor and excellent storage characteristics. If you have the season length for it, it is one of the most rewarding potatoes you can grow. Katahdin at 110-120 days is another late-season performer with excellent storage life -- it is not flashy but it is deeply reliable.

Zone 7 adds a fall planting opportunity. Spring planting runs February through March; fall planting opens in September through October. Early varieties planted in September can yield a genuine fall crop before hard freeze. Use that second window. It is one of the advantages of zone 7 that most growers completely ignore.

Adirondack Red (95-105 days, mid-season) is worth growing in zone 6-7 if you want a red variety with more growing time. Good disease resistance and excellent performance as a roasting potato.

Warm Zones (8-11): Plant Around the Heat

Here is the counterintuitive truth about potatoes in warm climates: fall planting is often more productive than spring. Tuber formation stops completely above 80°F soil temperature. That is not a guideline -- it is a hard biological limit. In zones 8-11, summer soil temperatures frequently exceed that threshold, which means summer-grown potatoes simply stop producing tubers at a critical stage.

The solution is to work backward from your heat. In zones 8-9, spring planting runs from mid-February through late March in zone 8, late January through February in zone 9. The goal is to get potatoes in the ground as early as possible so tuber formation happens before soil temperatures spike. Fall planting in September through November is often the better play, treating potatoes as a cool-season winter crop.

In zones 9-11, Yukon Gold planted in late January through February is the most reliable spring choice -- it is fast enough (75-90 days) to finish before summer heat arrives. Red Norland at 75-85 days works for the same reason. For fall planting in zones 9-10, early and mid-season varieties again: Purple Viking, Caribe, and French Fingerling all perform well in fall gardens across the South and coastal West.

Zones 10-11 should lean on fall and winter planting as the primary strategy. Avoid summer entirely. Late-season varieties like Russet Burbank are essentially not viable here unless you have an exceptionally mild summer.

Container growing in warm zones has a useful advantage: pots warm faster than ground soil in spring, allowing slightly earlier planting, and can be moved to shaded spots during the hottest weeks if needed.

Quick Reference Table: Top Picks by Zone Group

Zone GroupTop 3 VarietiesSeasonWhy
3-4Red Norland, Purple Viking, Yukon GoldEarly (55-90 days)Short season; must mature before fall frost
5-6Yukon Gold, French Fingerling, KennebecEarly to lateFull range viable; succession planting optimal
6-7Carola, German Butterball, KatahdinMid to lateLong season supports storage varieties
7-8Red Norland, Yukon Gold, CaribeEarlyTwo-crop zones; beat summer heat
9-11Yukon Gold, Red Norland, French FingerlingEarly to midFall/winter planting; avoid summer soil temps

Planting Methods: Six Ways to Grow a Potato

There is no single correct way to grow potatoes. The right method depends on your soil, your space, your willingness to dig, and whether you want to grow on a patio or in a field. Here are the options, honestly assessed.

The Traditional Trench and Hill

This is the highest-yielding approach for most growers and the one with the most research behind it. Dig a trench 4-6 inches deep. Place seed potato pieces 10-12 inches apart with eyes or sprouts facing up. Cover with 4 inches of soil. Space rows 30-36 inches apart to give yourself room to hill.

As plants grow, you pull soil from between rows toward the base of each plant, mounding 2-3 inches at a time. More on hilling below -- it is its own topic.

This method requires good soil. Compact clay or poorly drained ground will work against you. If your native soil is heavy, raise the beds instead.

Raised Beds

Raised beds solve the soil problem entirely. Fill them with a loose, well-draining mix, control the quality from the start, and plant the same way you would in a trench. Beds should be at least 12 inches deep -- 18-24 inches is better if you want full hilling room. Soil in raised beds warms faster in spring, which gives you a small but real head start in cold zones.

The tradeoff is that raised beds dry out faster than in-ground plantings. Water accordingly.

Containers and Grow Bags

This is where potatoes get accessible to anyone with a balcony. A 10-gallon container holds 2-4 seed pieces and yields 3-5 pounds. A 20-gallon grow bag holds 6-8 pieces and can yield 7-12 pounds. The 10-gallon size is the sweet spot -- best balance of yield, space, and soil cost.

Use a light, fluffy potting mix (equal parts compost and coco peat, or quality potting soil). Never use straight garden soil in containers -- it compacts, drains poorly, and suffocates roots.

The non-negotiable rule for container potatoes is water. Containers dry out dramatically faster than ground soil. In hot summer weather, daily watering is normal. On very hot days, twice daily. Stick your finger 2 inches into the soil -- if it is dry there, water. Use fabric grow bags if you can find them: built-in drainage, air-pruned roots, and they breathe in a way that plastic pots do not.

Best container varieties: Yukon Gold, Red Norland, French Fingerling, Purple Viking, and Adirondack Blue. All early to mid-season, all compact enough to work well in limited soil volume.

Straw Mulch and No-Dig Methods

Lay seed potatoes on the soil surface (or in a shallow 2-inch depression) and cover with 6-8 inches of loose straw. Add more straw as plants grow. Maintain 8-12 inches of straw coverage through the season.

The harvest is the payoff: pull back the straw and the potatoes are sitting right there, clean, with no digging required. Straw also retains moisture well and suppresses weeds effectively. Some growers report reduced Colorado potato beetle pressure under straw, though voles and mice find the mulch appealing.

The Ruth Stout method takes this further -- throw seed potatoes on the ground and cover with at least 8 inches of hay or straw, year after year, with no tilling. First-year yields are lower while soil biology develops. It improves over time. If you are gardening for decades and value minimal effort above maximum yield, this approach makes sense.


Hilling: The Technique That Makes or Breaks Your Harvest

Hilling is not optional. It is not a stylistic choice. It is the single most yield-critical technique in potato growing, and most beginner advice undersells how important it is.

Here is the biology: potatoes are swollen portions of the underground stem, not the root. The more underground stem the plant has, the more tubers it can produce. All tubers form during a critical two-week initiation period. More buried stem means more initiation sites. More initiation sites means more potatoes. Hilling is how you give the plant more underground stem.

Hilling also prevents greening. Any tuber exposed to sunlight starts producing solanine -- a toxic glycoalkaloid. A thick soil mound blocks all light from reaching developing tubers. This is not a cosmetic issue; it is a food safety issue. We will cover solanine in detail below.

Start the first hilling when plants reach 6-8 inches tall. Pull loose soil from between rows toward the base of the plants, mounding 2-3 inches at a time. Always leave 3-4 inches of foliage exposed above the hill -- burying the entire plant slows growth. Repeat every 2-3 weeks, or whenever plants have grown another 6-8 inches. Total hillings per season: typically 2-4. Stop when plants begin to flower, the canopy closes over, or plants become very bushy.

Final hill dimensions should be roughly 10-15 inches high and about 18 inches wide at the base, sloped to shed water rather than pool it.

Straw, compost, or leaf mold can substitute for soil in the hill. Straw produces cleaner potatoes at harvest. Compost adds nutrients while hilling. Both are valid.

Three hilling mistakes to avoid: waiting too long to start (you will find green tubers and the damage is done), burying the entire plant, and hilling after rain when wet soil compacts and cuts off oxygen to developing tubers.


Watering: The Critical Window Nobody Explains

Potatoes need approximately 1 inch of water per week from planting through flowering. That number roughly doubles during tuber bulking -- the period from flowering onward when tubers are actually sizing up. In hot weather, 2-3 inches per week during that stage is not unusual.

The reason the bulking period matters so much is what inconsistent moisture does to the tubers: knobby and misshapen shapes, hollow heart (actual cavities inside the tuber), growth cracks, and elevated scab susceptibility. These are all symptoms of the same problem -- moisture swings during the most critical growth window. A potato that was drying out and then got flooded shows it in the harvest.

Drip irrigation is the best approach. It delivers water directly to the root zone, keeps foliage dry (which reduces disease pressure), and is easy to automate. Soaker hoses are a solid second choice. Overhead sprinklers work but wet the foliage unnecessarily -- if you use them, water in the early morning so leaves dry quickly.

Stop watering 2-3 weeks before harvest. Dry soil lets skins set properly and makes digging significantly easier.

The specific watering failure modes to watch for: if foliage wilts in the afternoon, check for underwatering. If you see yellowing lower leaves, tuber rot signs, or a waterlogged smell from the soil, you are overwatering. Waterlogged conditions promote fungal growth and soft rot. Potatoes planted in soil where water stands for more than a few hours after rain will struggle -- build raised beds or find a better spot.

What zone are you in?

Enter your zip code for frost dates, growing season, and soil type.


Fertilization: Why Your Greenest Plants Might Give the Worst Harvest

Potatoes have an unusual nutritional profile compared to most vegetables. They need moderate nitrogen, higher phosphorus, and the most potassium of the three. Most general-purpose garden fertilizers get this backwards.

The result is one of the most reliable frustrations in potato growing: spectacularly healthy, deep green foliage and a genuinely disappointing harvest. Big leaves, small potatoes. Excess nitrogen redirects the plant's energy into foliar growth at the expense of tuber production. It also increases susceptibility to blight. If your potato plants look like the healthiest things in the garden but yield is poor, nitrogen overfeeding is the probable cause.

What you want: Fertilizers where N is lower than P and K. Formulas like 5-10-10 or 4-8-10 are correctly balanced for potatoes. Commercial potato formulas at ratios like 2:2:3 or 3:5:5 (N:P:K) work well. The best organic approach is well-rotted compost plus bone meal (3-15-0, for phosphorus) plus kelp meal (1-0-2, for potassium). Blood meal (12-0-0) and fish emulsion (5-2-2) are nitrogen-heavy -- do not use them as primary fertilizers for potatoes.

The Feeding Schedule

At planting: Work a balanced fertilizer or compost into the top 6 inches of soil -- about 2-3 lbs per 100 square feet.

First side-dress (around 4 weeks): Apply a balanced fertilizer alongside the row during hilling. About 1-2 lbs per 100 square feet.

Second side-dress (around 6-8 weeks): Shift to a higher-potassium formula -- 12-12-17 or 14-7-21 at 1-2 lbs per 100 square feet.

Two weeks before harvest: Stop fertilizing. Late fertilization delays skin set and reduces storage quality. Always water after applying fertilizer to prevent root burn.

Container potatoes need more frequent feeding -- every two weeks -- because nutrients leach out with each watering. Adjust accordingly.

And one more reminder on pH and potassium: do not reach for wood ash as a potassium source. Yes, it contains potassium. It also raises your soil pH and actively promotes scab. Use sulfate of potash instead.


Harvesting: Two Types, Two Strategies

You can harvest potatoes two ways, and choosing between them is not complicated once you understand what you are getting from each.

New Potatoes: The Early Reward

Harvest new potatoes 7-8 weeks after planting, around the time flowers appear and begin falling off. These are small, tender, thin-skinned tubers with delicate flavor -- the kind of potato you roast whole with olive oil and salt and eat in about ninety seconds. Any variety can be harvested this way.

The technique: dig carefully about 12 inches from the plant, feel around for small tubers, take a few, and leave the plant to keep growing and produce a full main crop. New potatoes do not store. Use them within days.

Main Harvest: Timing Matters More Than You Think

For the main crop, wait until vines yellow, wither, and die back naturally. That die-back is the signal that the plant is done. Then wait two more weeks before digging. This patience period matters: it lets skins toughen underground, which is critical for storage life. Thin-skinned potatoes harvested too early will shrivel and rot in storage.

Before you dig, do the rub test. Pull one tuber out and rub the skin with your thumb. If it stays firmly attached, they are ready. If it rubs off easily, give it more time.

Use a spading fork, not a spade -- far less likely to slice tubers. Insert it 12-18 inches from the plant center. Lever the soil up rather than cutting into it. Work from the outer edges inward to find all tubers. Handle what you pull out gently: do not throw or drop. Bruising reduces storage life significantly.

After digging, brush off loose soil (do not wash) and let potatoes dry in shade for 1-2 hours. Not in sun -- light triggers greening even at this stage. Sort immediately and set aside any cut, bruised, or damaged tubers for same-day or next-day use.

In zones 3-5, target harvest by mid-to-late September before hard freeze. Tubers left in frozen ground suffer flesh discoloration and cell damage.

Curing Is Not Optional

Freshly dug potatoes need to cure before long-term storage. Curing at 45-60F and 85-95% relative humidity for 10-14 days in complete darkness allows skins to toughen, heals minor cuts and bruises by forming a protective suberization layer, and dramatically extends storage life. An unheated basement, garage, or covered porch usually works.

After curing, move to long-term storage at 38-45F, 85-95% humidity, in complete darkness with good air circulation. Never seal potatoes in airtight containers -- trapped moisture causes rot. Do not store near apples or other ethylene-producing fruit, which accelerates sprouting. Check monthly and remove any showing rot before it spreads.

Late-season varieties store 4-6 months or more. Early-season varieties like Red Norland and Yukon Gold store only 1-3 weeks and should be eaten promptly. Kennebec, Katahdin, and German Butterball are your best storage varieties if a winter supply of potatoes is the goal.

One safety note on storage that needs saying clearly: decaying potatoes produce toxic gases. In enclosed spaces like root cellars or basements, these gases can cause unconsciousness. Multiple deaths have been documented from people entering root cellars with large quantities of rotting potatoes. Always ventilate storage areas and remove rotting potatoes promptly. This is not alarmism -- it is documented fact.


The Solanine Problem: Green Potatoes Are a Genuine Hazard

This section gets skipped in most potato guides. It should not be skipped.

All potato tissue contains glycoalkaloids -- solanine and chaconine -- at naturally low levels (20-80 mg/kg in normal potatoes). Those levels are safe. The problem is that light exposure triggers production of both chlorophyll (the green color) and glycoalkaloids simultaneously, and those levels can reach dangerous concentrations (200+ mg/kg) in greened, damaged, or heavily sprouted potatoes.

The toxic dose for a 150-pound person is roughly 136-340 mg. A single heavily greened potato can contain 250+ mg. Symptoms include burning in the mouth, nausea, vomiting, cramps, diarrhea, headache, and dizziness. Severe cases involve internal hemorrhaging and CNS effects. Historical records document roughly 2,000 cases and 30 deaths between 1865 and 1983. Cooking does not destroy solanine -- boiling, baking, frying, microwaving, none of it significantly reduces glycoalkaloid levels. Prevention is the only protection.

The green color itself is harmless chlorophyll. But it is an accurate indicator that alkaloids are elevated underneath.

How to handle it:

  • Store in complete darkness. Even fluorescent light causes greening over time.
  • Hill consistently throughout the season to keep developing tubers buried and light-blocked.
  • When you find a green potato, cut away all green areas plus at least 1/4 inch beyond the visible green.
  • If a potato is heavily green throughout the flesh, heavily sprouted, tastes bitter, or is shriveled and mushy: discard it entirely.
  • Remove all sprouts before cooking. Sprout tissue concentrates glycoalkaloids.
  • Never eat raw potatoes.

This is the real reason hilling is a food safety practice, not just a yield technique.


The Mistakes That Kill the Most Harvests

Ranked by how much damage they actually cause, based on what consistently shows up in extension service diagnostic guides.

Mistake #1: Grocery Store Potatoes in Garden Soil

Covered above, but it bears repeating in this context. Planting uninspected potatoes in your garden soil is a multi-year mistake. The diseases that arrive with them -- late blight, viruses, bacterial pathogens -- do not leave when the season ends. They persist in soil and get worse with each planting. Use certified seed potatoes.

Mistake #2: Too Much Nitrogen

The big plants / small potatoes problem. Excess nitrogen is one of those mistakes where the early feedback feels positive -- your plants look great -- and the damage only shows up at harvest. Stick to lower-nitrogen formulas (5-10-10, 4-8-10). Avoid blood meal and fish emulsion as primary fertilizers.

Mistake #3: Inadequate Hilling and Solanine Exposure

Skipping hilling or starting too late produces two problems simultaneously: lower yields (less underground stem means fewer tuber initiation sites) and green, potentially toxic tubers at the surface. By the time you can see green tubers, the solanine is already there. Hill early, hill often.

Mistake #4: Alkaline Soil and Scab

Adding lime or wood ash to potato beds is a very common mistake, usually made by gardeners trying to do something positive for their soil. Target pH 5.0-6.0. Test before planting. Use sulfate of potash for potassium, not wood ash.

Mistake #5: Inconsistent Watering During Tuber Bulking

Letting soil dry out and then flooding during flowering and bulking produces knobby, cracked, hollow-hearted tubers. The critical window is from flowering onward. Keep moisture consistent -- 80-90% of field capacity -- through vine yellowing. Drip irrigation with mulch makes this dramatically easier.

Mistake #6: Planting in Waterlogged or Compacted Soil

If water stands in your plot for more than a few hours after rain, the drainage is insufficient for potatoes. Build raised beds, amend heavily with organic matter, or find a better spot. Waterlogged soil means fungal growth, tuber rot, and misshapen harvests.

Mistake #7: No Crop Rotation

Do not grow potatoes (or any nightshade) in the same ground more than once every 3-4 years. Diseases and pests accumulate. This is not complicated -- just keep a planting map and plan rotations into it.

Mistake #8: Container-Specific Failure

Using a 5-gallon bucket is not the worst container mistake -- underwatering is. Containers in hot weather need daily water. Sometimes twice daily. The number one cause of poor container yields is not the container size or the variety or the fertilizer. It is forgetting to water. Check containers daily.

Mistake #9: Harvesting at the Wrong Time

Digging too early produces thin-skinned tubers that will not store. Do the rub test. Wait the full two weeks after vine die-back. In cold zones, do not wait so long that hard freeze gets to the tubers in the ground.

What zone are you in?

Enter your zip code for frost dates, growing season, and soil type.


Frequently Asked Questions

Can I Grow Potatoes in a Small Space?

Yes. A 10-gallon grow bag yields 3-5 pounds of potatoes from 2-4 seed pieces and takes up about as much room as a large pot of tomatoes. A 20-gallon bag yields 7-12 pounds. You need 6+ hours of sun and a willingness to water daily in summer heat. Yukon Gold, Red Norland, and Purple Viking are the best choices for container growing -- all early-season, compact, and proven in limited soil volume.

How Do I Know When to Harvest?

For the main crop: wait for vine die-back (foliage turns yellow, then brown, then collapses), then wait two more weeks. Do the rub test -- if the skin stays firmly attached when rubbed, they are ready. For new potatoes: go at 7-8 weeks, around when flowers appear. For zones 3-5, be aware of your first fall frost date and harvest the main crop by mid-to-late September regardless of vine condition.

Why Are My Potatoes Knobby and Cracked?

Inconsistent moisture during tuber bulking. This is the most common cause of misshapen harvests. If the soil dried out and then got flooded during the period from flowering onward, the tubers show it. The fix for next season is drip irrigation and mulch to maintain consistent soil moisture through that critical window. Hollow heart (cavities inside tubers) comes from the same cause -- extreme moisture swings.

What Causes Scab on My Potatoes?

Soil pH above 6.5. The scab pathogen (Streptomyces scabiei) thrives in neutral to alkaline conditions. Test your soil. If pH is above 6.0, lower it with elemental sulfur or ammonium sulfate. Do not add lime or wood ash to potato beds under any circumstances. Maintaining pH 5.2-5.8 is the most effective cultural control available.

How Long Do Potatoes Store?

It depends entirely on the variety and your storage conditions. Late-season varieties -- Kennebec, Katahdin, German Butterball, Russet Burbank -- store 4-6 months or more at 38-45F, 85-95% humidity, in complete darkness. Early-season varieties like Red Norland and Yukon Gold store only 1-3 weeks and should be used promptly. New potatoes store for days only. Cure all storage potatoes at 45-60F for 10-14 days before moving to long-term storage.

My Potato Plants Look Amazing But Yield Is Terrible. What Happened?

Almost certainly excess nitrogen. Lush, spectacular foliage with disappointing tubers is the signature symptom of nitrogen overfeeding. Check whatever fertilizer you used -- if nitrogen is the highest number in the N-P-K ratio, that is the problem. Switch to a formula where N is lower than P and K, like 5-10-10 or 4-8-10.


The Bottom Line

Potatoes are not complicated plants. They are specific ones. Get the soil pH right, buy certified seed, hill consistently, keep moisture steady through tuber bulking, and match your variety to your actual growing window. Do those things and you will pull a real harvest.

The payoff is significant. A single 10-foot trench in good conditions yields 50-100 pounds of food. A 20-gallon grow bag on a patio yields 7-12 pounds with no digging and almost no space. Succession plantings of early, mid, and late varieties give you fresh potatoes from midsummer through fall and a cellar full of storage potatoes for winter.

Start with certified seed potatoes. Pick varieties that match your season length. Plant at the right time for your zone. Hill from the beginning. The rest of it is just paying attention.


Research for this guide drew on extension service publications and cultivar data from across the United States, including guidance from USDA certification programs, university extension services, and documented regional growing experience. Variety timing and storage data reflect published cultivar performance records.

Where Potatoes Grows Best

Potatoes thrives in USDA Zones 4, 5, 6, 7. Explore each zone's complete guide for growing tips, companion plants, and seasonal advice.

Also possible in: Zone 3, Zone 8 (challenging but possible with the right conditions).

Not sure of your zone? Look it up by zip code →