Fruits

Blackberries Will Take Over Your Yard — Here's How to Let Them, on Your Terms

Sarah Whitfield

Sarah Whitfield

Fruit & Berry Specialist · Updated April 2026

How to grow blackberry — vintage botanical illustration showing the plant in detail

Blackberry at a Glance

Sun

Sun

6-8 hours full sun

Soil pH

Soil pH

5.5-6.5

Water

Water

1-2 inches per week during growing season

Spacing

Spacing

36-96"

Days to harvest

Days to Harvest

Year 2 for first fruit

Height

Height

4-8 feet

Soil type

Soil

Well-drained soil

Lifespan

Lifespan

perennial

Get your personalized growing data

Enter your zip code for frost dates, growing season, and soil type.

Every summer, I hear a version of the same story. Someone planted a blackberry or two a few years back. The first season was fine. By the third season, canes were coming up through the lawn, over the fence, and into the vegetable beds. The patch now looks like something that evolved specifically to be unmovable. The homeowner, scratched and frustrated, starts googling "how to kill blackberries."

It did not have to go this way. Not because blackberries are not aggressive — they absolutely are — but because a well-sited, well-contained blackberry patch is one of the most rewarding plants you can grow. A mature planting produces 15–20 years of fruit with minimal inputs. Pick every 2–3 days at peak season and you will have more blackberries than you know what to do with. The flavor of a sun-warm, fully ripe blackberry pulled off your own canes bears almost no resemblance to the tart, grainy thing in a grocery store clamshell, picked days early because blackberries do not ripen after harvest.

The plants are not hard. They are just vigorous, and vigorous things require a plan.

There are two things you need to get right before anything else: containment strategy, and understanding which canes fruit when. Growers who sort out those two things — where the plants are going and what each cane is supposed to do — almost always succeed. Growers who skip them end up in the war stories.

This guide covers everything we have learned about growing blackberries well, from soil prep through the annual pruning calendar, with specific variety recommendations for every zone from 5 through 9. We will tell you what actually matters, what the common mistakes cost you, and exactly what to do each season to keep your patch producing for decades.


Quick Answer: Blackberry Growing at a Glance

USDA Zones: 5 through 9 (with zone-appropriate varieties)

Sun: 6–8 hours of direct sunlight daily; non-negotiable for yield

Soil pH: 5.5–6.5 (test before planting; amend 6–12 months early if needed)

Spacing: 3–4 feet in-row for erect types; 5–6 feet for semi-erect; 5–8 feet for trailing

Row Spacing: 8–10 feet for erect; 10–12 feet for semi-erect and trailing

Water: 1–2 inches per week during the growing season; drip irrigation strongly preferred

Fertilizer: Balanced 10-10-10 at 5–6 lbs per 100 feet of row in early spring; compost side-dressing in June

Pruning: Tip primocanes at 42–48 inches in summer; remove spent floricanes immediately after harvest; shorten laterals to 12–18 inches in late winter

Containment: Plan before planting — mowing lane, root barrier, or raised bed

First harvest: Year 2 (modest); full production by Year 3

Productive life: 15–20 years


The Cane Lifecycle (Everything Else Depends on This)

Before we talk about varieties, zones, or pruning schedules, you need to understand one thing about how blackberries fruit. Miss this and you will either eliminate your entire harvest in a single afternoon or spend years wondering why your patch underperforms.

Blackberry canes live exactly two years — in traditional floricane-fruiting varieties, which covers the majority of what home gardeners plant.

In year one, a new shoot emerges from the crown or root system. This is the primocane. It grows all season — getting taller, developing branches, building reserves — but it does not flower or fruit. Not a single berry. By fall it is a woody, fully grown cane.

In year two, that same cane is now called a floricane. It leafs out in spring, produces flowers, fruits in early-to-mid summer, and then begins to die. It will never fruit again.

This means a healthy blackberry patch always holds two generations of canes at once: the current-year primocanes growing up for next year, and the second-year floricanes carrying this year's crop.

The consequence is significant. If you cut every cane to the ground in winter — trying to be tidy, starting fresh — you remove all the floricanes that were going to fruit the coming summer. Zero harvest. You have also eliminated two full years of investment in a single afternoon, because the primocanes that regrow this spring will not fruit until the following summer.

This is the single most common and most costly blackberry mistake we see, and it happens because the two-cane system is not obvious until someone explains it.

There is an important exception. Primocane-fruiting varieties — Prime-Ark Freedom, Prime-Ark 45, and Prime-Ark Traveler — bear fruit on first-year canes in late summer and fall. These genuinely can be mowed to the ground in late winter. You will still get a fall crop from the new primocanes. We will cover these fully in the variety section. The point for now is this: know which type you have planted before you touch a pruning tool in winter.


Best Blackberry Varieties by Zone

The variety decision shapes everything that follows: what kind of trellis you need, how you prune, when you harvest, and how hard winter is going to be on your canes. Get this right and the rest of the management becomes straightforward.

What zone are you in?

Enter your zip code for frost dates, growing season, and soil type.

Before you look at zone-specific recommendations, orient yourself to the three growth habits, because they determine your management approach more than any other single factor.

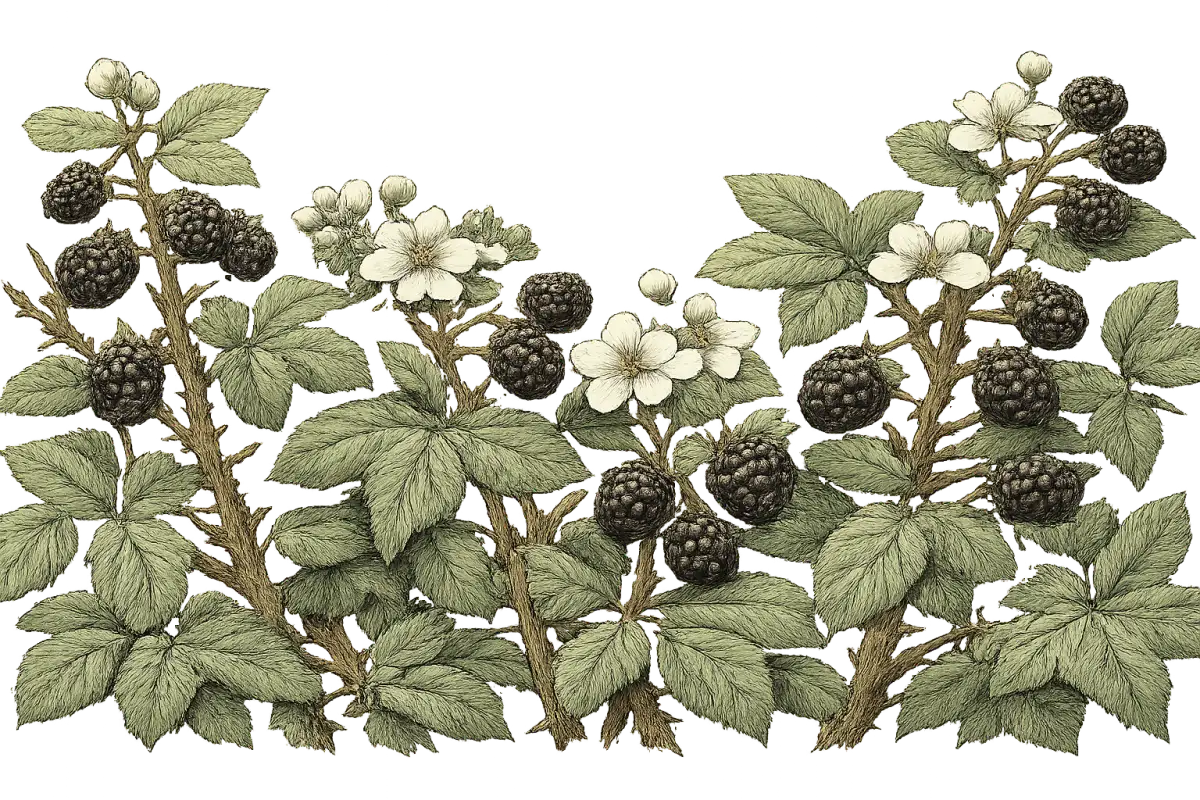
Erect varieties have stiff, self-supporting canes that grow 5–8 feet tall. They spread by root suckers and are the easiest to manage without a trellis (though they still benefit from one). These are the workhorses of the home garden: Ouachita, Navaho, Kiowa, Apache.

Semi-erect varieties have arching canes that need trellis support, but they reward that effort with very large berries and high yields. Canes reach 5–8 feet and fan outward. Triple Crown, Chester, and Hull are the main players here.

Trailing varieties are a different animal: canes reach 15–20 feet, require full trellis support, and spread by tip rooting rather than root suckers. They produce some of the most flavorful berries of any blackberry type but are more cold-sensitive and more labor-intensive to manage. Marion, Boysen, Logan, and Olallie are the classic trailing types — beloved in the Pacific Northwest, risky in cold climates.

Cold Zones (5–6): Hardiness Is the First Filter

Zone 5 spans the upper Midwest, parts of the Northeast, and the mid-Atlantic mountains, with winter lows hitting -20°F to -10°F. That eliminates trailing types outright — Marion, Boysen, and Logan are not reliably hardy here. Erect and semi-erect types are your world, with a clear emphasis on proven cold hardiness.

Chester is our top recommendation for zone 5. It is considered the most cold-hardy thornless blackberry in commercial production, with consistent performance proven down to zone 5. It is a semi-erect type with a late-season harvest window that extends into August — valuable in climates where the growing season is compressed. Pair it with Triple Crown for outstanding flavor (the best of the thornless semi-erects), though note that Triple Crown performs best in zone 6 and warmer; in zone 5, shelter from desiccating winter winds helps.

For growers who want the reliability of primocane fruiting, Prime-Ark Freedom is the right call. It is thornless, erect, and delivers a fall crop that does not depend on overwintered canes surviving the winter. In 5a and colder, consider mowing it to the ground each late winter — the floricane summer crop may winterkill anyway, but the fall primocane crop is dependable. Prime-Ark 45 is the thorny equivalent if you are willing to work in gloves — extremely vigorous and productive.

If you want large berries and do not mind thorns, Kiowa is one of the hardiest erect types available and produces some of the biggest berries in the species. Worth considering if you have the management bandwidth.

Regardless of variety in zone 5: mulch canes heavily (6–8 inches) after the ground freezes to protect crowns and the lower cane buds. That crown protection is what allows regrowth the following spring even when upper canes suffer dieback.

Zone 6 opens up the full range of erect and semi-erect types. Ouachita is outstanding here — thornless, disease-resistant, with a long fruiting window that makes it an excellent producer across the mid-Atlantic and lower Midwest. Navaho gives you the firmest berry of the thornless erect types, with excellent shelf life if you plan to share or sell fruit. Triple Crown reaches its full potential in zone 6 — large berries, exceptional flavor, very high yields from a semi-erect form. Prime-Ark Traveler adds a thornless primocane option with berries firm enough to ship and share.

Warm Zones (7–8): Where Blackberries Hit Their Stride

Zone 7 is the heart of American blackberry country. The Southeast and mid-South have centuries of blackberry culture for good reason — the climate is nearly perfect. Nearly every variety performs here, which means your selection can be driven by flavor, fruit size, and harvest timing rather than survival.

Apache is the standout for zone 7 if berry size is a priority. Thornless, erect, with very large berries and excellent flavor — it is widely recommended by Southeastern extension services and shows good disease resistance. Ouachita is arguably the most reliable all-around performer in zone 7, with superior disease resistance to double blossom and anthracnose (both of which become more serious in the humid Southeast). If you can only plant one variety in zone 7 and want to minimize management, Ouachita is the answer.

Triple Crown thrives in zone 7 and will bury you in large, sweet berries if you trellis it properly. Navaho holds up beautifully in heat, maintains berry firmness through the hottest part of the season, and is a dependable mid-season producer. Choctaw is a thorny erect type that deserves mention — early season, popular in Oklahoma and Arkansas, and very productive.

If you want to extend your season into fall, Prime-Ark Freedom is capable of both a summer floricane crop and a fall primocane crop in zone 7 — two harvests from the same planting. That is a meaningful advantage if you want a long picking window.

Zone 8 covers the Deep South, Gulf Coast, and the Pacific Coast from central California south through Oregon. Heat and humidity become the primary challenges here, and disease pressure — especially double blossom and orange rust — rises significantly. Ouachita's disease resistance makes it the workhorse of zone 8. Apache handles heat well. Kiowa earns its place in zone 8 despite the thorns: enormous berries, solid yields from Oklahoma to Georgia.

For Pacific Northwest zone 8 coastal conditions, Marion enters the picture. This trailing type produces what many consider the definitive fresh blackberry flavor — intensely aromatic, complex, and rich — and it is the variety that built the Pacific Northwest's commercial blackberry industry. It requires full trellis support and careful cane management, but for flavor-first growers with the right conditions, there is nothing like it.

In zone 8, inspect plants every spring for orange rust (bright orange pustules on leaf undersides) and double blossom (distorted, thickened flower buds with no fruit). Catching either early is critical — more on that in the pests and diseases section.

Hot Zones (9): Chill Hours Are the Limiting Factor

Zone 9 includes Southern California, the Central Valley, southern Arizona, and the Gulf Coast. The challenge here is not cold — it is the absence of it. Most blackberries require 200–700 hours below 45°F to break dormancy and fruit properly, and zone 9 may not reliably deliver enough.

Brazos and Womack are the Texas-bred workhorses for zone 9 — both developed specifically for low-chill, high-heat conditions. They are thorny erect types, but they produce where others fail. These are not the best-flavored berries in the world, but they are reliable in climates that defeat most other varieties.

In coastal zone 9 with marine influence (much of coastal California), the situation is better than inland areas. Navaho performs acceptably with adequate winter chill. Olallie is the trailing type bred for Pacific Coast conditions — a classic California variety, good flavor, manageable chill requirement.

For inland zone 9, be honest with yourself about chilling hours before you plant. If your area receives fewer than 200–300 hours below 45°F, blackberries will underperform regardless of variety. Primocane-fruiting varieties are generally not a good fit for zone 9 — fall temperatures stay too warm for proper fruit development and flavor expression.

Quick Reference Table: Top Picks by Zone Group

Zone GroupTop 3 VarietiesTypeWhy
5Chester, Prime-Ark Freedom, KiowaSemi-erect / ErectCold hardiness proven; primocane crop reliable when floricanes winterkill
6Ouachita, Triple Crown, NavahoErect / Semi-erectFull range opens up; disease resistance and flavor drive the decision
7Apache, Ouachita, Triple CrownErect / Semi-erectPeak blackberry climate; focus on size, flavor, disease resistance
8Ouachita, Kiowa, Marion (coastal)Erect / TrailingDisease resistance critical in humidity; Marion for PNW coastal only
9Brazos, Womack, Olallie (coastal)Erect / TrailingLow-chill development critical; coastal vs. inland distinction matters

Soil Prep and Site Selection: Do This Before You Buy a Single Plant

A blackberry planting will be in the ground for 15–20 years. That is not a typo. The site work you do before the first plant goes in determines whether those two decades are productive or frustrating, and almost none of it can be redone once canes are established.

Get Your Soil Right First

Blackberries thrive in a soil pH of 5.5–6.5 — slightly acidic, more forgiving than blueberries but still specific enough that you cannot just plant and hope. Outside this range, nutrient availability drops. Below pH 5.0, aluminum and manganese toxicity damage roots. Above pH 7.0, iron and manganese become unavailable and you will see interveinal chlorosis on young leaves — yellow tissue between green veins, which most gardeners misread as a nutrient deficiency and try to correct with fertilizer. The nutrients are there. The plant cannot access them.

Test your soil first. A basic test from your state cooperative extension service costs $15–25 and tells you your current pH plus nutrient levels with region-specific amendment recommendations. Do this 6–12 months before planting — pH correction takes time.

To lower an alkaline pH, apply elemental sulfur. The rate depends on soil type: sandy soils need 0.5–1.0 pounds per 100 square feet to drop pH by one unit; loamy soils need 1.5–2.0 pounds; clay soils need 2.5–3.5 pounds. Do not apply more than these rates at once — excessive sulfur damages soil biology. Apply in fall for spring planting and retest before putting plants in.

To raise a pH that is too acidic (common in the Southeast and Pacific Northwest coastal areas, where starting pH can be below 5.0), apply agricultural lime or dolomitic lime. Sandy soils need 2–3 pounds per 100 square feet to raise pH by one unit; loamy soils 5–7 pounds; clay soils 8–10 pounds. Apply in fall; lime takes 3–6 months to fully react.

Before you plant, incorporate 3–4 inches of compost into the top 8–10 inches of soil. This is the only time you can work amendments deeply into the soil — once plants are established, you can only top-dress. Finished compost is best for immediate nutrient availability; aged wood chips build long-term organic matter; aged (never fresh) manure adds nitrogen.

Drainage and Site Selection

Blackberry roots are highly susceptible to crown rot and root rot in waterlogged conditions. Plants may establish and appear healthy for a season or two, then decline suddenly in year two or three when root rot takes hold. This is one of those problems you cannot fix after the fact.

Test drainage before planting: dig a 12-inch hole, fill it with water, and observe the rate. Water that drains within 1 hour is excellent. Drainage slower than 4–8 hours is marginal and requires raised rows (6–8 inches above grade). Standing water after 8 hours means you need raised beds — 12–18 inches tall, filled with a mix of 50% quality topsoil, 40% compost, and 10% coarse sand — or French drains. One thing drainage testing has taught us definitively: do not add sand alone to clay soil. In insufficient quantities, it creates a material that sets like concrete. Use organic matter instead, or build a raised bed.

Choose a site with 6–8 hours of direct sunlight daily. More sun means more fruit — this is not a guideline, it is a direct relationship. In zones 8–9, some afternoon shade during the hottest summer weeks can protect ripening berries from sunscald, but morning sun is always preferable for drying foliage and reducing disease pressure.

Avoid sites where tomatoes, peppers, eggplant, potatoes, or strawberries grew in the previous three years. These crops share Verticillium wilt, a soilborne fungus that persists for years and infects blackberry roots. There is no treatment once established. If no alternative site is available, build raised beds with fresh soil imported from outside the affected area. Also clear wild blackberry and raspberry from the area — ideally within 300 feet of your planting — because they serve as reservoirs for orange rust, double blossom, and Spotted Wing Drosophila.

Orient rows north–south if your site allows it. This maximizes sunlight interception on both sides of the row and improves air circulation, which reduces fungal disease pressure.


Planting, Spacing, and Trellising

Timing

Plant bare-root plants in early spring while still dormant — March through April in zones 5–7, February through March in zones 8–9. Container plants are more flexible but establish best with spring planting; avoid setting container plants out in midsummer heat unless you can water daily.

Spacing

Give plants room. Erect types: 3–4 feet in-row, rows 8–10 feet apart. Semi-erect types: 5–6 feet in-row, rows 10–12 feet apart. Trailing types: 5–8 feet in-row, rows 10–12 feet apart. This feels like a lot of space when you are planting small bare-root starts, but erect and semi-erect types fill in quickly via suckers and lateral growth. Crowding creates poor air circulation and sets up disease problems that are difficult to fix.

Planting Technique

For bare-root plants: soak roots in water for 1–2 hours before planting. Dig a hole wide enough to spread roots naturally without bending. Set the plant at the same depth it grew at the nursery — look for the soil line on the crown. Backfill, firm the soil, and cut canes back to 6–12 inches. This feels drastic but redirects energy to root establishment, which is exactly what you want in year one.

Mulch immediately after planting: 3–4 inches of wood chips, straw, or shredded bark, kept 2–3 inches away from the crown. Mulch conserves moisture during the critical first season, suppresses weeds, and moderates soil temperature. Replenish annually.

Trellising

All blackberry types benefit from a trellis, even erect varieties. Trellised plants have better air circulation, cleaner fruit, and are dramatically easier to harvest. The standard home garden setup is a T-trellis: 4×4 treated wood posts or metal T-posts set every 20–25 feet along the row, standing 6 feet above ground, with a 2-foot crossarm at the top. Run two wires: one at 3 feet and one at 5 feet. Canes are trained between the wires and tied as needed. Trailing types need denser wire spacing and considerably more tying effort.


Pruning: The Annual Schedule That Makes or Breaks Your Harvest

Now we can get specific. With the lifecycle in mind, here is exactly what to do each season for floricane-fruiting varieties — which covers the majority of what home gardeners grow.

Summer: Tip Your Primocanes

When new primocanes reach 42–48 inches tall — roughly 10 inches above the top trellis wire — clip off the soft growing tip. Just 3–4 inches. This is called tipping.

Why does it matter so much? An untipped cane produces one terminal fruiting cluster the following year. A properly tipped cane develops 8–15 lateral branches, each of which becomes a fruiting branch — 5–10 times more fruit from the same cane. Tipping is a five-minute task per row that multiplies next year's harvest significantly. Do it in June–July as canes reach height. Fast-growing erect types may need a second tipping later in the season.

Sanitize your pruning shears between plants — wipe blades with 70% isopropyl alcohol or a 10% bleach solution. Cane blight and anthracnose spread on pruning tools. This is not optional if disease pressure is present.

After Harvest: Remove Spent Floricanes Immediately

As soon as harvest is complete — typically July through August in zones 5–7, June through July in zones 8–9 — cut all spent floricanes at ground level. Every one of them, down to the soil.

These canes are already dead or dying. Leaving them standing is not neutral — it actively increases disease pressure. Dead cane tissue is a breeding ground for anthracnose, Botrytis, and cane blight. Floricane stubs harbor overwintering Spotted Wing Drosophila pupae and other pests. Spent canes also make it harder to identify and manage new primocanes, which is your next priority.

Remove all cut material from the planting. Do not leave it as mulch. Get it out of the patch.

Late Winter: Lateral Shortening and Cane Thinning

In late winter, before new growth begins (February–March in zones 5–7; January–February in zones 8–9):

Shorten all lateral branches on remaining canes to 12–18 inches. This removes weak lateral tips and concentrates fruiting energy into the stronger, thicker base of each lateral. Leave 12–15 laterals per cane for best fruit size; remove any laterals thinner than a pencil.

Thin to the strongest canes: 4–6 per plant for erect and semi-erect types, 8–12 for trailing types. "Strongest" means thick, firm, fully ripe-wood canes. Thin or damaged canes will produce fewer, smaller berries. Remove damaged, diseased, and crossing canes first; then select the best from what remains.

For primocane-fruiting varieties, the simplest approach is to mow every cane to the ground in late winter. The entire planting starts fresh each spring with new primocanes that grow through summer and fruit in late summer and fall. No two-cane juggling required. If you want both a summer and fall crop, leave second-year canes as floricanes, harvest them in summer, then remove them — letting primocanes carry the fall crop. More yield, more complexity.

What zone are you in?

Enter your zip code for frost dates, growing season, and soil type.


Watering and Feeding: Less Than You Think, More Precisely Than You Think

Water

Blackberries need 1–2 inches of water per week during the growing season. That number is straightforward. The critical part is timing it correctly within the season, because two windows matter most.

The first is fruit development — the 3–4 weeks before harvest when berries are sizing up. Water deficit at this stage produces small, seedy, dry berries with poor flavor. Berry size is largely determined by cell expansion during fruit development, which requires consistent moisture. Even a brief drought stress during this window significantly reduces berry size and quality. Do not let soil dry out when berries are swelling.

The second is the first growing season. Newly planted crowns need consistent moisture to establish roots. This is when the planting is most vulnerable and where drip irrigation pays for itself.

Drip irrigation is strongly preferred over overhead watering for the same reason we recommend it for all cane fruits: keeping foliage and canes dry prevents fungal disease. If you use overhead irrigation, water in the morning so foliage dries before evening. After harvest, reduce watering — plants are semi-dormant and excess moisture promotes unwanted late-season growth.

Fertilizer

Blackberries are not heavy feeders. This is important. Over-fertilizing — especially excess nitrogen — stimulates excessive vegetative growth at the expense of fruit production and makes plants more susceptible to diseases and winter injury. More fertilizer is not better.

The standard approach: in early spring as new growth begins, apply a balanced granular fertilizer at 5–6 pounds of 10-10-10 per 100 feet of row. Alternatively, top-dress with 2–3 inches of compost. In June, a light side-dressing with compost or balanced fertilizer supports fruit development without pushing excessive vegetative growth.

Do not fertilize after mid-summer. Late nitrogen delays hardening off and increases winter injury risk in zones 5–7.

If your soil test shows yellowing between leaf veins on older leaves — a sign of magnesium deficiency common in acidic sandy soils — address it with dolomitic lime or a magnesium supplement. Test first; do not guess.


Containment: The Conversation to Have Before You Plant

We touched on blackberry spreading earlier, and it deserves its own focused discussion because this is where the war stories come from. Blackberries spread. They are designed to spread. And thornless varieties are just as aggressive as thorny ones — a fact that surprises almost every gardener who hears it for the first time.

Erect types spread by root suckers — new shoots that emerge from lateral roots extending 3–5 feet from the parent plant, sometimes farther. An uncontrolled erect blackberry patch expands its occupied area by 2–4 feet per side per growing season in good conditions. Trailing types spread by tip rooting: long, flexible canes arch outward until the tip contacts moist soil, roots, and becomes a new plant. Semi-erect types may use both mechanisms.

The solution is not a different variety. It is a plan, executed before you plant.

The most practical containment method for most home gardeners is mowing. Mow a 3–4 foot perimeter around blackberry rows every 2–3 weeks from late April through September. Root suckers and tip-rooted plantlets emerge from soil; a standard lawn mower set to 3–4 inches cuts them off. The frequency matters — suckers allowed to establish for 4–6 weeks develop enough root system to become genuinely difficult to control. Miss two or three mowing cycles and you are doing emergency management instead of routine maintenance.

For urban gardens, small spaces, or sites where mowing is not possible, a root barrier is the right tool. Excavate a trench 18–24 inches deep around the planting perimeter and install commercial HDPE root barrier sheeting (60 mil or thicker) vertically in the trench. Overlap ends by at least 6 inches and seal with root barrier tape. Leave 1–2 inches above grade so you can see where it is. Any gap allows roots through — continuity is everything. Quality HDPE barrier lasts 20+ years.

Raised beds with a solid bottom barrier are the most complete containment solution, particularly useful for poor drainage sites. Frame with untreated cedar, composite lumber, stone, or concrete block (minimum 18 inches tall — blackberry roots extend 18–24 inches deep in good soil), line the bottom with hardware cloth or heavy weed barrier fabric, and fill with a mix of 50% topsoil, 40% compost, and 10% coarse sand.

Site selection is containment too. A row bordered by regularly mowed lawn on both sides means routine maintenance automatically controls spreading. A row against a wooden fence means suckers grow through gaps and appear on the neighbor's side. A row adjacent to a woodland or stream bank means potential escape into natural habitat — in the Pacific Northwest and parts of the Southeast, naturalized Himalayan blackberry is already a significant invasive problem, and adding more cane material near wild lands increases establishment risk.

Build the 4-foot mow-able clearance into your site plan. It is far easier than what comes after you do not.


Pests and Diseases: What to Actually Worry About

Blackberries are relatively tough, but a handful of problems are serious enough to warrant knowing before you encounter them.

Spotted Wing Drosophila (SWD)

This is the most significant blackberry pest in most US regions, and the management principle is simple: harvest frequency. SWD is a small fruit fly that, unlike native fruit flies, lays eggs in ripening intact berries. Larvae develop inside the fruit — you will see berries that collapse and become weepy, and when split open, small white larvae inside. Infested fruit is soft, mushy, and unsalvageable.

Every 2–3 days during peak harvest season is the target picking frequency. Overripe fruit left on the plant is the primary SWD habitat. Refrigerate harvested fruit within 2 hours — cold stops larval development. If you know or suspect SWD is present, get fruit into the refrigerator within an hour. To confirm SWD presence before visible damage occurs, place a small sample of berries in salted water for 10–15 minutes; larvae float to the surface.

For monitoring before harvest season, commercial SWD traps (apple cider vinegar, red yeast, and dish soap) detect adult presence. Fine-mesh exclusion netting (50 mesh or finer) physically blocks SWD but is labor-intensive. Spinosad or malathion applied to fruit surfaces when adults are detected from traps can reduce infestation; follow pre-harvest interval labels carefully.

Orange Rust

Orange rust is the disease that requires immediate, drastic action. It is a systemic fungal infection — the fungus lives throughout the entire plant, including the root system. Removing infected canes does not cure the plant.

In early spring, watch for pale or yellowish young shoots. By late spring, examine leaf undersides: infected plants show masses of bright orange to yellow powdery pustules. This is a death sentence for that individual plant.

Dig out and destroy the entire plant including as many roots as possible. Bag and dispose with trash or burn — never compost. Remove any wild blackberry near your planting; it is the primary reservoir for orange rust spores. The soil spot is safe to replant with blackberry after one season.

Orange rust is most prevalent in zones 7–9. Ouachita and Apache show good resistance. Brazos and Rosborough are notably susceptible.

Double Blossom

Double blossom is a fungal disease that hits hardest in zones 7–9 with warm, moist springs. Infected flower buds are abnormally swollen, distorted, and reddish, with excess petals and no fruit production — a cane that should have carried dozens of berries instead carries dozens of useless thickened buds. There is no chemical cure once a cane is infected.

Remove and destroy all affected canes immediately; do not compost. In heavily infected plantings, summer pruning all canes after harvest and allowing only new primocanes to develop reduces overwintered spores. The best long-term defense is resistant varieties — Ouachita and Apache show good resistance; Brazos is susceptible.

Anthracnose and Cane Blight

Anthracnose causes small purple-to-reddish spots on canes that enlarge into gray lesions with raised purple borders, weakening canes and reducing lateral development. Cane blight causes brown-to-black lesions at wound sites — pruning cuts, insect damage, mechanical injury — with canes wilting and dying above the infection point.

Both are primarily managed through sanitation: remove and destroy infected canes during winter pruning, sanitize pruning tools between plants, and improve air circulation through trellising and proper cane thinning. For anthracnose, lime sulfur applied as a dormant oil spray before growth begins is the most effective cultural control. Avoid overhead irrigation; wet canes promote spore germination.

Japanese Beetles and Other Pests

Japanese beetles feed in groups and skeletonize leaves — consuming tissue between veins and leaving a lacy framework. For small infestations, knock beetles into a bucket of soapy water in early morning when they are sluggish. Avoid Japanese beetle traps; they attract more beetles to your yard than they capture. Neem oil applied to leaves disrupts feeding and needs repeating every 7–10 days.

Blackberry crown borers bore into the crown and lower canes; infested plants wilt in summer without obvious external cause. Look for holes with sawdust-like frass at the base of the plant. Severely infested plants must be dug out and destroyed — there is no effective in-plant chemical control for larvae already inside.

Spider mites are worst in hot, dry summers. Stippled, bronzing, or yellowing leaves on the underside are the sign. A strong stream of water from a hose, applied to leaf undersides and repeated every 2–3 days for two weeks, physically removes mites and disrupts populations before reaching for chemical controls.

The cultural practices that prevent all of these problems overlap almost entirely: remove spent floricanes immediately after harvest, thin canes to 4–6 per plant for good air circulation, trellis canes off the ground, control weeds around the planting, remove wild brambles nearby, and harvest frequently. A well-managed patch is inherently more resistant.


Harvesting: Black Is Not the Same as Ripe

This is the fact that changes everything about home-grown blackberries: blackberries are non-climacteric fruit. They do not ripen after picking. A berry harvested early stays tart forever. The deep, complex sweetness of a fully ripe blackberry is only available at the moment it is ready on the plant — you cannot finish the job on the counter.

The problem is that blackberries turn black before they are fully sweet. A berry must satisfy two criteria simultaneously: fully and uniformly black (no red drupelets — the individual segments — anywhere on the berry) and slightly soft to gentle pressure. A black-but-firm berry still needs 2–4 more days on the plant. The berry should release easily from the receptacle — the pale center core that stays on the plant — with minimal pressure. If you have to tug, it is not ready.

Taste one before picking the cluster. There is no ambiguity once you have tasted the difference between a properly ripe blackberry and one that needed two more days.

When to Pick by Zone

Harvest timing varies significantly by zone. Zone 9 sees berries ready as early as May–June; heat can cause berries to overripen quickly, so monitoring is critical. Zone 8 peaks June–July; humidity increases SWD pressure during this window. Zone 7 runs late June through August, with primocane types extending to September–October. Zone 6 is July through August, where cooler temperatures mean slower ripening. Zone 5 has a July–September window; primocane-fruiting types are particularly valuable for extending that compressed season.

How to Pick and Handle

Pick in the early morning when berries are cool and firm — they have lower field heat, meaning slower spoilage after picking, and SWD adults are less active at that hour. Use wide, shallow containers; no deeper than 3–4 inches of berries. Deep piles crush the bottom layer, and every transfer and pour costs you more crushed fruit.

During peak season, pick every 2–3 days. Every overripe berry left on the plant is lost fruit, an invitation to birds, and a SWD breeding site. Pick all ripe berries, even those you do not particularly want to eat that day.

Get out of the sun immediately after picking. Do not wash berries until you are ready to eat — washing removes the protective waxy bloom and accelerates mold growth. Refrigerate within 2 hours (1 hour if SWD is present in your planting). Unwashed blackberries keep 2–3 days in the refrigerator with perfect technique; plan to use or freeze them quickly.

Freezing and Preserving

For longer storage, blackberries freeze beautifully. Wash gently in cold water, drain, and spread in a single layer on a parchment-lined baking sheet. Freeze solid — at least 4 hours, ideally overnight — then transfer to labeled freezer bags, squeeze out air, and seal. Flash freezing keeps berries separate so you can pour out exactly what you need rather than wrestling with a solid clump. Quality holds for 8–12 months at 0°F; best in the first six months.

Blackberries are high in natural pectin and make outstanding jam, with or without commercial pectin. The basic ratio is equal parts crushed blackberries and sugar by weight, cooked to 220°F. Slightly underripe berries have higher pectin — which is why some jam recipes call for a mixture of ripe and underripe fruit. Properly made jam in sterilized jars, water-bath canned for 10 minutes, keeps 1–2 years at room temperature.


The Top Mistakes That Eliminate Your Harvest (and What to Do Instead)

We have tracked these by consequence, not just frequency. The ones at the top will cost you an entire season or an entire plant.

Pruning all canes to the ground on floricane types. This is covered in depth above, but it bears repeating here because it is the most devastating single-afternoon mistake in blackberry growing. If you have a floricane-fruiting variety — Triple Crown, Ouachita, Navaho, Chester, Apache, any variety not specifically labeled "primocane" — mowing everything to the ground in winter removes your entire coming harvest. Know your variety type before you pick up the pruning shears.

Not tipping primocanes. This one is quieter because you do not notice the loss until harvest comes and goes. A properly tipped cane produces 5–10 times more fruit than an untipped one by forcing lateral development. It takes five minutes per row in June or July. It is one of the highest-return tasks in the entire growing season.

Picking berries too early. A black-but-firm berry is not ripe. Picking it early is the main reason people conclude that home-grown blackberries taste like grocery store blackberries. Wait for softness. Taste test. The 2–4 extra days on the plant are worth every moment.

Not harvesting frequently enough. During peak season, every 2–3 days is the target. Ripe berries left on the plant overripen, attract birds and pests, and become SWD breeding sites. Missed picking sessions compound — by the time you get back to the patch, you have lost fruit and increased pest pressure simultaneously.

Ignoring the spreading behavior. Blackberries planted without a containment plan become a multi-year reclamation project. The neighbors notice before you do. Plan the containment before you plant, not after.

Planting in low-lying areas or heavy clay. Root rot and crown rot in waterlogged conditions is a slow killer — plants may look fine for a year or two before declining suddenly. Test drainage before planting and build raised rows or raised beds on any marginal site.

Leaving spent floricanes standing. Post-harvest cleanup is one of the highest-return tasks in blackberry management. Dead canes harbor fungal spores, insect larvae, and overwintering SWD pupae. Remove them promptly, remove the material from the patch, and your disease and pest pressure for the following season drops significantly.

Ignoring orange rust until it spreads. If you see bright orange pustules on leaf undersides in spring, act immediately. Waiting to confirm the diagnosis allows spores to spread to neighboring plants. Remove the entire infected plant including roots — bag and dispose, never compost — and clear any wild brambles in the vicinity.

What zone are you in?

Enter your zip code for frost dates, growing season, and soil type.


Frequently Asked Questions

Do Blackberries Need Two Plants to Produce Fruit?

Unlike many fruits, most blackberry varieties are self-fertile — a single plant will produce fruit. You do not need to plant two varieties for pollination. That said, planting multiple varieties with staggered harvest windows is still a good idea, not for cross-pollination but for extending your picking season. A combination of an early erect variety like Choctaw, a mid-season producer like Ouachita or Apache, and a late variety like Chester gives you fruit from June through August depending on your zone.

Can I Grow Blackberries in Containers?

Blackberries are not ideal container plants because their root systems extend 18–24 inches deep and they spread by root suckers or tip rooting. That said, if your in-ground soil is problematic (very alkaline, heavy clay, or contaminated with Verticillium from prior crops), a large raised bed with a barrier bottom is a practical alternative. Use a container no smaller than 24 inches in diameter and 18 inches deep, filled with a mix of topsoil, compost, and coarse sand. Plan for significantly more frequent watering than in-ground plantings — raised beds dry out 25–50% faster in hot weather.

What Is the Difference Between Thornless and Thorny Varieties?

The main practical difference is ease of harvest and maintenance — thornless varieties are dramatically more comfortable to work with. Thorny varieties like Kiowa and Choctaw can produce outstanding berries, and some growers argue thorny types have an edge in cold hardiness and vigor in challenging conditions. The key fact that surprises most people: thornless varieties are just as aggressive spreaders as thorny ones. The absence of thorns does not reduce root sucker production or tip rooting at all. Plan containment accordingly, regardless of which you choose.

When Should I Expect My First Real Harvest?

Year 2 for floricane-fruiting varieties — the canes planted in year one become floricanes in year two and carry your first crop. This will be modest. Year 3 is when things start to feel like a real harvest, and full production typically arrives by year 3–4 as the patch fills in. The 15–20 year productive lifespan means you are building toward a long return on that initial investment.

Why Are My Berries Small and Seedy?

The most common cause is water deficit during fruit development — the 3–4 weeks before harvest when berries are sizing up. Even a brief drought stress during this window significantly reduces berry size and quality. Cell expansion during fruit development requires consistent moisture; without it, berries reach their final size with fewer cells and a higher seed-to-flesh ratio. Check your watering frequency during the pre-harvest period and ensure you are hitting 1–2 inches per week. The second common cause is harvesting before full ripeness — underripe berries feel drier and seedier than fully ripe ones of the same variety.

How Do I Know If I Have a Primocane or Floricane Variety?

Check your plant tag or purchase receipt, or look up the variety name. The key primocane-fruiting varieties widely available for home gardens are Prime-Ark Freedom, Prime-Ark 45, and Prime-Ark Traveler — all include "Prime-Ark" in the name, which makes identification straightforward. All other commonly sold varieties (Ouachita, Navaho, Triple Crown, Chester, Apache, Kiowa, Marion, and the rest) are floricane-fruiting types. If you have inherited an unknown planting, observe it: if canes fruit in summer and then die, it is floricane-fruiting. If canes fruit in late summer or fall on new growth, it is primocane-fruiting.


The Bottom Line

Blackberries are not a delicate crop. They are vigorous, persistent, and productive in a way that very few plants match over a 15–20 year horizon. A well-managed patch requires less ongoing work than most vegetable gardens, produces more food per square foot than almost anything you can grow, and delivers fruit that is genuinely superior to anything available commercially — because you pick it fully ripe instead of early for shipping.

The work is front-loaded. Get the site right: soil pH in the 5.5–6.5 range, drainage confirmed, crop rotation respected. Pick varieties that match your zone. Build your containment strategy into the plan before a single plant goes in. Learn the two-cane lifecycle so you never accidentally remove next year's harvest. Tip your primocanes in summer.

After that, the main task is keeping up with the picking.

That is a good problem to have.

Research for this guide synthesized information from cooperative extension resources across multiple US land-grant universities and state extension services, with zone-specific recommendations grounded in published cultivar trial data and regional field performance records. Soil amendment rates, drainage assessment protocols, and pH management guidance reflect standard extension service recommendations calibrated for home garden scale.

Where Blackberry Grows Best

Blackberry thrives in USDA Zones 6, 7, 8. Explore each zone's complete guide for growing tips, companion plants, and seasonal advice.

Also possible in: Zone 5, Zone 9 (challenging but possible with the right conditions).

Not sure of your zone? Look it up by zip code →