Extreme Cold Zones (3–4): English Lavender or Containers
In the upper Midwest, northern plains, and Canadian border regions, your choices are narrow and your strategy must be precise. This is English lavender territory exclusively, and even there, only the hardiest varieties will reliably survive.
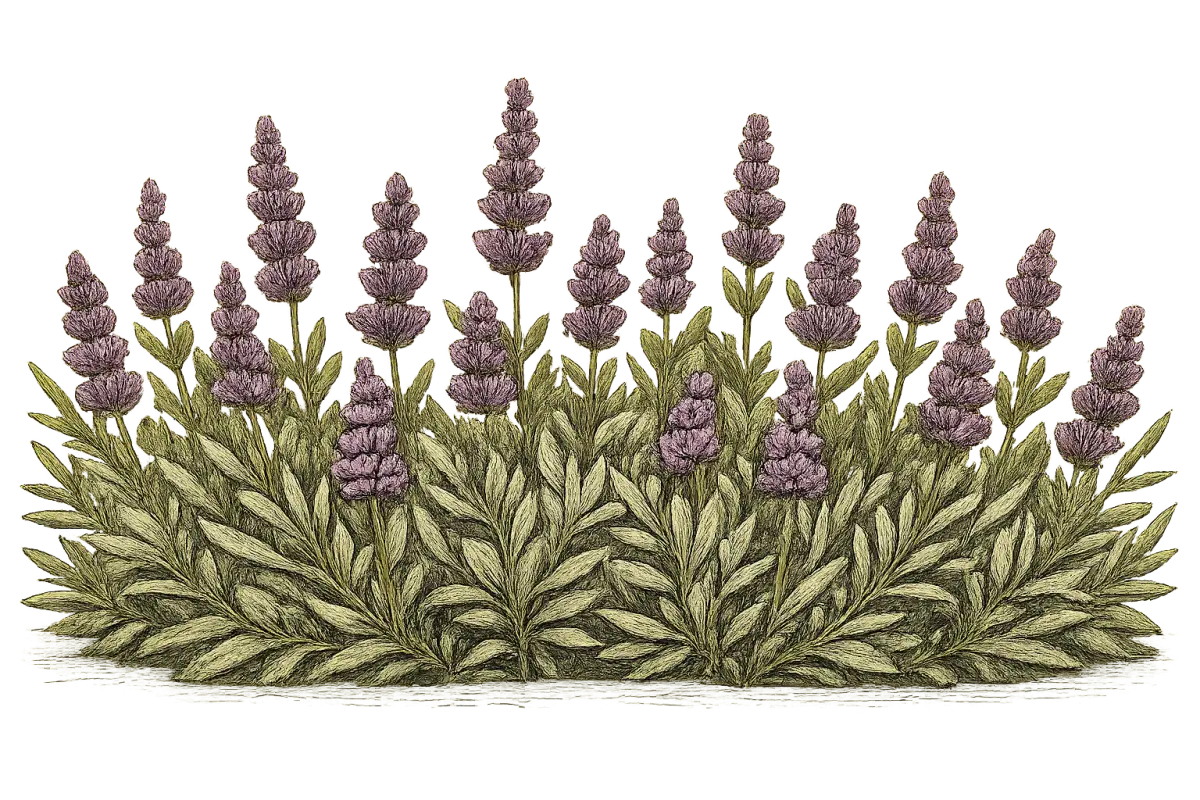
Munstead is the anchor recommendation — the most cold-tolerant lavender known, surviving zone 3 with good snow cover and excellent drainage. It stays compact at 12–18 inches, blooms earlier than most varieties, and has high essential oil quality matching larger plants. It is also a superb culinary variety. If you grow one lavender in zone 3 or 4, Munstead is it.
Blue Cushion is rated to –20°F dormant and deserves mention as a dwarf option for tight spaces or container cultivation. SuperBlue produces the largest blue blooms of the compact English types and is rated to zone 4. Royal Velvet survives subzero temperatures when dormant and offers rich, dark color.
The important caveat for these zones: in-ground lavender success depends heavily on snow cover, which insulates roots against temperature extremes. Consistent snow cover can effectively bump cold hardiness by one to two zones. Without reliable snow, container cultivation is the more dependable approach — overwinter plants in a cool but non-freezing garage or mudroom, and bring them out once spring temperatures stabilize.
Lavandin varieties — including Phenomenal — are generally not reliable in zones 3–4. Reserve those for zones 5 and above.
Cold Zones (5–6): The Sweet Spot for the Widest Selection
Zone 5 and 6 represent lavender's most rewarding territory in the continental United States: cold enough to need thoughtful variety selection, but warm enough that both English lavender and Lavandin varieties thrive. The challenge here is not cold — it is winter wet. More lavender dies in these zones from saturated frozen soil than from low temperatures, which makes raised beds and gravel mulch near-essential rather than optional.
For the most reliable, compact English lavender with excellent color, plant Hidcote. Its deep, rich purple is the most visually striking of any common English variety, and that color holds beautifully when dried — making it the right choice when you plan to harvest for sachets, arrangements, or crafts. Pair Munstead alongside it for the earliest blooms and culinary use, and you have two varieties that complement each other in both timing and purpose.
When you are ready to step up in plant size, Phenomenal is the upgrade that changes the landscape. This Lavandin variety brings 2–3 foot mounds of blue-lilac blooms on long stems, cold hardiness to zone 4–5, and the best humidity tolerance of any lavender introduced in decades. For zone 6 gardeners who want a hedge-scale planting or who deal with humid summers, Phenomenal is frequently the most reliable lavender available. Grosso anchors the oil-production end of the Lavandin range in these zones — its 6-inch flower spikes on long stems make it unmatched for dried bundles and essential oil, though it needs good snow cover in zone 5 to reliably survive. Provence, famous for its classic fragrance, survives –10°F and adds a billowing, large-scale presence to any planting.
One firm rule for zones 5–6: French and Spanish lavenders do not reliably survive these winters. Leave them for zone 7 and above.
Moderate Zones (7–8): Humidity Becomes the Battle
Zone 7 and 8 temperatures are entirely hospitable to lavender. The challenge is not cold — it is humidity. In coastal Georgia, the Carolinas, and most of the Mid-Atlantic, summer humidity routinely hits 80–90%, creating exactly the conditions that cause powdery mildew, Botrytis gray mold, and the crown rot that follows. The Pacific Northwest adds another dimension: winter rain rather than winter cold is the primary threat.
Phenomenal is the default recommendation for this zone — not one option among several, but the first choice by a meaningful margin. Its combination of vigor, size, and humidity resistance is what the Southeast was waiting for. When in doubt, plant Phenomenal. When you want something slightly more beginner-friendly and compact, Sensational — with its attractive silvery foliage and similar humidity adaptation — is an excellent second choice.
For bold landscape impact, Hidcote Giant (a Lavandin variety reaching 3–4 feet) offers award-winning presence. Betty's Blue, one of the few English varieties with some humidity tolerance, makes a refined choice when you want the sweeter English fragrance and culinary capability alongside reasonable disease resistance.
Zone 7 is also the threshold where Spanish lavender becomes a serious option. Anouk — compact, prolific, and striking with its classic rabbit-ear blooms — brings early spring color to the garden before any other lavender has stirred. It can bloom and fade before summer humidity peaks, making it an elegant seasonal accent rather than a main event.
Spacing in this zone is not negotiable: add 25% to any recommended spacing on the variety tag. Those extra inches of air circulation are the most effective and least expensive disease prevention available.
Warm and Hot Zones (9–10): Where the Other Species Finally Thrive
In the Deep South, Desert Southwest, and coastal California, the growing map expands. Spanish and French lavenders — frost-tender species that cannot survive colder zones — thrive in the heat of zones 9–10, and this is the only zone where they reliably live outdoors year-round.
Lavandula stoechas varieties (Spanish lavender) shine here: Anouk for compact prolific bloom, Ballerina for bicolor drama, Regal Splendour for a more formal presence. French lavender (L. dentata) offers the remarkable benefit of near-continuous bloom in mild climates — nearly year-round in coastal Southern California or central Florida. Goodwin Creek Grey is a heat-tolerant hybrid with beautiful silvery foliage that performs well across this zone range.
For oil production or large-scale planting, Phenomenal handles the heat and humidity of zones 9–10 admirably. For culinary use in desert zones (Tucson, Phoenix, Palm Springs), English lavender can be grown with afternoon shade to mitigate the most intense summer heat.
Fall planting is preferred in these zones — plants establish roots during the cooler months and enter summer with far more resilience than spring-planted specimens.
Quick Reference Table: Top Picks by Zone
| Zone Group | Top Varieties | Type | Why |
|---|
| 3–4 | Munstead, Blue Cushion, SuperBlue | English | Only species cold-hardy enough; Munstead to zone 3 |
| 5–6 | Hidcote, Phenomenal, Grosso | English / Lavandin | Full selection available; Phenomenal for humid summers |
| 7–8 | Phenomenal, Sensational, Anouk | Lavandin / Spanish | Humidity tolerance is the priority; Spanish viable from zone 7 |
| 9–10 | Anouk, L. dentata varieties, Phenomenal | Spanish / French / Lavandin | Frost-tender species thrive; near year-round bloom possible |
Drainage, Soil, and Where to Plant
Here is the practical reality of lavender soil preparation: it is less about adding things and more about ensuring conditions that allow roots to breathe. Lavender roots require approximately 21% oxygen in the soil pore space — matching ambient air. When soil stays saturated, oxygen is displaced, roots suffocate, and fungal pathogens move in. The entire soil preparation process exists to prevent that sequence.
Sunlight First
Before soil, before drainage, before variety: does your chosen site receive 6–8 hours of direct sunlight daily? If not, stop here and find a different spot. Insufficient sun is the most common cause of lavender that produces no flowers despite otherwise healthy-looking foliage. South-facing slopes are ideal — they maximize sun exposure while providing natural drainage. Avoid low spots, areas under eaves or downspouts, and any location covered by lawn sprinklers.
The Soil Test: Does Your Site Drain?
Dig a 12-inch hole, fill it with water, let it drain, and refill. If the second fill takes more than four hours to drain, your soil needs raised beds or significant amendment. Do not skip this test. Saturated soil in winter is not visible on the surface, and it is exactly the condition that kills lavender while the gardener assumes cold is responsible.
The Sand Mistake
Never add straight sand to clay soil. This is genuinely counterproductive: sand mixed into clay creates a near-concrete substance that is worse than clay alone. Clay and silt particles fill the gaps between sand grains and seal drainage further when irrigation exceeds infiltration capacity. The correct amendment for clay is large amounts of coarse organic matter — bark mulch or coarse compost — incorporated to at least 30% of total volume in the top 6–8 inches. Even better: build raised beds filled with imported well-draining mix, at minimum 12 inches deep (18–24 inches preferred).
For individual plants where raised beds are impractical, build planting mounds 8–12 inches high and at least 18 inches across. The crown and roots are elevated above any pooling groundwater, which is the single most important physical intervention for lavender success.
Soil pH: Neutral to Alkaline
Lavender prefers pH 6.5–7.5 — neutral to slightly alkaline. This runs counter to most garden perennial advice. Lavender evolved on Mediterranean limestone hillsides where calcareous, alkaline soil is the norm. Gardeners in the Midwest, Mountain West, and Desert Southwest are likely already in range. Gardeners in the Southeast, Pacific Northwest, and Northeast — where soils tend toward acidity — will need to add lime before planting. Calcitic lime (calcium carbonate) or dolomitic lime (which adds magnesium as a bonus) both work; apply before planting and allow time to react. Above pH 8.0, iron and manganese become unavailable and you will see yellowing foliage — a small sulfur incorporation can bring pH back down in that scenario.
Gravel Mulch Is Not Optional
This is the detail that separates successful lavender beds from beautiful ones. Organic mulches — wood chips, bark, straw — retain moisture around the crown and create exactly the humid microclimate that invites crown rot, Botrytis, and Septoria leaf spot. Gravel does the opposite: it keeps the crown dry, reflects sunlight and heat back up into the plant, prevents rain splash that spreads disease, and improves drainage over time as it works into the soil surface.
Apply 2–3 inches of pea gravel, crushed stone, or small river rocks, leaving a 1–2 inch gap directly around the stem. Light-colored gravel is preferred for maximum heat and light reflection. The premium choice — and the one worth seeking out — is crushed limestone, which provides drainage, light reflection, and a slow pH benefit in one material.
Watering: The Art of Mostly Not Doing It
Lavender's relationship with water is almost the opposite of what most gardeners instinctively bring to a new planting. The instinct is to water regularly, to keep soil moist, to err on the side of generosity. With lavender, that instinct will kill the plant.
Water deeply and infrequently. Let the soil dry out completely between waterings. For established plants in a climate with regular summer rainfall, this may mean no supplemental watering at all. For established plants in a dry summer climate, it may mean a deep watering every two to three weeks during the hottest stretch of the season. Neither of these schedules resembles what most gardeners would consider "watering."
The First Season
New plants need more attention than established ones — not because they need more water, but because they have not yet developed the root system to find it. Water deeply every two days for the first week. Weeks two through four, every three to four days. Months one through three, once per week using roughly one gallon per plant per watering. Through the remainder of the first season, every one to two weeks depending on rainfall and heat.
The shift to a more lavender-appropriate watering schedule happens in year two, once the root system is established.
Established Plants
In most climates, established lavender (year two and beyond) needs a deep watering every two to three weeks during the hottest, driest summer periods — and possibly nothing at all if the season brings regular rain. During active bloom, slightly more frequent watering (once per week to once every two weeks) produces larger, more fragrant flowers. In winter, do not water at all in most climates. The exception is dry mountain climates — Colorado, Mountain West — where the root zone should not desiccate entirely through a rainless winter.
How to Water
Drip irrigation with lines placed 4–6 inches from the plant base is ideal. It delivers water to the root zone without wetting the crown or foliage. In low-humidity climates like Colorado or the Desert Southwest, overhead irrigation works equally well — foliage dries quickly enough that disease is not a concern. In the humid Southeast, Midwest, or Pacific Northwest, never use overhead watering. Wet foliage in humid air is a direct invitation to powdery mildew and Botrytis.
The diagnostic rule that will save plants: an underwatered lavender wilts but recovers immediately when you water it. An overwatered lavender wilts and does not recover — the roots are gone. If a plant is wilting, check the soil before reaching for the hose.
Pruning: The Practice That Gives You 15 Years Instead of Five
Annual pruning is not optional maintenance that can be skipped in a busy year. It is the single practice that determines whether your lavender lives a decade and a half of dense, beautiful bloom or collapses into a woody wreck within five years. The two outcomes are that different, and the difference traces entirely to whether you prune once per year.
Here is what happens without pruning: the woody base grows larger with each passing season. New green growth retreats to the tips of increasingly bare, long stems. The center of the plant opens up and eventually splits under the weight of rain or snow. Airflow through the center drops, and fungal disease follows. Eventually the plant cannot be restored. What began as a full, handsome mound becomes a hollow, splitting skeleton that no amount of care can rehabilitate.
With annual pruning, lavender lives 10–15 years or more, stays compact and dome-shaped, and blooms abundantly every season.
The Cardinal Rule
Never cut into old wood below the green leaf zone. Lavender has no latent buds in its woody tissue — it cannot regenerate from bare brown stems the way roses or hydrangeas can. If you cut below where you see green leaves emerging from the stem, that stem very likely will not regrow from that point. Before every cut, look at the stem: find the transition zone where small green leaves begin emerging from the woody base. Your cuts must stay above that boundary. Two inches above the last emerging leaves is the minimum safe cut point.
When and How Much
The primary pruning event is after the main bloom — mid to late summer for most English varieties, later for Lavandin. Prune immediately when the flowers fade. This removes spent spikes and leggy growth, controls size, maintains the dome shape, and — critically — stimulates new growth that has weeks to harden off before the first frost. Delaying this pruning into fall is one of the most common timing errors: late pruning stimulates tender new growth that winter then destroys.
Take at least one-third of each stem's length. You can safely shear back up to one-half of green growth. The goal shape is a symmetrical dome — not just for aesthetics, but because a dome sheds rain and snow rather than collecting it in a hollow center that invites splitting and rot.
In early spring, after new leaves emerge, perform a lighter secondary pruning: remove any winter-damaged or dead stems, cutting back to the first set of green leaves. CSU Extension recommends removing approximately one-third of the top at this stage. This is shaping, not the main event.
Never prune within six weeks of your first frost date. Late pruning triggers soft new growth that cold destroys — and the resulting frost damage can reach deeper into the plant than it otherwise would.