Flowers

Lilies: A Three-Month Parade of Color That Asks for Very Little in Return

Margaret Chen

Margaret Chen

Flower & Ornamental Specialist · Updated April 2026

How to grow lilies — vintage botanical illustration showing the plant in detail

Lilies at a Glance

Sun

Sun

6-8+ hours full sun

Soil pH

Soil pH

6.0-6.5

Water

Water

1 inch per week during growing season

Spacing

Spacing

8-12"

Height

Height

2-8 feet depending on type

Soil type

Soil

Fertile

Lifespan

Lifespan

perennial

Get your personalized growing data

Enter your zip code for frost dates, growing season, and soil type.

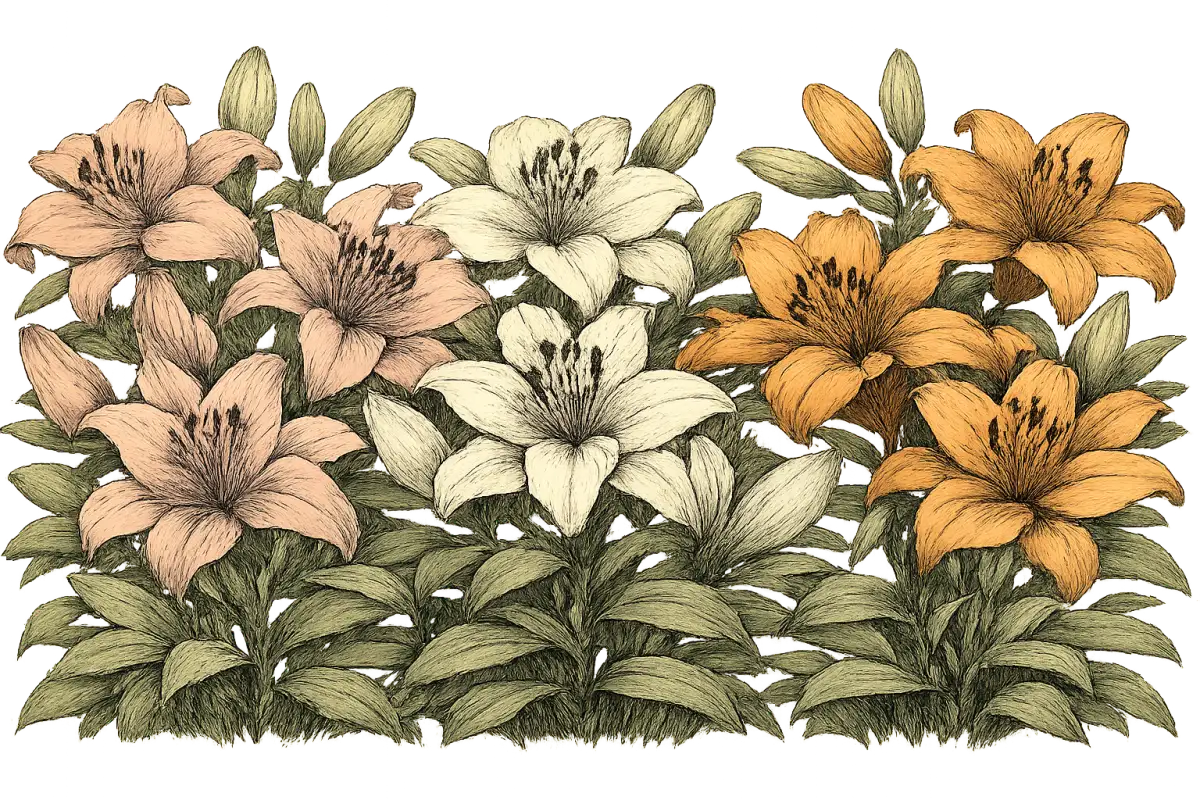
There is a particular kind of garden magic that happens when you plant three types of lilies instead of one. In June, the Asiatics open first -- bright, upward-facing, shameless in their color. July brings the tall trumpets swaying above the border, filling the evening air with fragrance you can smell from across the yard. Then August arrives with the Orientals, the most voluptuous flowers in the garden, so heavily perfumed and dramatically marked that visitors always stop to ask what they are.

Three months of continuous bloom from a single well-planned planting. That is what true lilies can do for a garden.

And yet so many gardeners plant a handful of bulbs, watch them bloom beautifully the first year, and then see the display diminish year after year until it disappears entirely. They conclude that lilies are difficult or short-lived. In almost every case, the real story is simpler: drainage was wrong, foliage was cut too soon, or the wrong type was chosen for the zone. None of those are difficult problems to solve once you understand them.

This guide is built around what actually makes lilies thrive for decades, not just for a season. We will walk through the critical distinction between true lilies and the daylilies that are frequently mislabeled and sold alongside them, explain why drainage matters more than any other factor, match specific varieties to your climate zone, and cover the handful of pests that require genuine vigilance. Follow this and you will have the kind of lily display that your neighbors photograph over the fence.

One clarification before we begin, because this confusion costs gardeners real money and disappointment every year: this guide covers true lilies only, meaning plants in the genus Lilium that grow from scaly bulbs with a single tall stem. Daylilies (Hemerocallis) -- the clumping, strappy-leafed plants sold everywhere -- are a completely different plant despite the shared common name. If your plant produces flowers that last only a single day and grows as a spreading ground-level clump rather than a single upright stem, you have a daylily. They are lovely plants, but not what we are discussing here.


Quick Answer: Lily Growing at a Glance

USDA Zones: 3 through 9 (depending on type)

Sun: Minimum 6 hours of direct sun daily; Asiatics prefer full sun; Orientals tolerate light afternoon shade

Soil pH: 6.0 to 6.5 (slightly acidic)

Drainage: Non-negotiable -- bulbs sitting in wet soil will rot

Planting depth: 6 to 8 inches (3 times the bulb height); deeper in cold zones

Spacing: 8 to 12 inches depending on type; always plant in groups of 3 to 5 minimum

Water: 1 inch per week during active growth; drip or soaker hose preferred

Fertilizer: Balanced fertilizer at spring emergence and again at bud formation; stop after bloom

Bloom season: June (Asiatics) through August (Orientals) when types are combined

First bloom: Same year as planting, typically

Dividing: Every 3 to 4 years as clumps become congested


The One Thing Lilies Will Not Forgive (And It Is Not What You Think)

Ask most gardeners what kills lilies and they will guess wrong -- too much sun, too little water, the wrong fertilizer. Those things matter, but they are almost never the cause of failure. The actual killer is poor drainage. It is responsible for more dead lily bulbs than every pest and disease combined.

Here is the anatomy of the problem. True lily bulbs have an open, scaly structure. There is no protective papery tunic around them the way there is on a tulip or daffodil bulb. Water gets in easily. In well-drained soil, this is perfectly fine. In waterlogged soil, water penetrates the scales, basal rot (caused by the fungus Fusarium) takes hold, and the bulb turns soft and brown from the bottom up. A bulb can be destroyed in a matter of days during a wet spell if drainage is inadequate. And because the damage happens underground and during the dormant season, you often will not discover it until the plant simply fails to emerge the following spring.

This problem is particularly insidious in three specific moments of the year. In spring, snowmelt and rain saturate soil just as bulbs are breaking dormancy -- their most vulnerable time. During summer, afternoon thunderstorms followed by heat create conditions in poorly drained clay where fungal disease spreads rapidly. And in fall and winter, dormant bulbs sitting in cold, wet soil develop basal rot with no visible warning until the following growing season.

The fix is to test your drainage before you plant a single bulb. Dig a hole 12 inches deep, fill it with water, let it drain, fill it again, and time how long the second fill takes to empty completely. If water is gone within four hours, you are in good shape. Four to eight hours is marginal -- amend the soil or use raised beds. Eight hours or more means this site is unsuitable without serious intervention. If water is still standing after twelve hours, choose a different location entirely.

For heavy clay soils, the most reliable solution is to build raised beds with a minimum depth of 12 inches (18 inches is better, given that lily bulbs need to be planted 6 to 8 inches deep). Fill them with a mix of quality topsoil (50%), well-rotted compost (30%), and coarse sand or perlite (20%). This combination drains freely, holds enough moisture for active growth, and warms up faster in spring. If raised beds feel like too much work, amend in-ground clay by loosening the soil 12 to 15 inches deep -- not just 6 -- and thoroughly mixing in coarse builder's sand and compost. A warning here: adding a small amount of sand to clay without thorough mixing can create a concrete-like mixture that drains worse than untreated clay. Be generous with amendments and mix them deep.

One additional drainage detail that makes a real difference: when planting in any soil with less-than-ideal drainage, place a thin layer of coarse sand or gravel at the bottom of each planting hole so the bulb's basal plate does not sit directly against wet soil.


Best Lily Varieties by Zone

The right lily type for your zone is the second most important decision you will make -- after ensuring your drainage is sound. Plant the wrong type and you will spend years nursing a plant that was never suited to your climate. Get it right and you will have bulbs that multiply and return reliably for a decade or more.

True lilies divide into several main types, each with distinct zone tolerances, bloom times, heights, and fragrance profiles. Asiatic hybrids are the cold hardiest and bloom first; they are also the only type with no fragrance, which surprises many first-time growers. Oriental hybrids bloom last and carry the most intense perfume of any garden flower. Trumpet lilies fall in between, tolerating the widest zone range (4 through 9) and offering strong fragrance on impressively tall stems. OT hybrids -- a cross between Oriental and Trumpet types, sometimes called Orienpets -- combine the best of both with dramatic size and fragrance.

What zone are you in?

Enter your zip code for frost dates, growing season, and soil type.

Cold Zones (3-5): Asiatics Are Your Foundation

In zones 3 and 4, Asiatic lilies are the answer. They are the most cold-hardy lily type, the most reliable returners and multipliers, and they require the least fuss. Plant them 8 inches deep for extra cold protection, mulch 3 to 4 inches deep after the ground begins to freeze, and they will come back faithfully. Oriental lilies can technically survive in zone 3, but they tend to decline after three to five years of harsh freeze-thaw cycles. For a cold-zone gardener who wants longevity and minimal heartbreak, Asiatics are the clear choice.

Blackout is one of the most striking -- a deep burgundy-red that photographs almost black in low light, growing to 3 feet with upward-facing flowers. Lollypop offers a completely different palette: white petals tipped with pink, compact at 2 feet, and ideal for the front of a border where shorter plants belong. If containers are part of your garden, the Tiny series was bred specifically for pot culture -- Tiny Bee in cheerful yellow and Tiny Ghost in dark, moody tones both top out at 12 to 18 inches and are exceptional container performers. For a bolder, more naturalistic look, Cancun in orange-yellow bicolor adds vibrant energy to any mixed planting.

The species tiger lily (Lilium lancifolium) deserves special mention for cold zones. Orange with recurved petals and black spots, it spreads by producing small bulbils in the leaf axils -- little bulb-like structures that fall to the ground and root. Tiger lilies are nearly indestructible, thrive in zones 3 through 9, and naturalize readily. If you want lilies that take care of themselves entirely, this is your plant.

Zone 5 opens the door to the full lily world. Stargazer -- the classic pink and crimson spotted Oriental -- becomes reliably perennial here, as does the pure white, intensely fragrant Casa Blanca. The species trumpet lily Regale (white petals with a wine-colored exterior, powerfully fragrant) begins to naturalize in zone 5 with good drainage and will return for years. Zone 5 is also where the magnificent OT hybrids become viable: Scheherazade, a burgundy-and-gold stunner reaching 6 to 8 feet, is one of the most talked-about lilies in the catalog world. It needs staking, but the visual impact is worth every bamboo cane.

Standard Zones (6-7): The Full Palette Is Yours

Zones 6 and 7 are the sweet spot for lily growing. Every type thrives, bloom times are predictable, and bulbs reliably return and multiply year after year. If you live in this range and are not yet growing three types of lilies for successive bloom, you are leaving three months of potential on the table.

The succession works beautifully here. Begin with Asiatic types in June -- Matrix in a spotted multicolor pattern (classified as a Tango type for its unusual markings) brings something genuinely different to the early-summer border. Follow in July with the tall trumpets: African Queen in orange-gold, powerfully fragrant and reaching 4 to 6 feet, is a garden statement that nothing else quite replicates. Pink Perfection extends the trumpet season in deep pink with enormous flower clusters that require staking but reward you for it. Then let August belong to the Orientals and OT hybrids: Dizzy in white with a striking red center stripe, fragrant and distinctive; Conca d'Or in warm yellow fading toward white, an OT hybrid with manageable height (4 feet) and excellent fragrance; Satisfaction in deep rose-pink with a gold center, among the finest cut flowers in this entire guide.

Zone 7 deserves a note about the shade-tolerant Martagon lily (also called Turk's cap for its reflexed petals). Unlike every other lily in this guide, Martagons perform beautifully in dappled shade or morning-sun-only locations. They grow 3 to 5 feet tall with multiple nodding flowers per stem, establish slowly in the first year or two, and then live for decades. If you have a woodland edge, a north-facing bed, or a garden corner that gets only morning light, Martagons are the answer.

Zone 8 shifts the calculus slightly. Heat stress becomes a factor, particularly for Oriental lilies, which are worth siting where they receive morning sun but are shaded from the intense afternoon heat. Trumpet types and OT hybrids handle full sun in zone 8 well. Mulch heavily here -- a 3-inch layer helps moderate soil temperature for the roots, which lilies prefer cool even when their tops are in full sun. The robust species lily Lilium henryi, growing 6 to 8 feet tall with arching stems and orange-yellow nodding flowers, is particularly heat-tolerant and one of the finest naturalizing lilies for zone 8. Conca d'Or and the deep pink Robina (an OT hybrid with white center) are standout performers in this zone.

Warm Zones (9): Trumpets Carry the Season

Zone 9 is the practical southern limit for true lilies, and it requires honesty about what will and will not perform reliably. Asiatic and Oriental lilies struggle here because their bulbs need adequate winter chilling. Without it, bloom diminishes and bulbs decline. Trumpet lilies, which tolerate zones 4 through 9, are the most reliable type in this zone. African Queen and Regale are strong choices. OT hybrids with good vigor like Conca d'Or can work as well.

For zone 9 growers, a few strategies improve success considerably. If your winters are mild and unlikely to provide sufficient chill naturally, pre-chill bulbs in the refrigerator (not the freezer) for 8 to 10 weeks before planting. Site all lilies in spots with afternoon shade to buffer summer heat. Accept that some varieties may perform better treated as annuals rather than perennials -- the flowers are worth the yearly replanting cost. The tiger lily is a notable exception to zone 9 difficulty; it tolerates warmth better than almost any other lily and may naturalize even here.

Quick Reference Table: Top Picks by Zone Group

Zone GroupTop 3 VarietiesTypeWhy
3-4Blackout, Lollypop, Tiger LilyAsiatic / SpeciesMaximum cold hardiness; reliable returners
5Stargazer, Regale, ScheherazadeOriental / Trumpet / OTFull type diversity opens up
6-7African Queen, Conca d'Or, DizzyTrumpet / OT / OrientalIdeal conditions; best succession blooming
8African Queen, Conca d'Or, L. henryiTrumpet / OT / SpeciesHeat-tolerant; afternoon shade for Orientals
9African Queen, Regale, Tiger LilyTrumpet / SpeciesWidest zone tolerance; pre-chill if needed

Planting: Depth Is the Detail Most Gardeners Get Wrong

Lily planting follows one rule above all others: when in doubt, go deeper. Most varieties should be planted 6 to 8 inches deep, measured from the top of the bulb to the soil surface. In zones 3 to 5, add an extra inch for additional cold protection. This depth requirement is not arbitrary -- it is about stem roots.

Lily stems produce roots along the portion of the stem that runs underground. These stem roots anchor the plant, provide additional nutrition, and improve moisture uptake. A lily planted too shallow -- say, 3 to 4 inches deep -- will have fewer stem roots, which produces a weaker, less stable, less vigorous plant that is prone to toppling. Stem lean and breakage at the base are almost always a shallow-planting problem. Deep planting also protects against the freeze-thaw cycles that can heave shallowly planted bulbs completely out of the ground in cold zones.

Always plant bulbs with the pointed end up and roots facing down. Loosen the soil 12 to 15 inches deep before planting -- shallow loosening creates a bathtub effect where water pools above the undisturbed zone below. Add compost to the loosened soil, and if drainage is in any doubt, place coarse sand at the bottom of the planting hole before setting the bulb.

Spacing matters for aesthetics as much as for plant health. Compact Asiatics can go 8 inches apart; Orientals want 10 to 12 inches; large Trumpet and OT hybrids need 12 inches. The visual principle, however, is the same regardless of type: always plant in groups of three to five or more. A single lily bulb planted alone looks sparse when it blooms. A drift of five produces the kind of massed effect that makes a garden look considered and intentional.

Fall planting is preferred over spring. When you plant in September through November (before the ground freezes), roots establish over winter and the plant hits the ground running in spring. Bulbs planted in fall are freshest and have the widest selection available from suppliers. Spring planting is acceptable -- pot-grown nursery plants work well and can go in after last frost -- but fall-planted bulbs typically produce more vigorous first-year growth.

After planting, water thoroughly to settle soil around the bulbs and eliminate air pockets, then apply 2 to 3 inches of organic mulch across the entire bed. Shredded bark, straw, leaf mold, and pine needles are all good choices. Keep mulch 2 inches away from the stem base -- piling it against the stem creates stem rot conditions. In zones 3 to 5, add 2 to 3 additional inches of mulch after the ground begins to freeze in fall to prevent the freeze-thaw heaving that is the enemy of shallow-planted bulbs.


Watering: The Narrow Line Between Moist and Wet

Lilies need approximately 1 inch of water per week during the growing season. That is the number to hold in your head. But the method of delivery matters as much as the amount, and the pattern of watering after bloom matters as much as anything during peak growth.

Drip irrigation or a soaker hose is the right tool for lilies. These methods deliver water slowly at soil level, keeping foliage completely dry. The single most common lily disease -- botrytis blight, a gray mold that produces brown spots on lower leaves and spreads upward -- is directly promoted by wet foliage. Overhead sprinklers are the worst irrigation choice for lilies because they wet leaves consistently, creating exactly the conditions botrytis needs. If overhead sprinklers are your only option, water in the early morning (before 10 AM) so foliage has time to dry completely before evening. Never water in the evening or overnight.

Mulch and watering work as partners. A 2 to 3 inch layer of organic mulch reduces evaporation from the soil surface by up to 50%, meaning you water less frequently without sacrificing soil moisture. It also prevents rain from splashing soil-borne fungal spores onto lower leaves, which is another botrytis pathway. With good mulch in place, you may only need to irrigate every 7 to 10 days rather than twice a week -- but do not guess. Push a finger 2 to 3 inches into the soil beneath the mulch and feel for moisture before deciding whether to water.

After the last flowers fade, begin reducing water gradually. The foliage continues to photosynthesize and send energy back to the bulb for 6 to 8 weeks after bloom, so do not stop watering entirely -- but the plant's needs decrease steadily as it moves toward dormancy. In the first four weeks post-bloom, drop to roughly three-quarters of the growing-season rate. As foliage begins to yellow, reduce further and allow the soil to dry more between waterings. Once foliage is completely brown and dead, stop supplemental irrigation. Dormant bulbs do not need water, and in most zones, natural rainfall provides what little moisture they require.

Container-grown lilies need closer attention. Pots dry out faster than in-ground plantings, and in hot weather a container lily may need water daily. The rule is simple: water until it runs freely from the drainage hole, then stop. Never let containers sit in saucers of standing water, even for a few hours -- that standing water is drainage waiting to become rot. Check containers daily during active growth.

What zone are you in?

Enter your zip code for frost dates, growing season, and soil type.


Feeding, Staking, and the After-Bloom Ritual

Fertilizing: Moderate Feeders, Not Heavy Ones

Lilies are not demanding feeders, and over-fertilizing creates real problems -- specifically, lush, floppy stems that collapse under the weight of their own flowers. High-nitrogen fertilizers are particularly problematic. Use balanced formulations (10-10-10 or similar) rather than anything heavily weighted toward nitrogen.

At planting time in fall, work a balanced bulb fertilizer or bone meal into the soil at the bottom of the planting hole. This gives the bulb something to draw on as roots establish over winter.

In spring, when lily shoots first emerge, top-dress with 1 to 2 inches of compost around the base and apply a light feeding of balanced fertilizer. When flower buds become visible, apply a second light feeding to support the energy demands of blooming. Then stop. Do not fertilize after flowers finish. Once the plant begins redirecting its energy back to the bulb for storage, your job is to get out of the way.

Staking: Plan Ahead or Pay for It Later

Stakes installed at planting time avoid the clumsy and root-damaging process of pushing bamboo canes into a bed full of established bulbs. This is the most commonly skipped step in lily care and the one gardeners most wish they had not skipped when a July windstorm flattens an entire planting of OT hybrids.

Compact Asiatics (2 to 3 feet) rarely need staking. Oriental lilies occasionally need support, particularly the large-flowered cultivars. Trumpet lilies generally do need staking. OT hybrids almost always need it -- Scheherazade at 6 to 8 feet in a summer storm is a plant that will test its own stems. Use bamboo stakes, metal plant supports, or peony rings. Tie stems loosely with soft twine or fabric plant ties at two to three points along the stem; wire cuts through stems and should never be used.

The After-Bloom Ritual: This Is Where Longevity Is Made

What you do in the weeks after bloom determines whether your lilies will return magnificently next year or gradually weaken over a few seasons. The principle is simple: the foliage must stay.

After flowers fade, remove the spent flower heads (deadhead) to prevent the plant from directing energy toward seed production. But leave every leaf and every inch of stem completely intact. For the next 6 to 8 weeks, the foliage is photosynthesizing and loading the bulb with the carbohydrates it needs to produce next year's flowers. Cutting the foliage early -- even braiding or bundling it -- reduces photosynthesis and starves the bulb. Lilies that are cut back too soon bloom less prolifically each successive year until they stop blooming entirely.

The foliage will look untidy as it yellows. The standard design solution is to plant low-growing companions -- annuals like alyssum or lobelia, or shallow-rooted perennials -- around the base of lily stems to mask the yellowing foliage while it completes its essential work. Only remove the stems once foliage is completely brown and dead, which typically happens in late summer or early fall depending on your zone.

Divide lily clumps every 3 to 4 years when flowering begins to decline. The signs are clear: smaller flowers than previous years, fewer blooms per stem, and stems emerging in a tight congested cluster. Dig the bulbs after foliage has fully died back in fall, separate the offset bulblets from the main bulb, and replant immediately at proper depth with fresh compost. Lily bulbs should not be stored dry -- replant them as quickly as possible after dividing.


The Pests and Diseases That Require Real Vigilance

Most lily problems are minor or easily managed. Three, however, demand genuine attention because they can destroy an entire planting if ignored.

Red Lily Beetle: The Non-Negotiable Priority

If you are in the eastern United States, the red lily beetle (Lilioceris lilii) is your most important pest concern. This invasive insect from Europe arrived in eastern Canada during the World War II era, spread to New England in the 1990s, and continues its westward expansion across the country. It attacks all true lilies (Lilium) -- every type, every hybrid -- as well as Fritillaria. It does not touch daylilies or other garden plants with "lily" in the name.

Adults are unmistakably beautiful and unmistakably destructive: bright scarlet red, about a quarter inch long, with black legs and undersides. When disturbed, they drop from the plant and land upside down, where their black underside camouflages them against the soil. The larvae cause more damage than the adults, but they have evolved an effective disguise -- they coat themselves in their own excrement, appearing as slimy brownish-green blobs on leaf surfaces that look disturbingly like animal droppings. Each female lays 250 to 450 eggs per season.

The most effective control for small plantings is daily hand-picking beginning in early April when adults first emerge. Pick adults into soapy water, crush eggs on leaf undersides, remove larvae by hand (unpleasant but harmless). Consistency at this early stage prevents the population explosion that makes control difficult later in the season. For chemical control, spinosad (an organic option) is effective on larvae. Imidacloprid, applied as a soil drench in early spring, is absorbed systemically and provides weeks of protection -- though given its pollinator concerns, apply it to soil only and not while plants are in bloom.

Encouragingly, researchers at the University of Rhode Island are releasing European parasitic wasps -- specifically Tetrastichus setifer, Lemophagus pulcher, and Diaparsis jucunda -- that target red lily beetles and have no established natural predators in North America. Released populations are beginning to establish and reduce beetle numbers in New England. This biological control is the most promising long-term solution to what has been a serious problem.

Deer: The Overnight Catastrophe

True lilies are a top-choice food for deer. Not somewhat preferred, not occasionally browsed -- actively sought out. A single deer can strip a lily planting to bare stalks in one visit overnight. If you live in an area with deer pressure and you do not have a protection plan in place before you plant, you are gardening on the deer's timeline, not your own.

An 8-foot deer fence is the only guaranteed solution. Electric fence with bait is effective and less visually intrusive. Repellent sprays (Liquid Fence, Plantskydd, Bobbex) require reapplication after every rain and on every flush of new growth, and they lose effectiveness when deer become accustomed to a single product -- rotate products regularly. The critical point: start applying repellents before deer discover the planting. Once deer know where the food source is, repellents become much harder to rely on.

If you live in a high deer-pressure area, the realistic options are: grow lilies inside a fenced garden, grow them in containers on a protected patio or deck, or accept some loss and overplant to compensate. Daylilies (Hemerocallis), though a completely different plant, are substantially more deer-resistant and worth considering if deer make true lilies impossible in your yard.

Aphids and Lily Mosaic Virus: The Slow Destruction

Aphids on lilies look like a minor nuisance. Small clusters of soft-bodied insects on buds and new growth, easily knocked off with a jet of water -- how serious can they be? Quite serious, as it turns out, because aphids are the primary vector for lily mosaic virus. The virus has no cure. Once a plant is infected, it must be destroyed -- not composted, where the virus can persist, but bagged and discarded. The streaked, mottled, mosaic-patterned foliage and stunted, distorted flowers that follow infection take a season or two to become obvious, by which time the virus has typically spread to neighboring plants.

The defense is simple: control aphid populations immediately when you spot them. A strong jet of water knocks them off plants. Insecticidal soap applied directly to clusters kills on contact. Neem oil applied every 7 to 10 days disrupts feeding and reproduction. Do not wait for a "bad" infestation -- even a small aphid population can transmit the virus. Buy certified virus-free bulbs from reputable suppliers as your baseline protection.


The Mistakes That Cost Gardeners Their Lily Plantings

A few missteps appear so consistently that they deserve their own spotlight. The drainage issue has already received it. Here are the others worth knowing before you plant.

Cutting foliage after flowering is the most common reason lilies fail to return. Deadheading (removing the flower head only) is correct and important -- it stops the plant from wasting energy on seed development. But the stems and leaves must stay until they brown and die on their own. This regularly takes until late August or early September. The untidy appearance during this period is the price of a healthy, flowering plant next year.

Buying the wrong plant accounts for a surprising number of lily disappointments. Daylilies (Hemerocallis) are sold in the same section as true lilies at many garden centers, sometimes with similarly vague labeling. They are not difficult to distinguish when you know what to look for: true lilies grow from a single tall stem with leaves arranged around it; daylilies form a spreading ground-level clump of strappy foliage. True lily flowers last several days; each daylily flower lasts one day. Look for the botanical name Lilium on the label, and buy from reputable bulb suppliers like Longfield Gardens or Brent and Becky's where labeling is reliable.

Voles eating bulbs underground is a problem that is invisible until it is too late. Established lily plantings that bloomed reliably for years simply fail to emerge in spring; when you dig where the bulb should be, it is gone or reduced to a gnawed shell. The prevention is to plant bulbs inside hardware cloth cages or baskets, which takes a few minutes per hole and provides complete protection. Adding a handful of coarse gravel to the planting hole also helps -- voles dislike navigating through gravel. This step sounds like overcaution until the day you dig and find nothing.

Planting a single bulb when three to five are needed for visual impact. This is as much a design point as a care point, but it matters to the experience of growing lilies. One stem, however beautiful when it blooms, looks accidental. Five stems together look intentional, designed, and worth walking across the garden to look at more closely.

What zone are you in?

Enter your zip code for frost dates, growing season, and soil type.


Frequently Asked Questions

Why Didn't My Lilies Come Back After the First Year?

Two causes account for the vast majority of cases: drainage failure and wrong type for zone. Check the planting site -- if it sits in low ground where water collects, the bulbs almost certainly rotted during a wet season. If drainage was adequate, consider whether the lily type you planted is appropriate for your zone. Oriental lilies pushed into zone 9, or Trumpet lilies planted in zone 3, will struggle to persist no matter how well everything else is managed. See the zone guide above and match your type to your climate.

Can I Grow Lilies in Containers?

Yes, and for gardeners with poor native drainage or small outdoor spaces, containers are an excellent option. Use a pot at least 12 inches deep with drainage holes -- no exceptions. Fill with well-draining potting mix and add perlite if needed. The Asiatic Tiny series (Tiny Bee, Tiny Ghost) was bred specifically for container culture at 12 to 18 inches tall. Compact Oriental varieties like Tom Pouce also work well. Group 3 to 5 bulbs per large container for a massed effect.

Container lilies need more frequent watering than in-ground plants and require winter protection in zones 3 through 6. Move pots to an unheated garage or shed when temperatures drop -- the goal is dormancy with cold but without the pot freezing solid for extended periods. Do not bring them indoors into heated spaces; lilies need the cold dormancy period.

My Lilies Have Spots on the Lower Leaves -- What Is It?

Almost certainly botrytis blight, the most common lily disease. It produces brown or gray spots that typically begin on lower leaves and work upward, with fuzzy gray mold visible in humid conditions. It is directly promoted by wet foliage, which is why overhead watering is such a problem. Remove affected leaves as soon as you spot them to slow the spread, switch to drip irrigation or base watering, and ensure plants are properly spaced (8 to 12 inches) for adequate air circulation. A preventive fungicide (chlorothalonil or copper-based) can be applied in springs with prolonged wet weather.

How Do I Get Lilies to Bloom All Summer?

Plant all three major types. Asiatics bloom in June, are the first to open, and come in the widest range of colors. Trumpets carry July, their tall stems and powerful fragrance making them the garden centerpiece of midsummer. Orientals and OT hybrids close the season in July through August, offering the largest blooms and the most intense fragrance. In zones 5 through 8, this succession produces continuous lily bloom for three months from a single thoughtfully planted bed. This is the most satisfying design move in lily growing and requires nothing beyond choosing the right types.

When Should I Divide Lily Clumps?

Every 3 to 4 years when you notice a decline in performance -- smaller flowers, fewer blooms per stem, congested clusters of stems. Divide in fall after foliage has completely died back. Dig the entire clump, separate the offset bulblets from the main bulb, and replant immediately at proper depth (6 to 8 inches) with fresh compost worked in. Do not store lily bulbs dry; they should go back into the ground as quickly as possible. Asiatic types multiply the fastest and typically need division on the shorter end of the 3 to 4 year range.


The Longer View

A lily planting done well is not a one-season proposition. It is a three-month parade of color that repeats and improves for years, the bulbs multiplying slowly until a single fall purchase of five bulbs becomes a naturalized sweep that fills a whole border. The tiger lily on a fence line that has been there for twenty years, spreading quietly by its own bulbils. The Stargazer that returns every August, larger and more fragrant each time. The trumpet lilies that add 4 feet of vertical drama to the back of a mixed border and make the entire planting look twice as designed as it actually is.

Getting there requires care on a few specific points: drainage that never fails, planting depth that respects the stem roots, foliage left intact after bloom, and variety choices matched to the zone. None of it is complicated. All of it is achievable in a single afternoon of proper preparation.

Plant the right types for your zone. Respect the drainage. Leave the foliage alone after bloom. Grow them in groups of five. The rewards are proportional to the attention paid in those early decisions -- and they compound, like a good investment, for every year the bulbs return.

Research for this guide was drawn from lily cultivation literature, university extension service resources on bulb gardening and pest management, including work from the University of Rhode Island on biological control of the red lily beetle, and established guidance on variety selection, soil preparation, and perennial bulb care from multiple horticultural institutions.

Where Lilies Grows Best

Lilies thrives in USDA Zones 3, 4, 5, 6, 7. Explore each zone's complete guide for growing tips, companion plants, and seasonal advice.

Also possible in: Zone 8 (challenging but possible with the right conditions).

Not sure of your zone? Look it up by zip code →